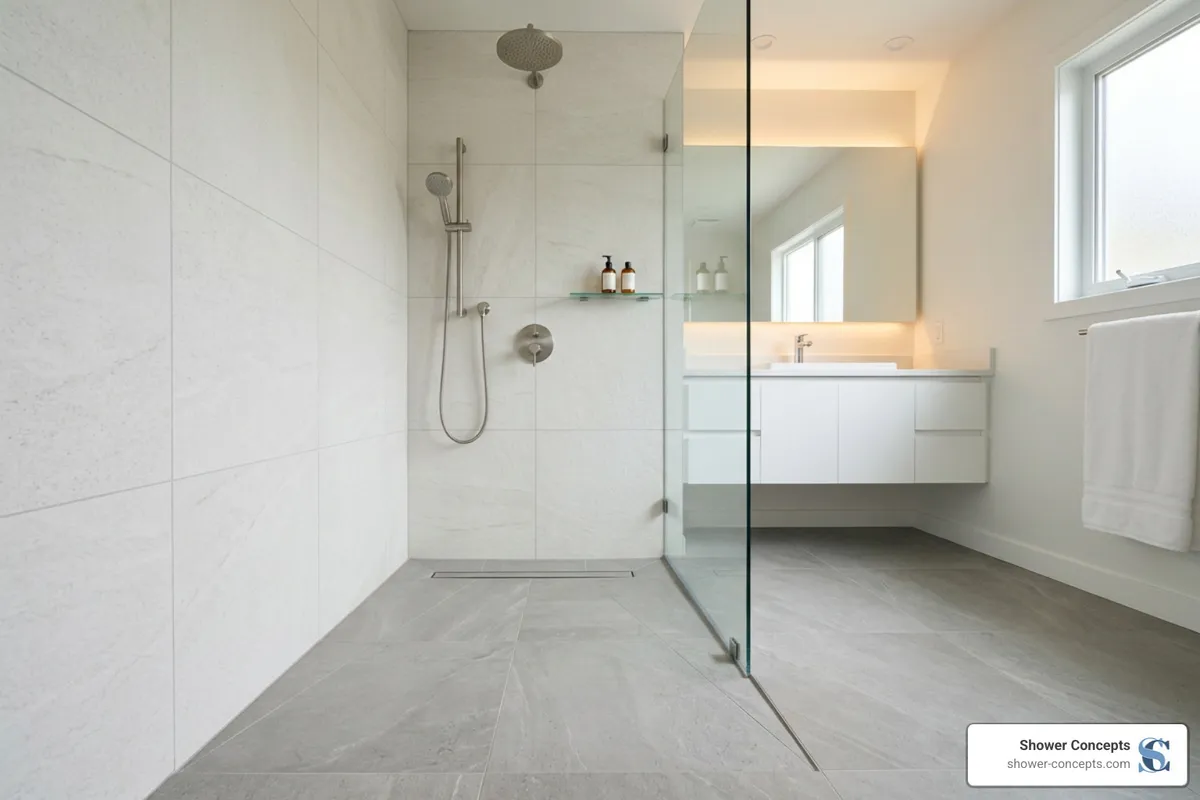
How to Design a Seamless Custom Curbless Shower Pan
What Is a Custom Curbless Shower Pan — and Why It Matters for Your Next Build
A custom curbless shower pan is a pre-sloped shower base with no raised curb or threshold — the floor transitions flush from the bathroom into the shower. It's the foundation of a zero-entry, barrier-free shower, and it can be built to any shape, size, or drain location your project requires.
Here's what you need to know at a glance:
No curb means no step-over barrier — fully accessible for wheelchairs, walkers, and aging-in-place
Pre-sloped toward the drain (standard 1/4" per foot pitch) so water drains correctly without guesswork
Fully custom — any shape (rectangular, L-shaped, neo-angle), any drain location, any size
Lightweight foam versions replace traditional mortar beds, cutting labor and drying time dramatically
Same-day flood testing is possible with foam-based pans — no waiting for mud to cure
Works with all major waterproofing systems — liquid-applied membranes, sheet membranes, and fabric
Unlike standard prefab pans, a custom curbless base is built around your actual opening — not the other way around. That means no awkward cuts, no forced framing changes, and no compromising on drain placement to match a stock size.
The difference matters most on the job site. When a stock pan doesn't fit, contractors lose hours adapting framing, shimming edges, or re-routing plumbing. A custom pan eliminates that entirely.
I'm David Stewart, owner and partner at Shower Concepts in Denver, Colorado, with over 15 years in the construction and tile-installation industry — including extensive field experience helping contractors spec and install custom curbless shower pans that meet tight schedules without the weight and cure time of concrete. In this guide, I'll walk you through everything you need to design one correctly, from materials and dimensions to waterproofing and installation.
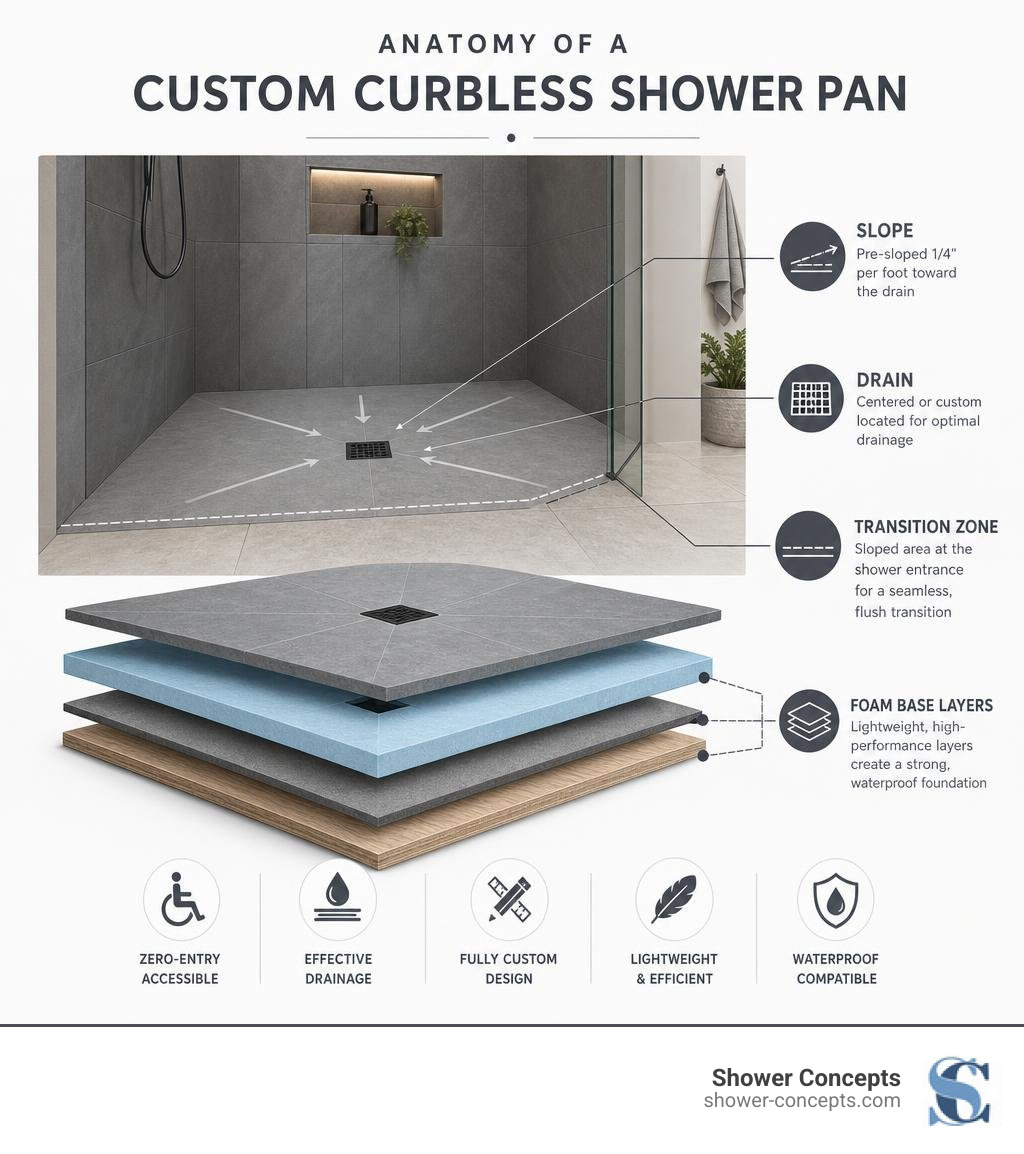
Understanding the Custom Curbless Shower Pan: Benefits and Design Trends
Curbless showers are not a passing fad. While they are often viewed as a hallmark of high-end contemporary design, they actually have deep historical roots. Ancient Roman bathhouses and communal bathing spaces pioneered open, barrier-free layouts long before modern pressurized plumbing. Today, we are returning to these open concepts to create bathrooms that feel less like utilitarian boxes and more like personal spas.
Zero-Entry Aesthetics and Modern Wet Rooms
The primary design benefit of a custom curbless shower pan is the elimination of visual breaks. In a traditional bathroom, a 4-to-6-inch shower curb acts as a physical and visual wall, slicing a small room into even smaller segments. By removing this barrier, the bathroom floor flows uninterrupted directly into the shower zone. This continuous floor plane visually expands the perception of space, making even compact master bathrooms feel incredibly open.
This open flow has paved the way for the rise of residential "wet rooms" - entire bathrooms designed to handle moisture, where the shower area is completely open to the rest of the room. Modern wet rooms frequently utilize linear trench drains positioned along the back wall or at the entrance. Because a linear drain only requires a single-slope floor (often called a plank pitch), you can install large-format tiles without having to cut them into pie-shaped pieces to accommodate a traditional center drain. This seamless integration allows for clean, uninterrupted lines that elevate the entire space.
ADA Compliance and Aging-in-Place Accessibility
Aesthetics aside, the practical utility of a zero-entry shower is unmatched. For households planning for the future, a curbless entry is a vital tool for universal design and aging-in-place. While private residences are not always subject to commercial accessibility rules, the ADA Standards for Accessible Design are a useful reference point for understanding clearances, turning space, and barrier-free shower concepts.
Stepping over a standard shower curb is one of the most common tripping hazards in a residential home. For individuals with limited mobility, wheelchair users, or seniors, a zero-step transition is not just a luxury - it is a necessity for independent living. A properly designed custom curbless shower pan allows for seamless roll-in or walk-in access. By planning for accessibility now, homeowners save themselves from disruptive and costly emergency remodels down the road. The decision to go curbless pays double dividends: stunning visual appeal today and effortless, safe utility for decades to come.
Material Options for a Custom Curbless Shower Pan
When selecting a custom barrier-free base, the material you choose dictates the installation speed, overall weight, and tile compatibility. While there are various options on the market, tile installers overwhelmingly prefer high-density foam for custom tile-over projects due to its unmatched versatility on-site.
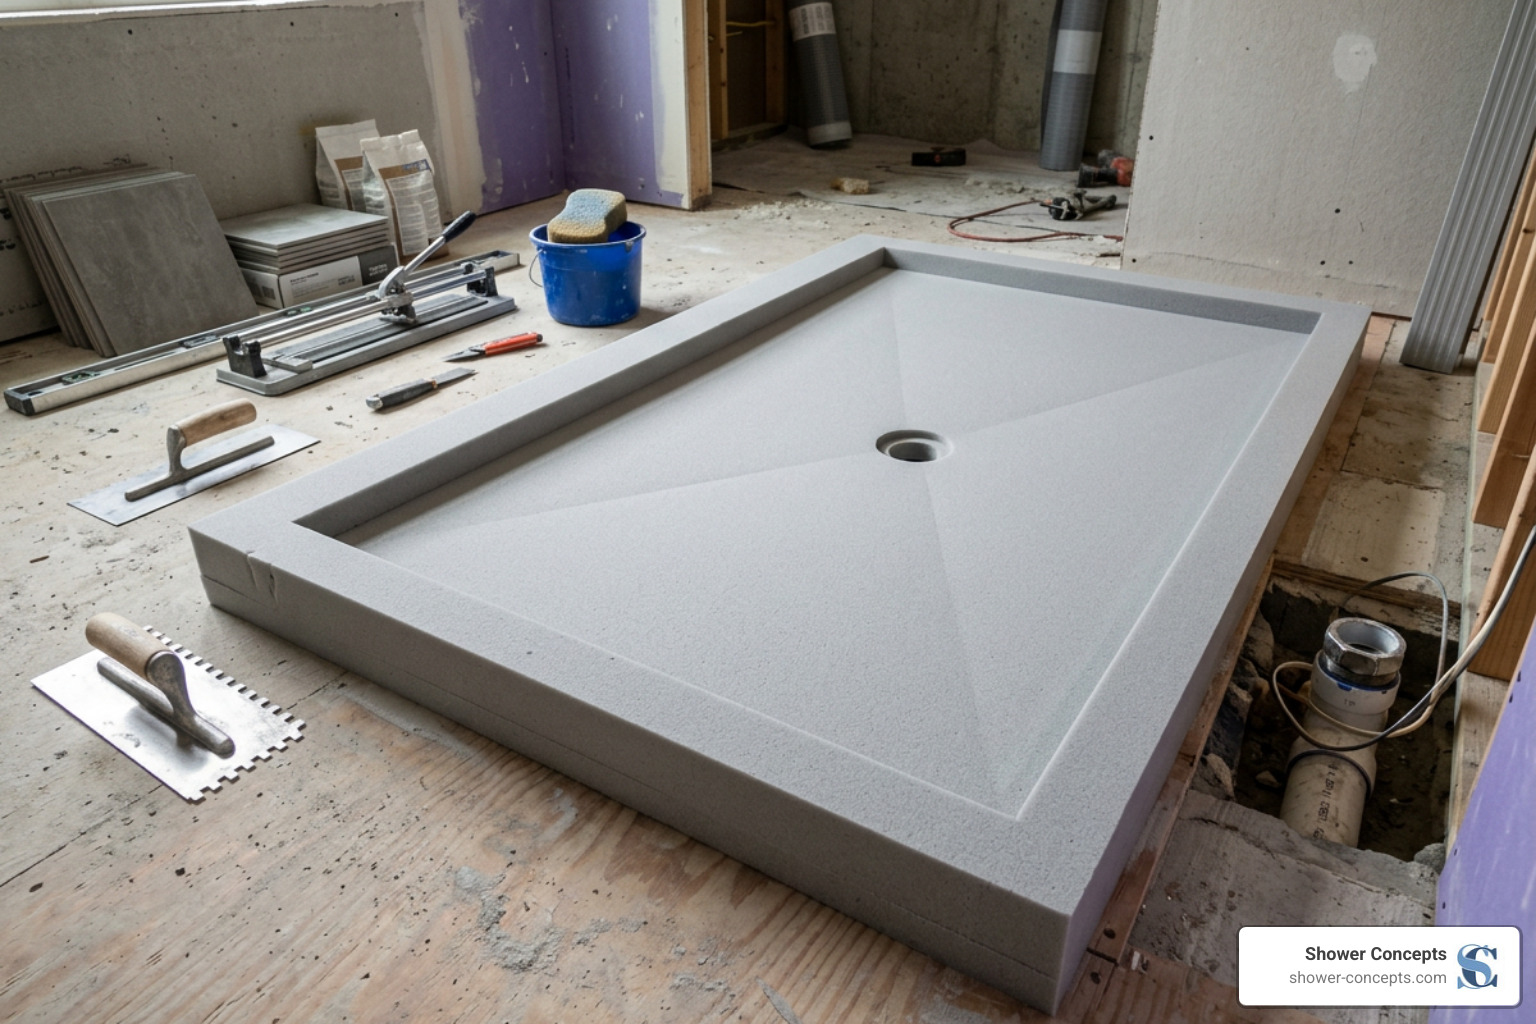
Why 100% Virgin-Foam is the Premier Choice for Custom Curbless Pans
At Shower Concepts, we manufacture our custom pans using 100% virgin Expanded Polystyrene (EPS) high-density foam. This structural foam serves as an incredibly durable, lightweight substrate designed to act as the perfect foundation for custom tile showers.
Traditional mortar beds (mud beds) are heavy, physically demanding to install, and highly leak-prone if the installer mixes the sand-to-cement ratio incorrectly or fails to pack it tightly. Furthermore, traditional mud beds require days to fully cure before you can apply waterproofing or tile. High-density virgin foam completely eliminates these pain points.
Feature | 100% Virgin-Foam Base | Traditional Mortar (Mud) Bed |
|---|---|---|
Weight | Extremely lightweight (under 15 lbs) | Extremely heavy (150+ lbs) |
Cure Time | Zero (ready to tile immediately) | 24 to 72 hours |
Slope Accuracy | Factory-machined to perfect 1/4" pitch | Hand-troweled (highly prone to human error) |
Leak Risk | Virtually zero (seamless, waterproof substrate) | High (cracks, structural settling, poor packing) |
Customization | Easily trimmed or patched on-site | Permanent once poured; impossible to modify |
Flood Testing | Same-day testing possible | Must wait days for mortar to fully cure |
Our virgin-foam pans feature a pre-applied, bond-promoting primer on the surface, ensuring a high-strength mechanical bond with all major liquid-applied and sheet waterproofing membranes.
The Advantages of Fully Custom Pre-Sloped Foam Bases
Using a pre-sloped custom foam base means the critical 1/4" per foot slope is engineered directly into the pan at our Denver facility. You do not have to spend hours troweling wet mud, hoping the slope is consistent enough to prevent standing water.
Furthermore, because our pans are made to order, we can design them with a consistent perimeter thickness. In traditional curbless setups, a variable perimeter thickness means the tile installer has to meticulously scribe and cut the bottom row of wall tiles to match a sloping floor. By engineering a level perimeter on our custom foam pans, we eliminate tedious on-site scribe work, saving tile setters hours of labor.
Designing for Unique Layouts: Dimensions and Specifications
One of the biggest mistakes in bathroom remodeling is trying to force a standard, off-the-shelf shower pan into a non-standard space. Standard pans rarely align with real-world framing, especially in older homes where walls are rarely plumb or square.
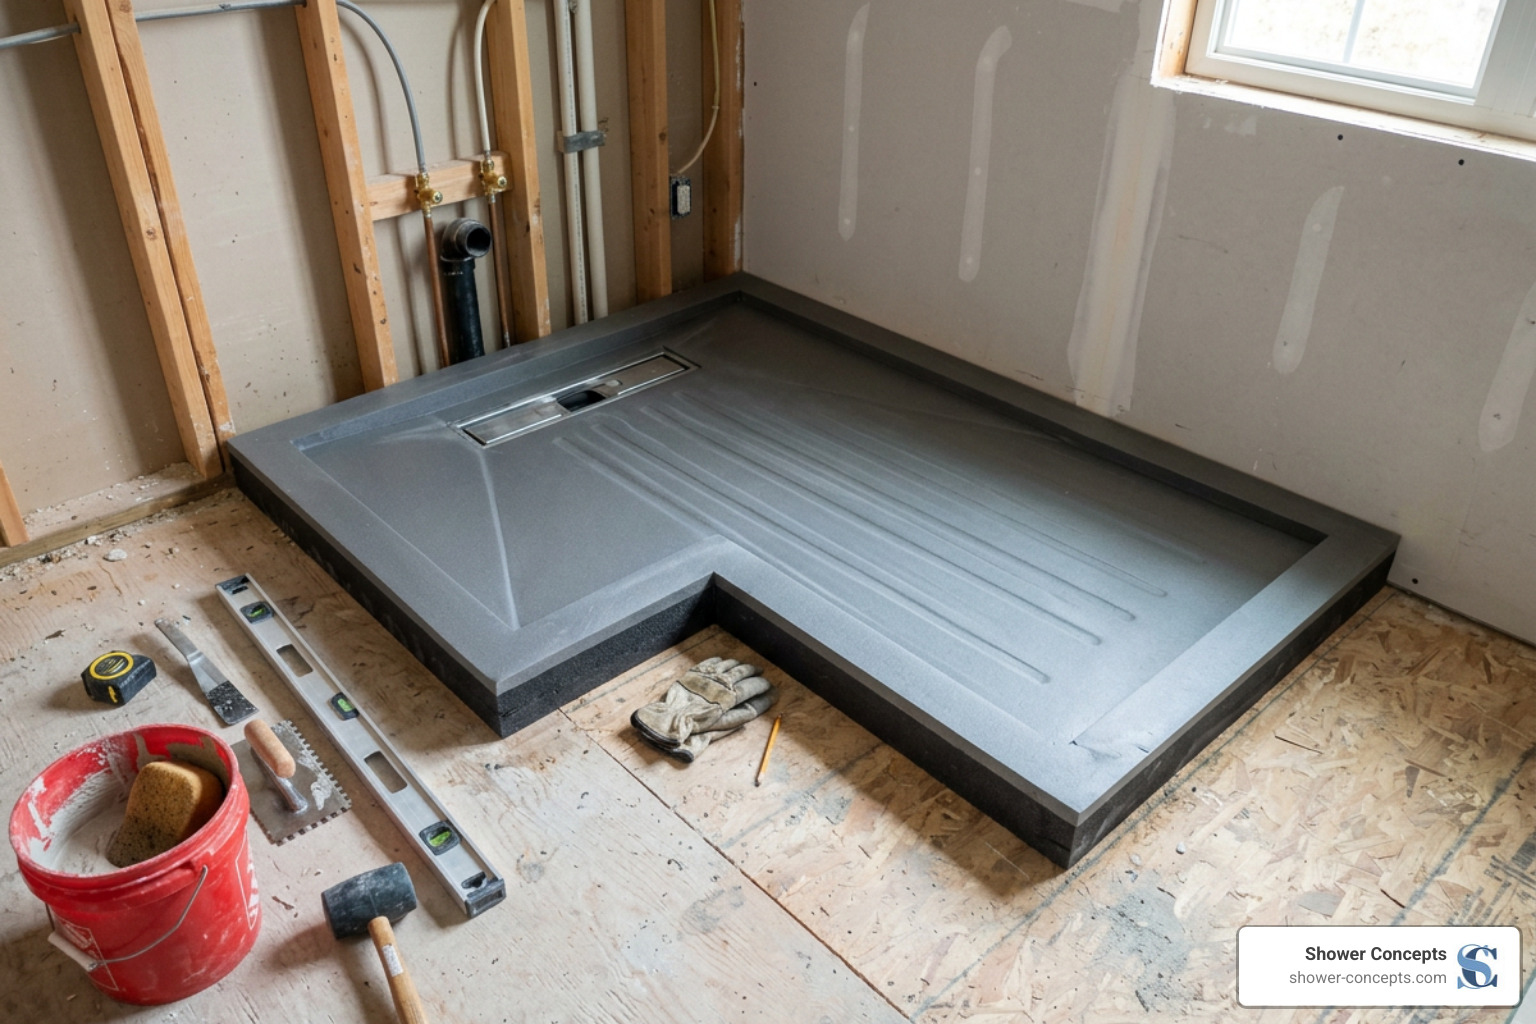
Designing a Custom Curbless Shower Pan for Any Shape or Size
With a fully custom foam pan, you are no longer restricted to standard rectangular footprints. We can fabricate pans for any architectural layout, including:
L-Shaped or U-Shaped Pans: Perfect for wrapping around structural columns, plumbing chases, or existing pony walls.
Neo-Angle and Multi-Sided Shapes: Designed to maximize floor space in tight or awkwardly shaped master suites.
Integrated Dry-Off Areas: Creating a continuous sloped wet-zone that includes a dedicated drying area next to the shower.
To order a custom shape, you do not need complex CAD files. Our team can work directly from a simple hand-drawn sketch on a piece of paper. As long as you include the finished width, depth, and desired drain location, we can manufacture a perfectly pre-sloped base tailored to your exact framing.
Drain Placement and Linear Trench Drain Integration
Traditional shower pans force you to place the drain directly in the center. If that location happens to sit directly on top of a structural floor joist, you are forced to notch, box out, or structurally modify the joists — a process that is expensive, labor-intensive, and often violates local building codes.
A custom curbless shower pan allows you to place the drain anywhere you need it to avoid structural obstacles.
Off-Center Drains: We can engineer the pre-sloped pitch to head toward a drain located in a corner, off to one side, or shifted slightly to clear a joist.
Linear Trench Drains: Linear drains are highly favored in modern curbless designs. They can be placed along the back wall or right at the shower entrance. Because they only require a single-slope plane (plank pitch) rather than a traditional four-way bowl slope, they simplify tile layout and allow for seamless installations of large-format stone or porcelain tile.
Key Installation and Waterproofing Considerations
Creating a zero-entry shower requires careful planning at the subfloor level. Because there is no curb to contain water, the entire installation relies on a precise slope and flawless waterproofing.
Recessing the Subfloor and Managing the Slope
To achieve a true flush transition where the bathroom floor meets the shower floor, you must recess the subfloor in the shower area. This ensures that the top edge of the pre-sloped shower pan sits flush with the adjacent dry bathroom subfloor.
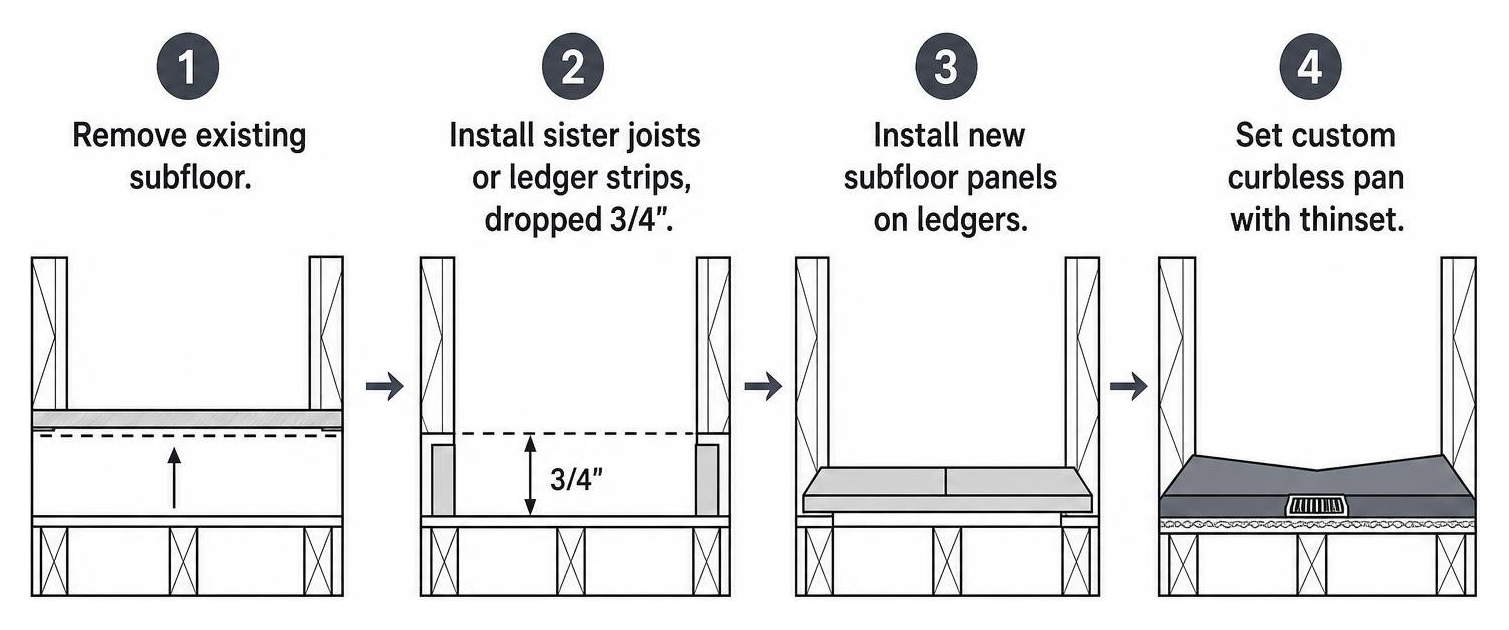
For standard wood-framed floors (typically featuring 16-inch on-center joists), the general process is as follows:
Remove the existing subfloor in the designated shower footprint.
Install sister joists or ledger strips along the sides of the existing joists, dropping down by the thickness of your subfloor material (typically 3/4").
Install new subfloor panels (such as plywood or OSB) between the joists, resting on the newly installed ledger strips. This lowers the floor deck in the shower zone.
Set the custom curbless pan onto the recessed subfloor using a modified thinset mortar.
By utilizing high-density foam pans, you do not need to notch or structurally weaken the tops of your joists, preserving the structural integrity of your home's framing.
Preventing Leaks at the Transition Zone
The "transition zone" — the exact line where the wet shower floor meets the dry bathroom floor — is the most critical area of a curbless installation. Without a physical curb, water droplets will inevitably migrate past the active shower area.
To prevent structural rot and mold, you must treat the bathroom as a semi-wet room.
Best practices for waterproofing the transition zone include:
Extend Waterproofing Beyond the Shower: We highly recommend applying a liquid-applied waterproofing membrane or waterproofing sheet membrane at least 12 to 24 inches outside of the shower opening onto the main bathroom floor.
Use Dedicated Seam Tape: Apply waterproof seam tape and bandings to all joints, corners, and the transition seam where the foam pan meets the wood subfloor.
Same-Day Flood Testing: One of the greatest benefits of using our virgin-foam pans is the ability to conduct a flood test the very same day. Once the waterproofing membrane is dry, plug the drain, fill the pan with water, and let it sit for 24 hours to verify a completely watertight seal before laying a single tile.
Cost, Manufacturing Timelines, and Choosing a Manufacturer
Investing in a custom curbless shower pan is a highly cost-effective choice when you factor in the massive savings in on-site labor, framing modifications, and tile prep.
Pricing Factors and Material Tiers
The cost of a custom curbless pan is primarily determined by its size, shape complexity, and drain configuration.
High-Density Foam Pans: These are the most economical and efficient custom options. Custom foam pans typically range from $350 to $900+, depending on the square inches and drain configuration. They offer the best balance of cost, installation speed, and custom shaping, making them the premier choice for modern tile installations compared to traditional, labor-intensive alternatives.
Lead Times and Shipping Logistics
When ordering custom architectural components, project lead times can make or break a construction schedule. Many national manufacturers have custom lead times of 4 to 5 weeks, which can stall a bathroom remodel.
At Shower Concepts, we operate with a highly efficient manufacturing setup in Englewood, Colorado. Our proximity to the Denver metro area allows us to offer incredibly rapid turnaround times. Every custom pan goes through a strict quality-management system to ensure dimensions are accurate down to the millimeter before shipping. For out-of-state projects, we utilize freight-aware fabrication and ZIP-aware routing to ensure your custom pan is crated safely and delivered directly to your job site without transit delays.
Frequently Asked Questions about Custom Curbless Shower Pans
Can I install a custom curbless shower pan as a DIY project?
Yes, but it depends on your comfort level with structural carpentry. Setting the custom foam pan and applying the waterproofing membrane is highly DIY-friendly because the foam is lightweight and easy to handle. However, recessing the subfloor (cutting joists, installing ledger strips, and dropping the subfloor deck) requires advanced framing skills. If you are not comfortable modifying your floor joists, we highly recommend hiring a professional carpenter or tile contractor for the subfloor preparation, while you handle the pan installation and tiling.
How long does it take to manufacture and ship a custom curbless shower pan?
While standard industry lead times for custom pans are often a month or more, our team at Shower Concepts specializes in rapid turnaround. Most of our custom virgin-foam pans are fabricated and ready to ship or pick up within a few business days of order confirmation.
What are the maintenance requirements for a custom foam curbless shower pan?
The maintenance of your shower floor depends entirely on the tile and grout you choose to install over the pan. Because the high-density foam base is completely sealed beneath a continuous waterproof membrane and tile layer, it is entirely protected from moisture. For the tile surface, we recommend using high-quality, stain-resistant epoxy or single-component grouts and cleaning with non-abrasive, pH-neutral cleaners to keep your zero-entry shower looking pristine for decades.
Conclusion
Designing a zero-entry, barrier-free bathroom does not have to be a logistical headache. By choosing a custom curbless shower pan fabricated from high-density virgin foam, you eliminate the physical strain, long cure times, and leak risks associated with traditional mortar beds. Whether you are designing a compact master bath, a sprawling modern wet room, or preparing a home for safe aging-in-place, a custom-engineered base ensures a perfect fit, flawless drainage, and rapid installation.
At Shower Concepts in Denver, Colorado, we are dedicated to helping tile installers, contractors, and homeowners bring their custom shower designs to life. Our lightweight, durable, 100% virgin-foam products are made to order with the fastest turnaround times in the industry.
Ready to get started on your next project? Visit Shower Concepts today to design your custom shower base, or stop by our facility at 2965 S Tejon St, Englewood, CO 80110 to speak with our experts.
