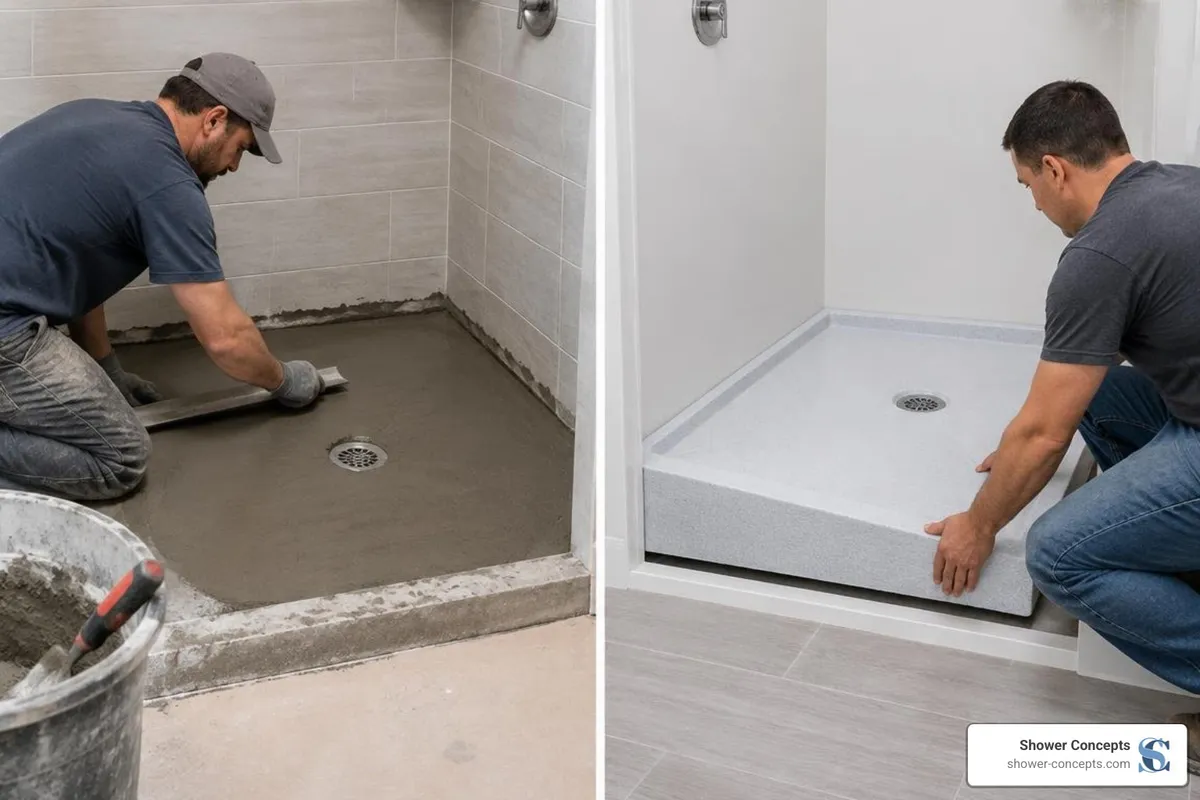
Why Foam Shower Pans are Changing the DIY Game
Benefits of Prefabricated Foam Bases Over Mortar Beds
Foam shower pan installation gives you a factory-sloped, lightweight base that installs in about one to two hours. You bond the tray to a flat, properly prepared subfloor with polymer-modified thin-set, seal the drain and perimeter seams, flood-test the assembly, and then tile once the mortar has cured. This approach removes the heavy mixing, screeding, and multi-day curing required by a traditional mortar bed.
Traditional mud beds have been the industry standard for decades, but they come with significant labor demands and a steep learning curve. Mixing sand and Portland cement, hauling hundreds of pounds of material into a second-story bathroom, screeding the perfect pitch to the drain, and waiting days for full curing turns a simple shower renovation into an exhausting endeavor.
Prefabricated foam shower pans completely change this dynamic. Manufactured from high-density expanded polystyrene (EPS) or extruded polystyrene (XPS), these trays arrive precision-engineered with an exact 1/4-inch per foot slope pre-cut directly into the surface. That guarantees compliance with the International Residential Code (IRC) without having to eyeball pitch angles with a screed board.
Beyond saving physical labor, foam bases offer superior moisture management. Traditional sloped mortar beds absorb water when the top grout or tile layer gets wet, leaving damp cement beneath the surface that can foster mold and slow-drying mildew over time. Because prefabricated foam systems integrate seamlessly with surface-applied waterproofing membranes, moisture is managed directly beneath the tile rather than soaking into a massive concrete bed.
Feature | Traditional Mud Bed / Mortar Pack | Prefabricated Foam Shower Base |
|---|---|---|
Material Weight | 150 – 300+ lbs | 5 – 12 lbs |
Slope Accuracy | Depends entirely on manual skill | Factory-machined (1/4" per foot) |
Installation Time | 4 – 8 hours (plus multi-day cure) | 1 – 2 hours (setting & fitting) |
Structural Load | Heavy point-load on floor joists | Minimal weight impact |
Mold & Moisture | Mortar can hold trapped moisture | Non-porous surface waterproofing |
Customizability | Shaped during wet pack | Cut to fit using simple utility hand tools |
Tools, Materials, and Subfloor Prep Requirements
Before diving in, gather all essential tools and supplies. Having everything staged keeps the mortar from skinning over while you search for a tool:
Measuring tape, pencil, and straightedge
2-foot, 4-foot, and torpedo spirit levels
3/8-inch square-notched trowel (or manufacturer-specified size)
Margin trowel and clean bucket for mixing
Heavy-duty drill with mixing paddle
Handsaw or circular saw with a 40-tooth blade, plus a sharp utility knife
100% RTV silicone sealant or polyurethane elastomeric adhesive (such as SikaFlex)
Polymer-modified thin-set mortar meeting ANSI A118.4 standards
Waterproofing seam tape, pre-formed corners, and flashing collar
Protective cardboard to protect the pan surface during handling
For complete system specifications and flange connection requirements, consult the official Shower Pan Installation Instructions before getting started.
Preparing the Subfloor for Foam Shower Pan Installation
A foam shower pan is only as rigid and level as the foundation beneath it. Foam absorbs compressive loads well, but it cannot bridge soft spots, high humps, or bouncy subfloors.
For wood-framed structures, joists should be spaced a maximum of 16 inches on center. The subfloor must consist of a minimum 3/4-inch tongue-and-groove (T&G) plywood or exterior-grade OSB, securely glued and screwed to the joists to prevent floor squeaks and vertical deflection. The subfloor must meet a minimum deflection rating of L/360 under total design load.
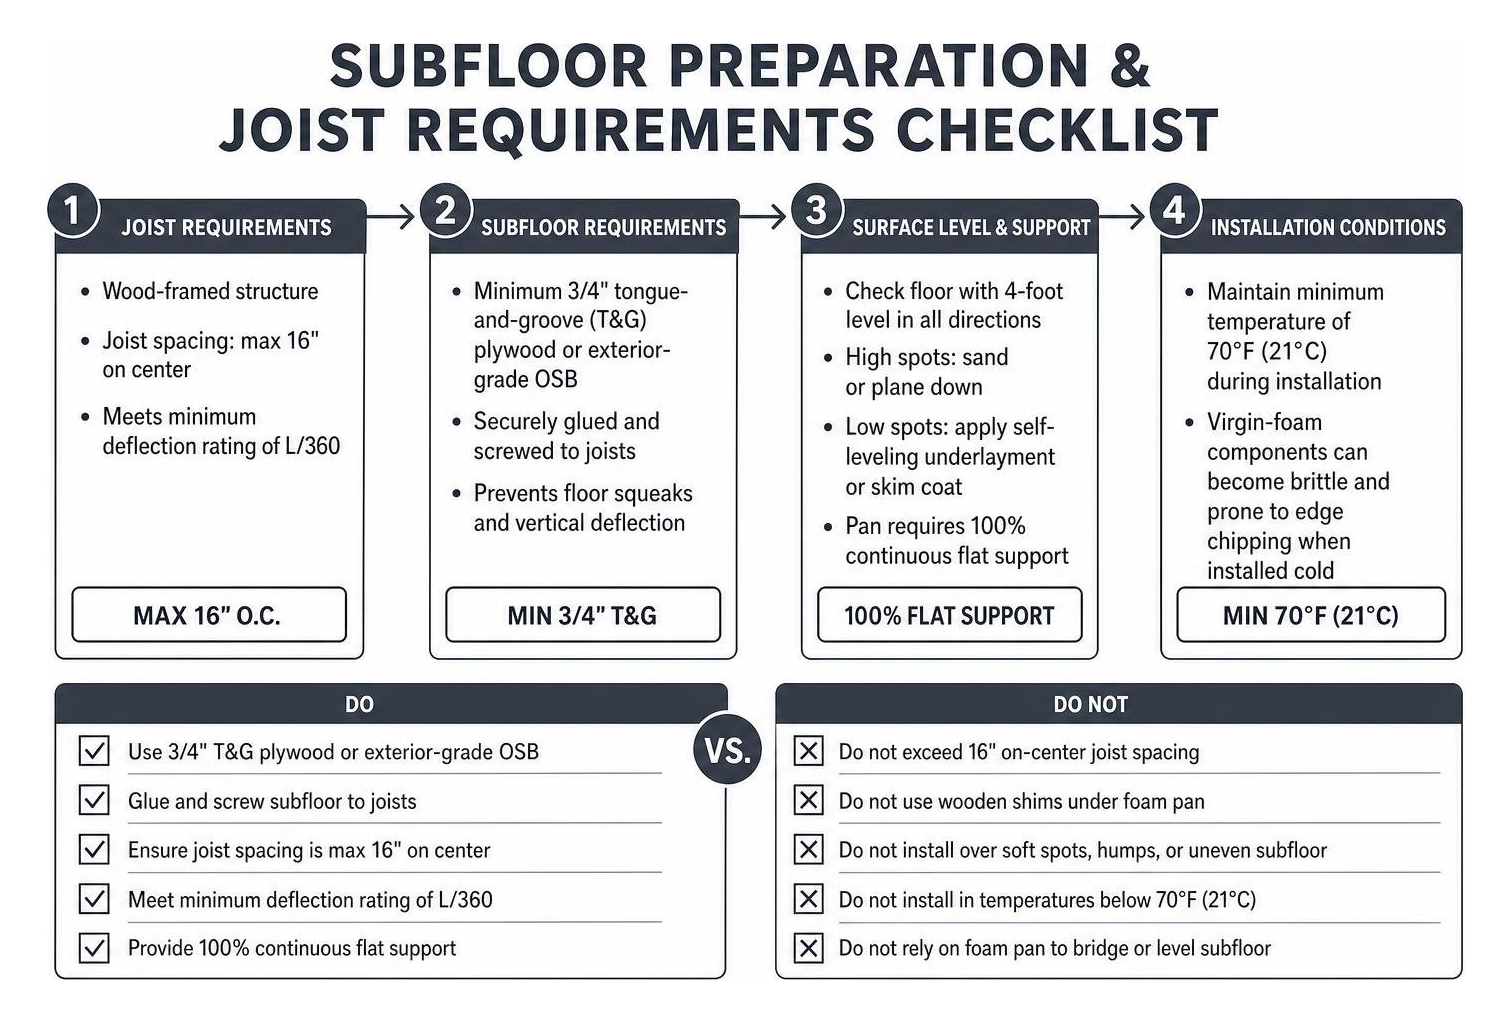
Check the floor with a 4-foot level in all directions. If high spots exist, sand or plane them down; if low spots are present, apply a self-leveling underlayment or skim coat before attempting to set the pan. Never use wooden shims directly under a foam pan to level it—the pan demands 100% continuous flat support.
Finally, keep ambient site temperatures in mind: maintain a minimum temperature of 70°F (21°C) during installation. Virgin-foam components can become brittle and prone to edge chipping when handled and installed in cold conditions.
Drain Pipe Sizing and Cutout Clearances
Rough plumbing must align with the tray’s drain opening. Standard installations utilize a 2-inch PVC or ABS waste pipe extending up through the floor.
Cut a clean 5-inch circular opening in the subfloor centered precisely on the drain rough-in location. This provides ample clearance for the integrated drain body housing beneath the tray. Cut the 2-inch drain pipe flush with the top of the subfloor (or to the specific height called out by your drain assembly instructions). Ensure the pipe is securely strapped beneath the floor so it cannot shift vertically when stepping into the pan.
Step-by-Step Foam Shower Pan Installation Guide
Setting a foam tray is straightforward, but it requires systematic execution. Following each phase in sequence ensures a solid, hollow-free base that lasts for decades.
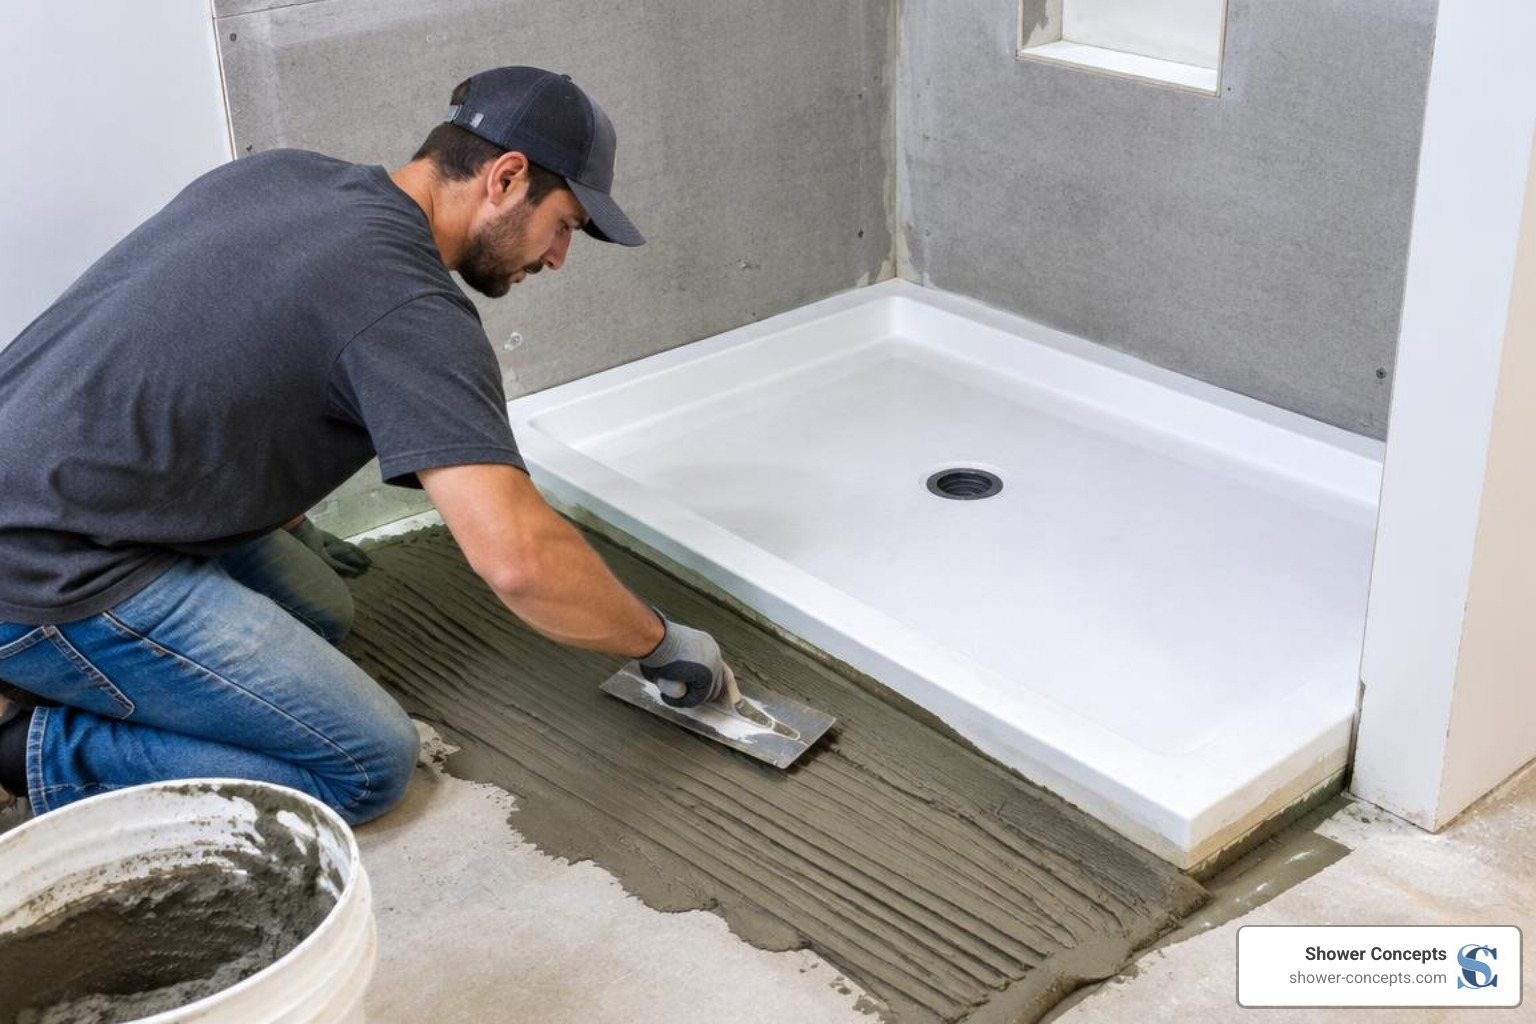
Dry-Fitting and Trimming the Tray
Never spread mortar until you have executed a complete dry-fit:
Clean the subfloor thoroughly of all dust, drywall mud, and wood shavings.
Carefully place the foam tray into the alcove or shower footprint, aligning the drain opening over the waste pipe cutout.
Check all sides with a spirit level. The outer rim should sit dead level while the floor slopes naturally toward the drain.
Verify that a 1/8-inch expansion gap exists between the foam perimeter and the surrounding wall studs to allow for framing movement.
If the tray is slightly oversized, you can trim the outer perimeter using a straightedge and a fine-toothed hand saw or a circular saw with a 40-tooth blade. If your pan features a pre-machined perimeter notch designed to integrate with wallboard, remember to re-cut that factory notch into the freshly trimmed edge.
For bathrooms requiring modern flush entries or linear configurations, consider pairing your base with a compatible point drain kit to drop the entire floor assembly without notching structural floor joists.
Mortar Application and Setting the Pan
Foam shower trays must be fully bonded to the substrate using an approved polymer-modified thin-set mortar (ANSI A118.4). Unmodified mortars (ANSI A118.1) do not provide the necessary flexural bond strength for foam substrates.
Mix your thin-set to an easily workable, spreadable consistency. Using the flat side of your trowel, firmly burn a layer of mortar into the subfloor substrate to ensure deep mechanical adhesion. Next, comb additional mortar across the floor using a 3/8-inch square-notched trowel, running all ridges in straight, parallel lines in the same direction. Parallel ridges allow air to escape freely when the pan is compressed.
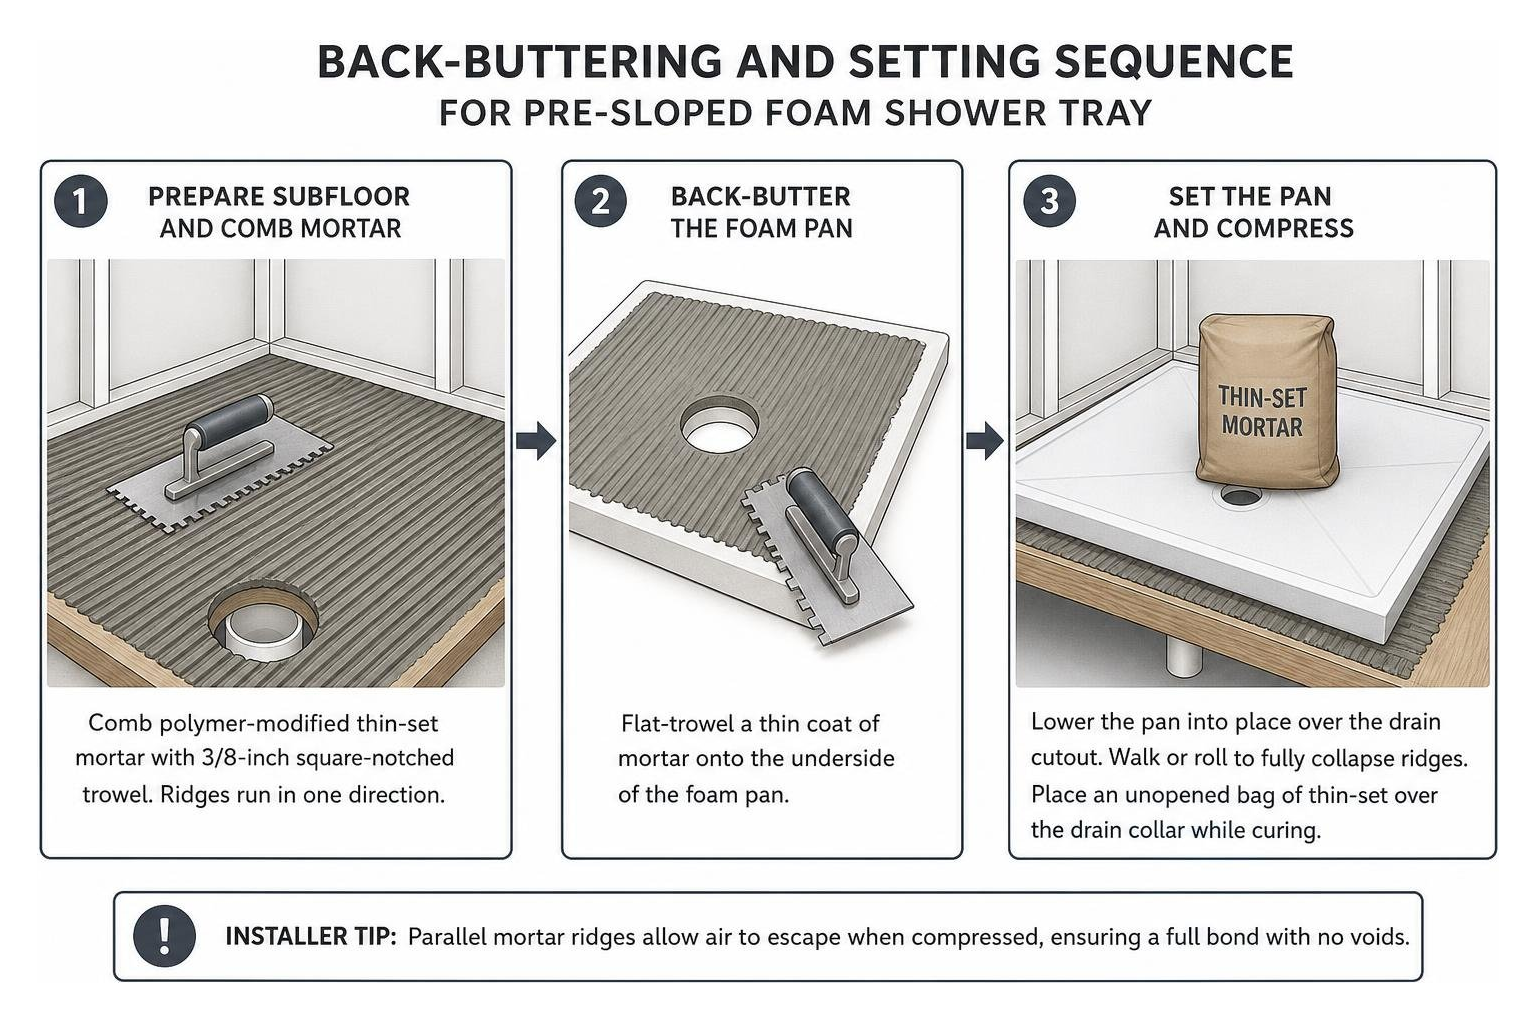
Flat-trowel a thin coat of mortar directly onto the underside of the foam pan (known as back-buttering). Carefully lower the pan into position over the drain cutout. Walk evenly across the tray surface or use a weighted roller to collapse the mortar ridges completely.
Installer Tip: Place an unopened bag of thin-set directly over the drain collar while the mortar cures. This gentle, uniform weight keeps the center locked firmly against the subfloor and eliminates any tendency for the foam to rise.
Waterproofing and Sealing in Foam Shower Pan Installation
Once the base is bedded securely, finish the complete waterproof envelope before tiling:
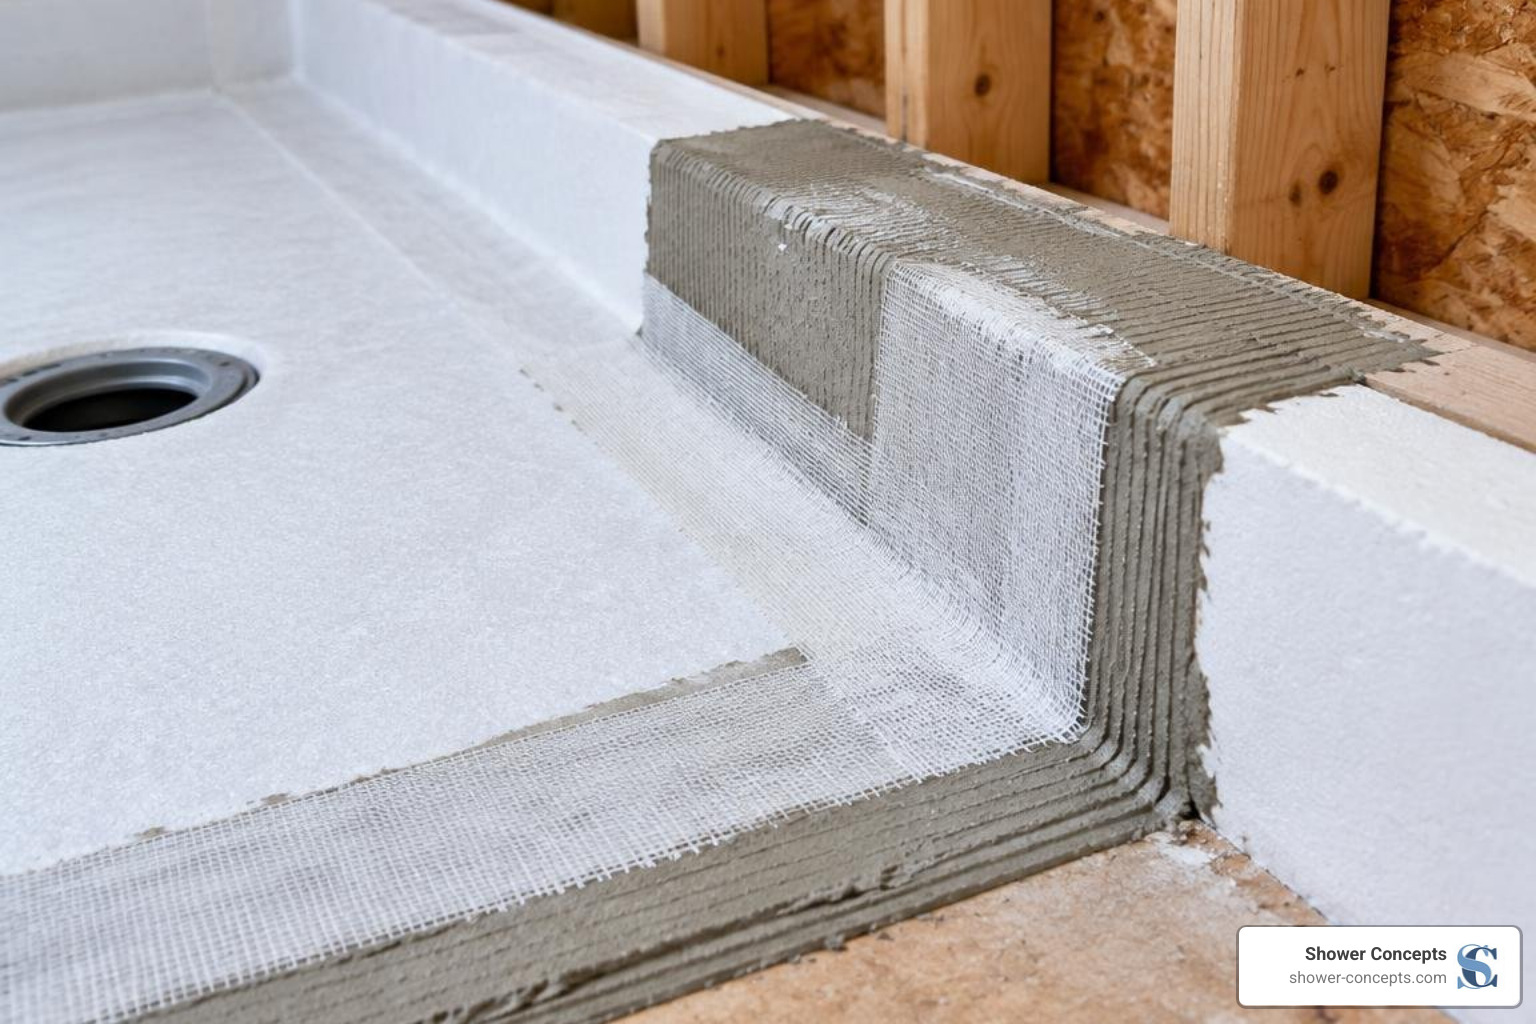
Drain Assembly: Install the drain bonding collar or clamping flange into the drain housing recess using a continuous bead of high-grade elastomeric sealant or thin-set, ensuring no gaps remain around the flange perimeter.
Curb Installation: Bed the pre-formed foam curb into a layer of modified thin-set over the subfloor. Apply a 1/2-inch bead of waterproof sealant along the joint where the curb meets the shower pan floor.
Corner and Seam Banding: Apply waterproofing membrane bands (such as 5-inch wide waterproofing fabric) over all perimeter joints where the pan meets the wall framing or backer boards. Ensure a minimum 2-inch overlap across every seam.
Pre-Formed Corners: Install pre-formed inside and outside corner patches bedded in thin-set or sealant to eliminate pinhole leaks at critical 90-degree transitions.
Flood Testing, Curing Times, and Tile Preparation
Do not rush the tile process. Allow the mortar bed and seam sealants to cure undisturbed for a minimum of 24 hours.
Per standard plumbing codes (including IRC Section P2503.6), a flood test is required prior to tile installation to confirm absolute watertight integrity. Insert an inflatable or mechanical test plug into the 2-inch drain pipe below the pan connection. Fill the shower base with clean water to a depth of approximately 2 inches (or just below the top of the curb).
Leave the water standing for at least 15 to 30 minutes (or 24 hours if required by your local building inspector). Check the drain perimeter, subfloor underside, and adjacent rooms for any signs of moisture or water drop. Once confirmed leak-free, release the drain plug and allow the pan to dry completely.
When selecting tile, standard ceramic, porcelain, or natural stone larger than 2x2 inches can be set directly over the bonded membrane using modified thin-set mortar. If you are installing small mosaic tiles or penny rounds under 2x2 inches, use a high-performance 2-part epoxy mortar and grout system to distribute high point-loads evenly across the virgin foam core.
Frequently Asked Questions About Foam Shower Pans
What type of thin-set mortar is required for foam shower pans?
You should always use an ANSI A118.4 polymer-modified thin-set mortar to bed both the foam tray to the subfloor and the tile to the tray surface. Unmodified thin-set (ANSI A118.1) lacks the necessary flexibility and bonding strength, which can lead to hollow spots, tile delamination, and voided product warranties.
Can you cut a foam shower pan to fit an off-center drain?
Yes, but you must trim the pan symmetrically whenever possible to maintain a consistent slope from all perimeter edges to the center drain. Measure the exact distance from the drain center to each surrounding wall stud, subtract that dimension from the pan’s center, and trim the excess evenly from the perimeter edges with a fine-toothed saw.
How long should you wait before tiling over a foam shower pan?
Wait at least 24 hours after setting the foam pan in thin-set mortar before walking on it to install tile. This cure window ensures the mortar ridges have fully bonded and hardened, and it provides the required timeframe to conduct a proper plumbing flood test.
Conclusion
Installing a pre-sloped foam shower tray provides professional-grade slope accuracy, bulletproof leak protection, and dramatic labor savings compared to traditional sand-and-cement mud packs. By ensuring your subfloor meets deflection limits, achieving 100% mortar coverage beneath the pan, and carefully sealing all perimeter seams and drain interfaces, you can build a solid foundation for any custom tile design.
At Shower Concepts, we design and manufacture custom foam shower pans, curbs, niches, and related shower components for professional tile contractors and discerning DIY builders. Fabricated in Denver, Colorado (2965 S Tejon St, Englewood, CO 80110) from 100% virgin foam, our custom shower systems deliver high structural durability, fast turnaround, and guaranteed slope precision for any bathroom layout.
