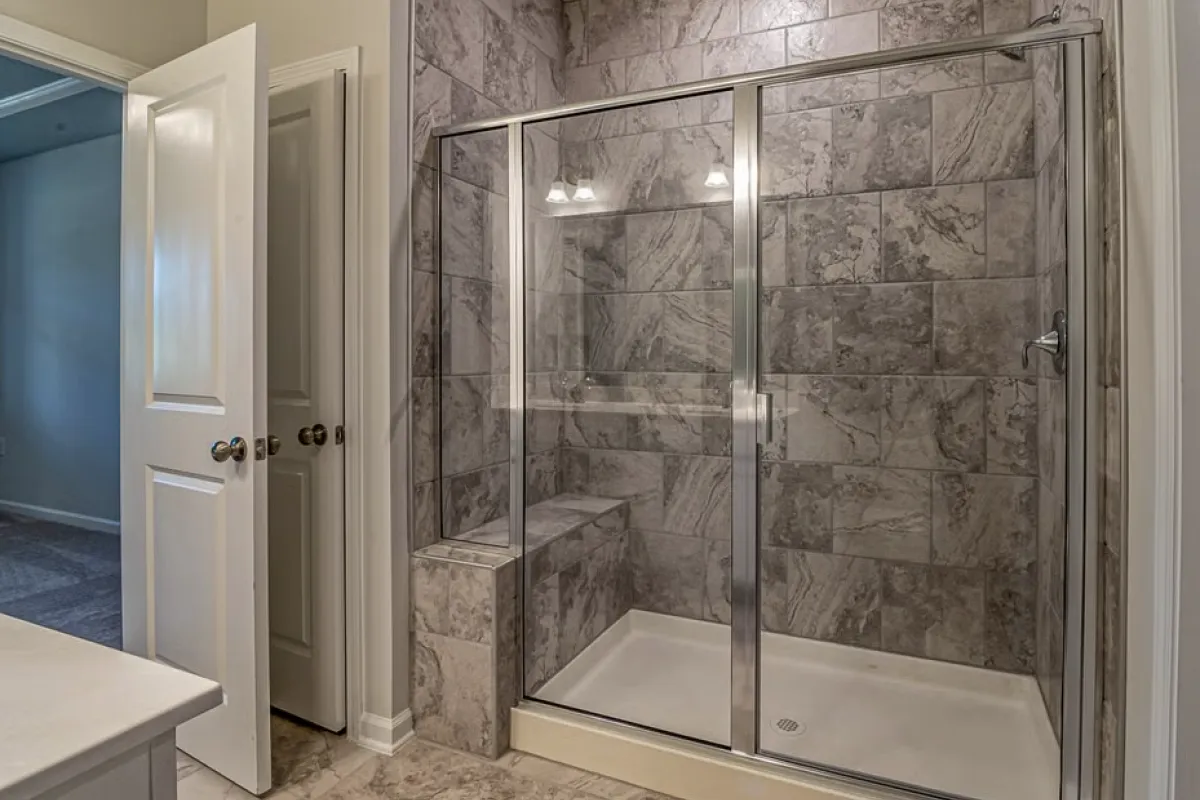
A Comprehensive Guide to Tile-Ready Shower Pan Options
Introduction
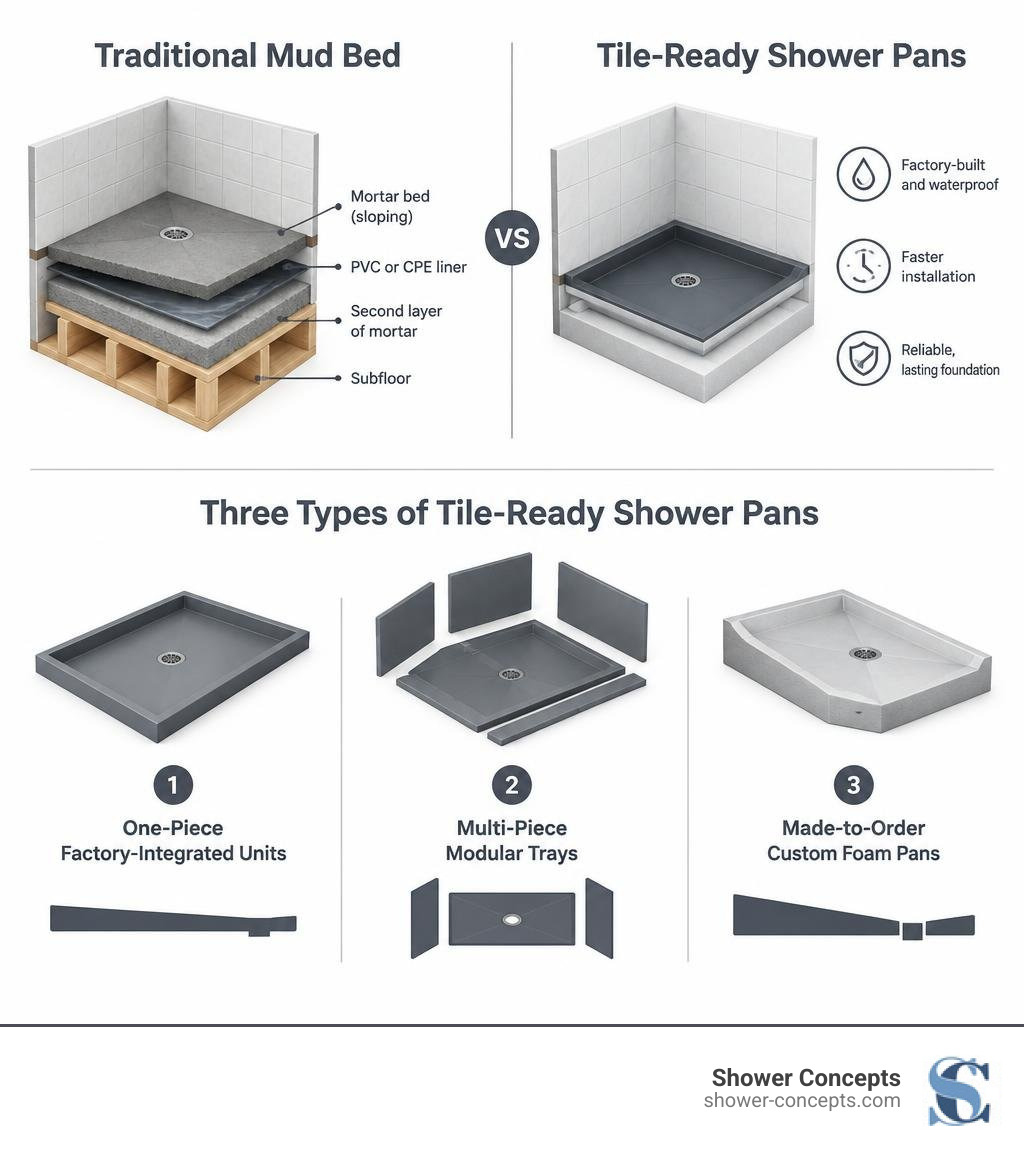
Shower pans ready for tile are pre-sloped, waterproof shower bases designed to replace traditional mud beds. They come in three primary configurations: one-piece factory-integrated bases, modular foam tray systems, and made-to-order custom foam pans. Each option delivers a factory-calibrated 1/4 inch per foot slope toward the drain, allowing tile installers to bond tile directly to the surface after setting the pan in thin-set mortar.
Modern engineered pre-sloped substrates have completely transformed this process. By delivering a factory-built foundation with an integrated, code-compliant pitch, these systems eliminate traditional mud beds while dramatically reducing labor hours and site mess. With modern tile-ready bases, installers gain an out-of-the-box waterproof foundation that cuts bathroom floor prep from a multi-day ordeal down to a couple of hours.
Comparing the Main Types of Shower Pans Ready for Tile
Choosing the right base starts with understanding how different configurations handle transport, jobsite modifications, and floor geometry. Most tileable substrates fall into three categories: one-piece factory-integrated units, multi-piece modular trays, and made-to-order custom foam pans.
Every reliable system maintains a factory-calibrated pitch—traditionally 1/4 inch of fall per linear foot toward the drain—ensuring rapid, pond-free drainage without requiring manual screeding.
Feature / Metric | One-Piece Pre-Sloped Bases | Modular Foam Tray Systems | Custom Made-to-Order Pans |
|---|---|---|---|
Material Base | Rigid high-density foam or composite | Sectional high-density XPS foam | 100% Virgin high-density foam |
Typical Weight | 22 to 28 lbs | 15 to 25 lbs (unassembled) | 12 to 22 lbs |
Slope Ratio | Factory pre-set 1/4" per foot | Factory pre-set 1/4" per foot | Calibrated 1/4" per foot standard |
Curbs & Walls | Built-in integrated curb & splash walls | Separate curb components | Custom integrated or separate curbs |
Subfloor Bonding | Thin-set mortar bed | Adhesive or polymer thin-set mortar | Modified thin-set mortar |
Best Application | Standard alcove remodels, hospitality | Large commercial footprints, tight stairs | Non-standard layouts, radius walls |
One-Piece Pre-Sloped Bases
One-piece pre-sloped bases provide a completely seamless floor structure. These units arrive with the sloped floor, curb, and perimeter splash walls molded into a single, cohesive part.
Weighing between 22 and 28 lbs, one-piece pans are light enough for a single installer to carry up a flight of stairs, yet rigid enough to handle heavy commercial foot traffic once set. Their primary advantage is the elimination of internal assembly seams. Because the perimeter flange and curbs are factory-welded or molded directly to the pan floor, there are zero pan joints to waterproof on site.
These units feature flat bottoms that sit directly into a layer of modified thin-set over the subfloor. They are widely specified in multi-family renovations and hospitality projects where standard sizing (such as 34" x 48" or 30" x 60") matches existing footprints and rapid, repeatable turnaround is paramount.
Modular Foam Tray Systems
Modular shower tray systems break the shower pan into interlocking or adjacent sections. Typically shipping as a four-piece assembly, these trays are designed to make transit and storage painless, especially in high-rise buildings, multi-unit complexes, or tight residential stairwells where maneuvering a rigid 6-foot pan is difficult.
Installers dry-fit the modular sections across the floor opening, secure them into a bed of approved adhesive mortar, and join the seams using manufacturer-specified peel-and-stick waterproofing bands and adhesion rings.
Modular systems offer high versatility for expansive shower spaces, with sizes scaling from 38" x 38" up to 72" x 72". If an unexpected framing stud or offset plumbing pipe throws off the layout, individual modular panels can be field-trimmed while preserving the uniform perimeter slope.
Custom and Made-to-Order Shower Pans Ready for Tile
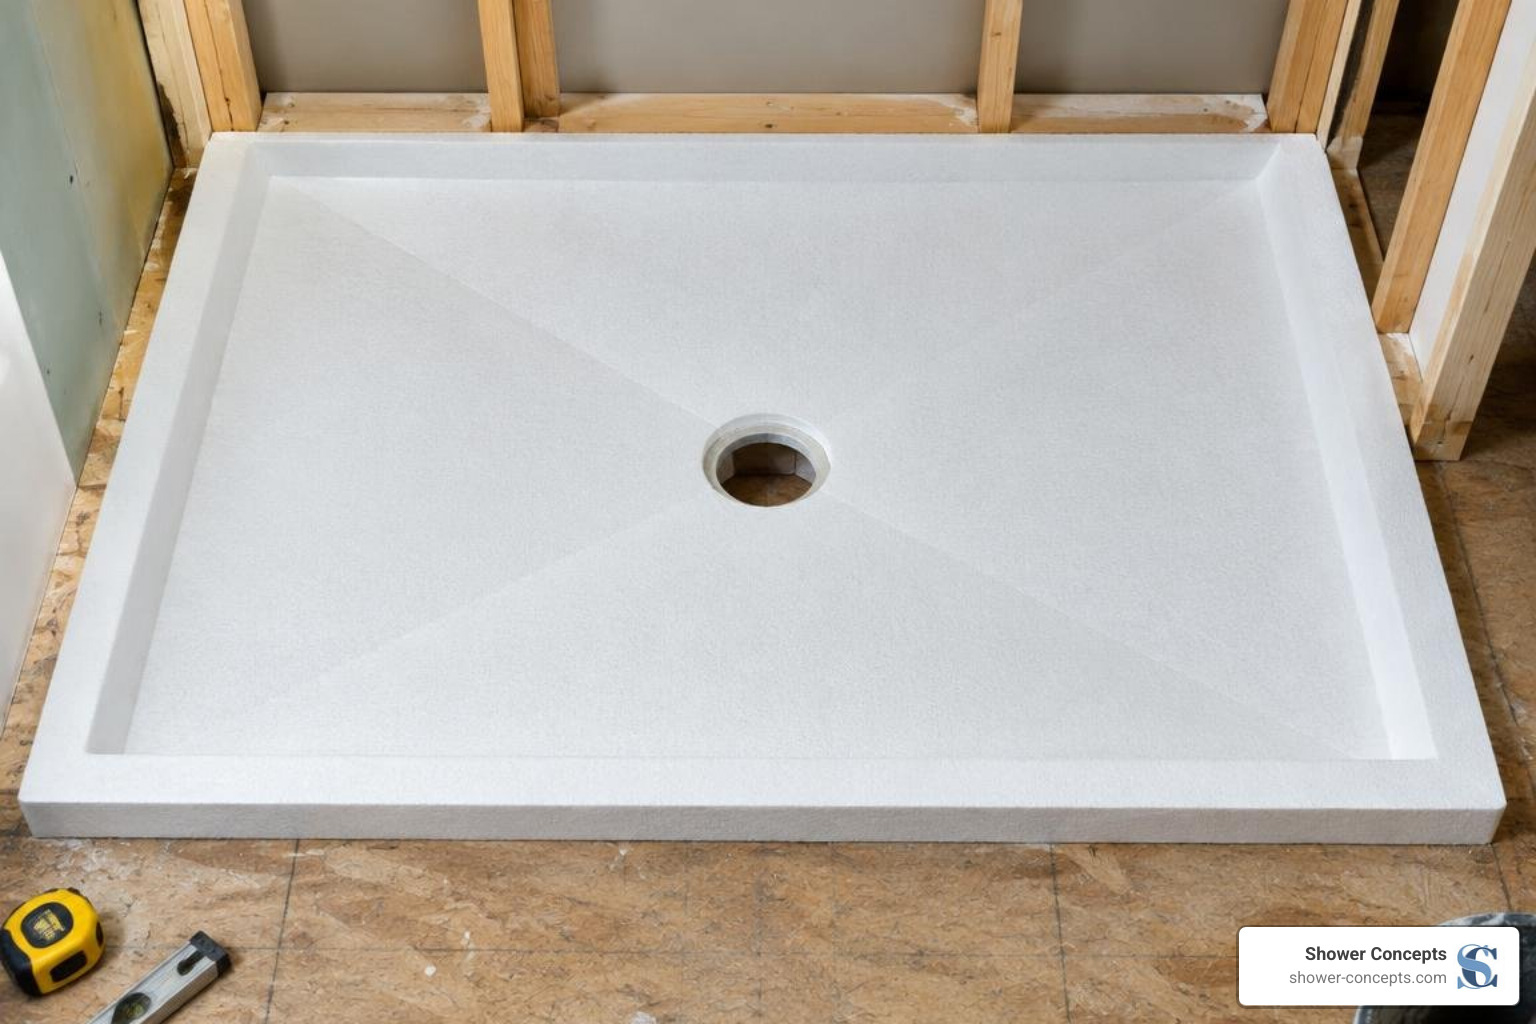
Standard square and rectangular bases cover typical alcoves, but high-end renovations, older homes, and architectural spaces often demand irregular shapes, structural post cutouts, curved or radius walls, or off-center drain locations to avoid moving structural floor joists.
This is where custom, made-to-order foam shower pans excel. Manufactured from 100% virgin high-density expanded or extruded polystyrene foam, these pans are cut on computerized CNC equipment to match the precise dimensions of a specific jobsite.
Standard custom trays maintain a consistent perimeter thickness of 1-15/16 inches, allowing seamless transitions to standard wall backer boards while tapering at the required 1/4" per foot slope down to the drain cutout.
Through regional manufacturing capabilities serving the Denver market, custom shower trays can be ordered, fabricated, and delivered with rapid turnaround times, keeping complex renovations moving forward without waiting weeks for specialty imports.
Material Composition, Durability, and Code Compliance
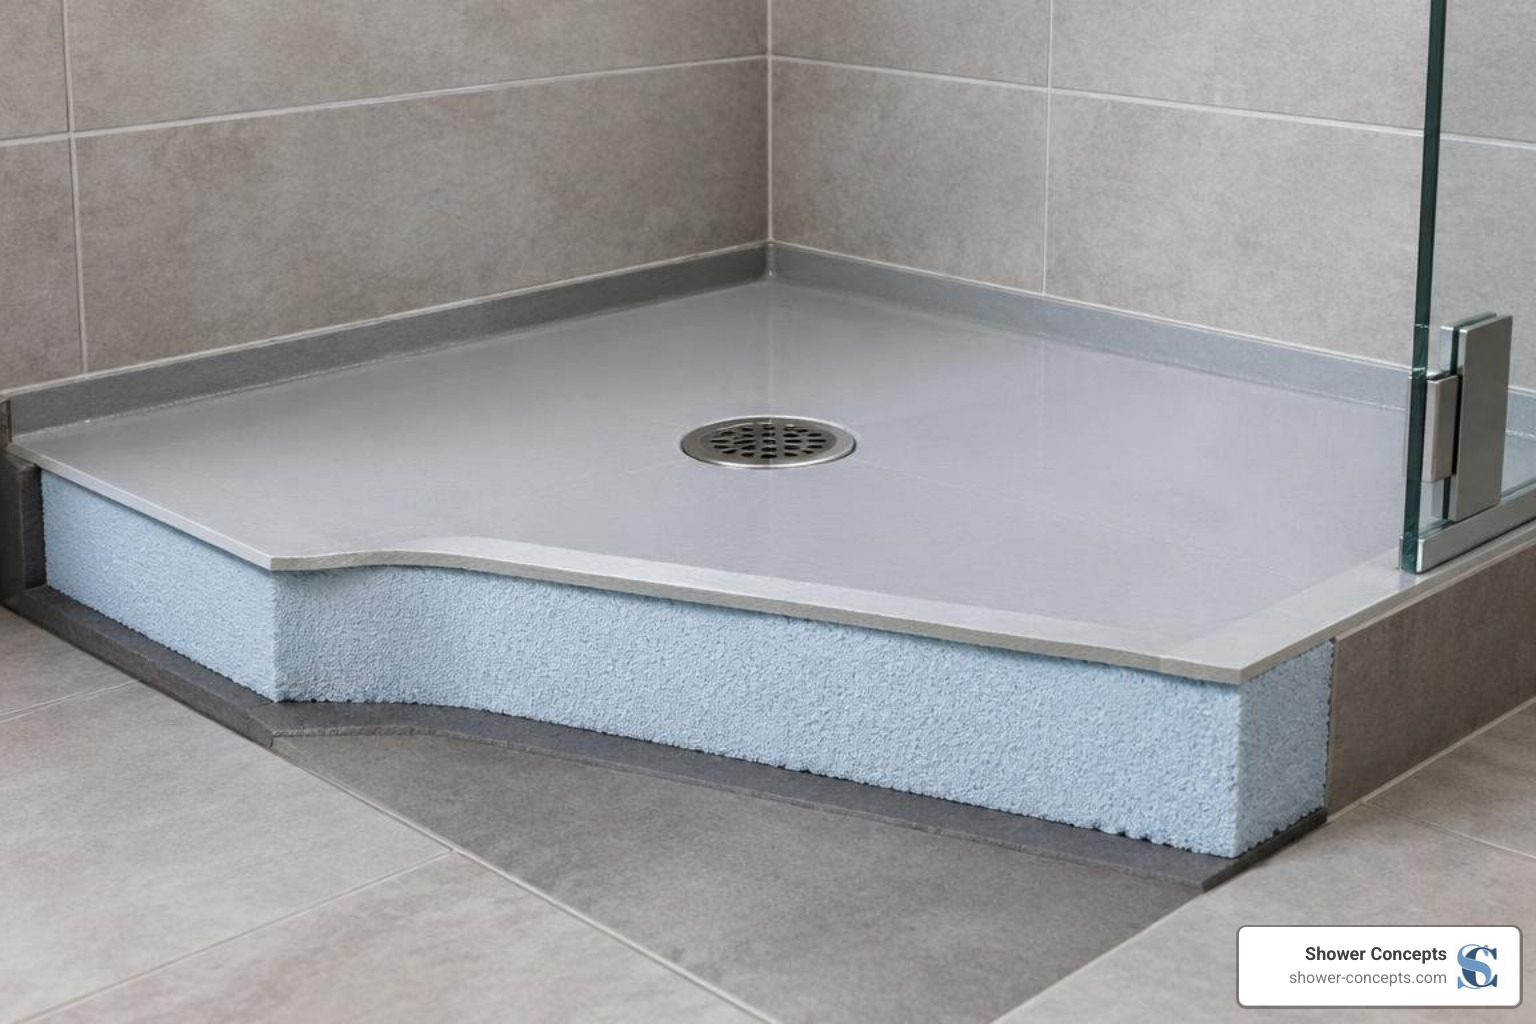
A common misconception among homeowners is that a foam shower pan must feel soft or flexible underfoot. In reality, engineered shower trays achieve immense compressive strength through multi-layer composite construction.
Core Materials and Surface Coatings
The structural foundation of a high-performance tileable pan starts with a core of high-density closed-cell extruded polystyrene (XPS) or high-density expanded polystyrene (EPS). XPS foam features a closed-cell matrix that is naturally hydrophobic, meaning it cannot absorb bulk moisture or support mold growth even in the event of top-surface mechanical damage.
To handle severe point loads—such as stilettos, wheelchair wheels, or heavy decorative shower benches—the foam core is reinforced. Manufacturers coat the top surface with an alkali-resistant fiberglass mesh embedded within a dense, polymer-modified cementitious coating or a synthetic waterproof membrane.
This creates a rigid, structural skin that distributes localized point loads across the high-density foam core. It provides a rugged mechanical key that allows standard thin-set mortars to form an unbreakable bond directly with floor tiles.
Industry Certifications and Warranty Standards
Building codes do not leave shower waterproofing to chance. When evaluating tile-ready pans, verify that the products meet the following industry standards:
IAPMO PS-46 / UPC Compliance: Certifies that the pre-sloped base, its integral drainage connections, and structural durability satisfy Uniform Plumbing Code standards.
ANSI A118.10: The American National Standard for load-bearing, bonded, waterproof membranes for thin-set ceramic tile and dimension stone installations.
ASTM D4068: Standard specification for chlorinated polyethylene (CPE) or polymer-based waterproof sheeting materials.
UL Listing: Confirms third-party verification for structural stability and fire-safety ratings in commercial building assemblies.
When systems are installed strictly to manufacturer guidelines—matching compatible wall boards, sealants, and bonding mortars—manufacturers offer comprehensive system warranties. These range from standard 10-year guarantees to 35-year limited warranties and lifetime system coverages.
Drain Configurations and Complete Shower Kits
Proper drainage depends on seamless integration between the sloped pan surface, the drain assembly, and the tile layout.
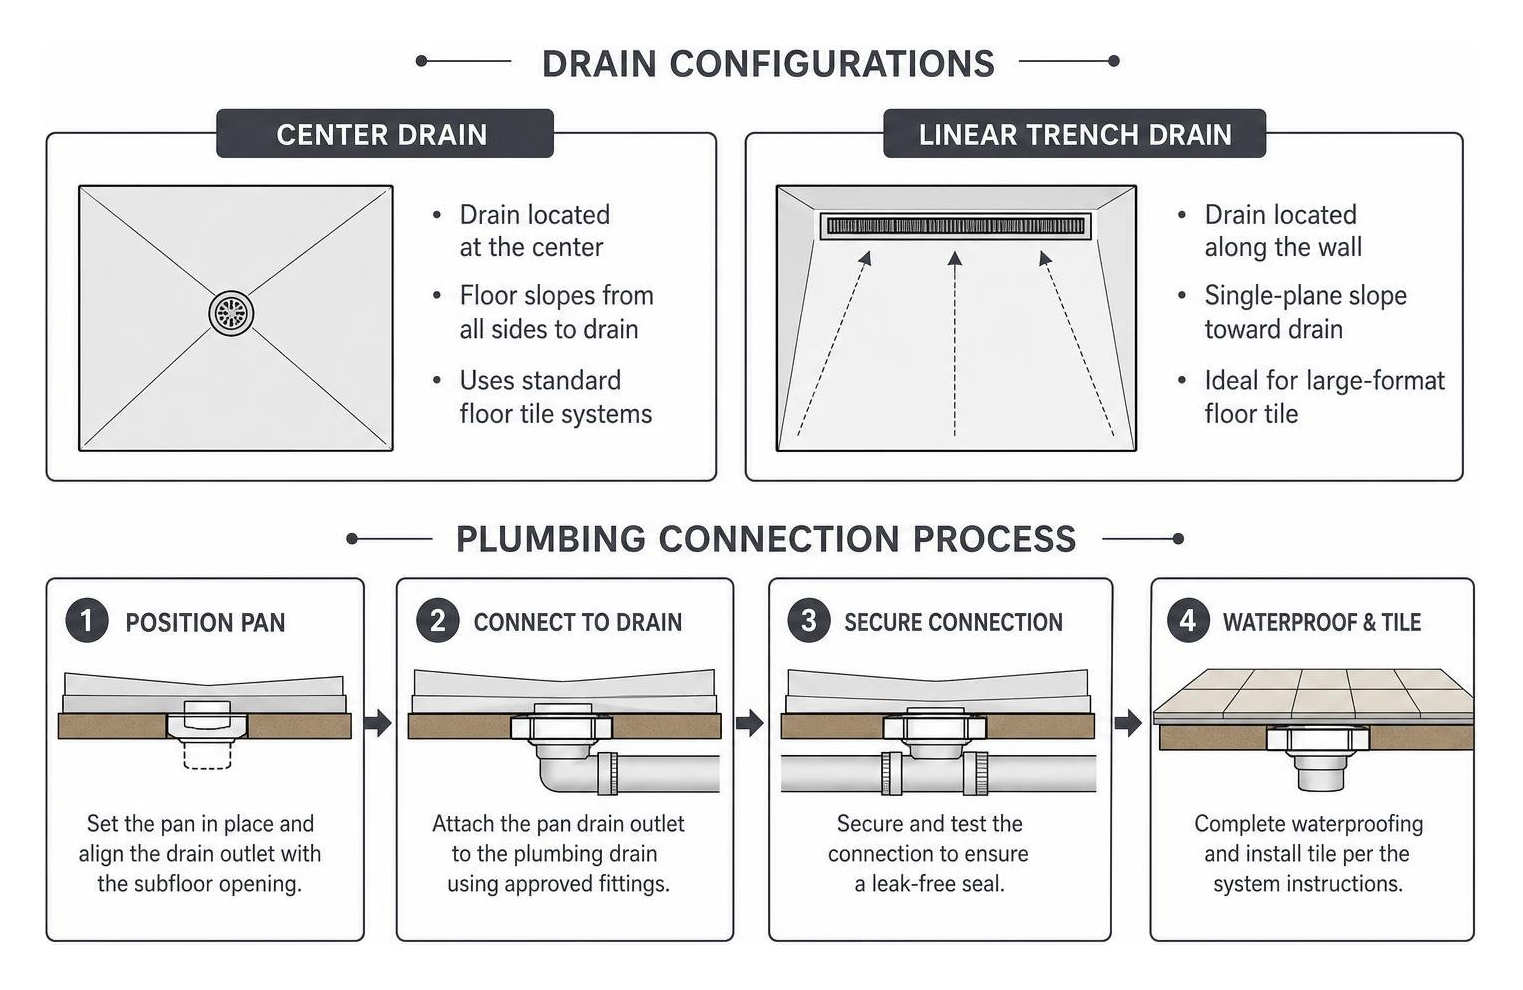
Center vs. Linear Trench Drains
The placement and style of your shower drain directly influence both subfloor plumbing prep and the type of floor tile you can install.
Center and Point Drains: Standard center or offset round/square drains channel water from all four corners inward. Because the floor slopes in four distinct planes, installers must use mosaic or small-format tiles (typically 4" x 4" or smaller) so the tile can follow the compound contours without lippage. Drain connections commonly utilize integrated ABS/PVC compression fittings or integrated sloped bonding flanges (such as Schluter Kerdi-Drain systems) with laterally adjustable grates for precise tile alignment. In specialty or curved-wall applications, flexible systems like the Noble Flex Drain paired with a 3-piece clamping ring ensure a watertight tie-in.
Linear Trench Drains: Linear drains sit flush along a single wall (left, right, or rear) or across the shower threshold. Because the floor slopes along a single, flat plane toward the trench, you can install large-format porcelain slabs and unbroken rectangular tiles without relief cuts.
Full Shower Kits vs. Individual Components
While you can purchase a shower tray separately, complete shower kits offer distinct advantages for project efficiency, waterproofing continuity, and code compliance.
Pre-Sloped Shower Pan: Engineered to your exact dimensions with factory-set 1/4" per foot slope.
Waterproof Wall Backer Boards: High-density XPS panels (typically providing wall coverage up to 80" high) that replace traditional cement boards.
Pre-Formed Waterproof Curbs and Benches: Eliminates field framing with 2x4s, preventing wood movement and fastener leaks.
Integrated Drain Assembly: Factory-matched clamping rings, bonding flanges, and subfloor connection gaskets.
Joint Sealants and Fasteners: Hybrid polymer or polyurethane sealants paired with corrosion-resistant screws and washers.
Waterproofing Sealing Tape: Pre-formed inside and outside corner patches to ensure continuous protection at all transitions.
Buying a matched kit eliminates the risk of chemical incompatibility between different sealants, membranes, and mortar beds while providing single-source warranty protection.
Installation Steps, Pricing, and Common Pitfalls
Even the best engineered shower tray will fail if installed over a poorly prepared subfloor. Follow these systematic steps to ensure a rock-solid, lifetime installation.
Step-by-Step Subfloor Prep and Setting
Subfloor Inspection and Leveling: Ensure the subfloor (minimum 3/4" exterior-grade plywood, OSB, or smooth concrete) is clean, structurally sound, and flat within 1/8" across 10 feet. Any deflection or dip under the pan must be corrected using self-leveling underlayment or floor patching compound.
Plumbing Rough-In and Dry-Fit: Cut the appropriate opening around the 2" DWV waste pipe. Dry-fit the shower pan, checking that it sits completely level along its perimeter top edges while the floor surface slopes uniformly toward the drain.
Mortar Bed Application: Mix a polymer-modified thin-set mortar (meeting ANSI A118.4 or A118.15 standards) to a smooth, workable consistency. Using a 1/2" x 1/2" square-notched trowel, comb uniform directional ridges across the subfloor. Do not spot-glue or use expanding foam; full, 100% continuous mortar coverage is required beneath the entire pan floor.
Setting the Pan: Press the foam pan firmly into the wet mortar bed with even, walking pressure across the surface to collapse the mortar ridges. Place a level across the perimeter curbs and side flanges to confirm the pan is level on all sides.
Drain Connection and Sealing: Connect the integrated compression gasket or solvent-weld bonding flange to the waste pipe. Apply polyurethane sealant along the pan’s perimeter upstand flange.
Waterproof Wall Integration: Fasten waterproof backer boards directly to the wall studs, overlapping or sealing tightly to the pan's perimeter flange with approved hybrid sealants and waterproofing mesh tape.
24-Hour Flood Testing: Before installing a single tile, plug the drain and fill the base with water to the top of the curb for 24 hours. Verify that no water level drops or subfloor leaks occur.
Critical Mistakes to Avoid When Installing Shower Pans Ready for Tile
Setting Over an Unlevel Subfloor: If the subfloor is pitched backward, the factory slope of the pan may be compromised, causing water to pool along back corners.
Using Unmodified or Incompatible Mortars: Using unapproved mastic, construction adhesive, or dry-set unmodified mortars beneath the pan or under tiles can lead to debonding.
Failing to Support the Perimeter Curb: Stepping on an unsupported curb edge before the bonding mortar fully cures can snap the perimeter seal.
Over-Tightening Drain Clamps: Over-torquing mechanical drain bolts can crack PVC/ABS flanges or compress the foam core unevenly.
Skipping the 24-Hour Flood Test: Never tile over a base without confirming total watertightness under hydrostatic pressure first.
Project Pricing and Budgeting Factors
Standard one-piece foam pans typically retail between $650 and $1,100, depending on curb layout, pan footprint, and drain hardware. Premium linear trench configurations and complete multi-piece kits featuring full wall boards generally range from $1,100 to $1,800.
Made-to-order custom pans are quoted based on square footage, complexity of layout, and integrated bench accessories. While a pre-sloped pan carries a higher upfront material cost than a bag of sand-and-cement mix, it eliminates 6 to 10 hours of specialized masonry labor, rendering the total installed project cost highly competitive while cutting days off the construction schedule.
Frequently Asked Questions About Tile-Ready Shower Pans
How does a pre-sloped pan compare to a traditional mud bed?
A pre-sloped foam pan cuts shower base installation time by approximately 30% to 50% compared to traditional dry-pack mud beds. It provides a precision-engineered 1/4" per foot slope that eliminates the risk of flat spots or human error during manual screeding.
Furthermore, foam trays do not require days of moisture curing before tile setting can begin; once the setting mortar beneath the pan cures (typically 12 to 24 hours), tile can be installed immediately.
What mortar should be used to bond tile directly to foam shower pans?
Always use a high-performance, polymer-modified thin-set mortar meeting ANSI A118.4 or ANSI A118.15 standards (or the pan manufacturer's proprietary modified adhesive).
Never use premixed organic adhesives (mastics) or unbonded dry-set mortars (ANSI A118.1), as they lack the flexural bond strength, moisture resistance, and chemical curing required for continuous wet-area performance over waterproof foam substrates.
Can pre-formed tileable pans be cut on-site to fit irregular dimensions?
Most high-density foam shower pans can be trimmed on-site using a standard circular saw, track saw, or utility knife. However, trimming must be done carefully along the outer perimeter edges to preserve the structural upstand flange and maintain the uniform 1/4" per foot drainage pitch toward the drain.
If your shower layout involves out-of-square walls, unusual angles, or severe structural obstructions, ordering a custom CNC-cut pan is safer and faster than extensive site modifications.
Conclusion
Engineered, tile-ready shower pans provide tile contractors and homeowners with a leak-proof foundation that combines rapid installation with code-compliant drainage performance. By replacing time-consuming mud beds with high-density, pre-pitched composite foam substrates, you protect your home against structural water damage while dramatically speeding up project completion.
Whether your bathroom renovation requires a standard alcove footprint, a sleek linear drain configuration, or tailored virgin-foam shower pan designs from Shower Concepts, choosing a certified pre-sloped system ensures your custom tile installation remains beautiful, functional, and watertight for decades.
