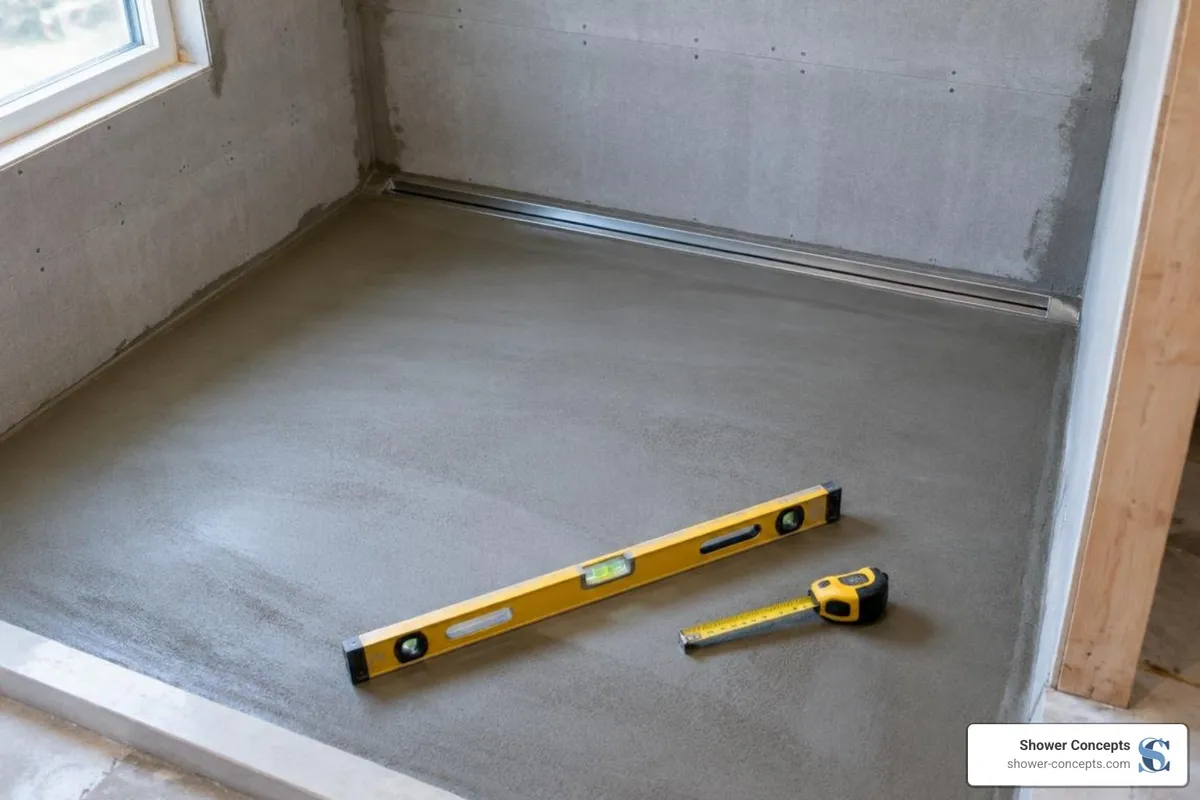
How to Install a Linear Shower Drain Without Flooding Your Bathroom
Essential Components and Linear Shower Drain Installation Diagram Breakdown
To install a linear shower drain correctly, establish a continuous 1/4-inch per foot (2%) single-plane slope toward the drain channel, solvent-weld the outlet to the 2-inch DWV waste pipe, and level the drain body along its horizontal plane. Seal the waterproofing membrane directly to the bonding flange, perform a 24-hour flood test to verify watertightness, and set floor tile with a 1/16-inch perimeter gap around the flush grate.
A successful linear drain project delivers a clean, modern aesthetic, supports large-format tile without pie cuts, and provides a continuous single-plane slope that simplifies barrier-free living. When miscalculated, however, water can pool against walls or seep past the subfloor into ceiling drywall below.
Following strict Tile Council of North America (TCNA) standards and local plumbing codes prevents these water-management issues.
Understanding the anatomy of a linear drainage system makes the installation sequence straightforward. Unlike standard circular point drains that require a multi-directional "bowl" shape in the floor, a linear system collects water along a narrow trench.
Component | Primary Function | Installation Consideration |
|---|---|---|
Drain Body / Trough | Collects runoff across a wide footprint | Must be installed level along its horizontal axis |
Waste Outlet | Connects channel to the building DWV plumbing | Typically 2" Schedule 40 PVC or ABS pipe |
Leveling Brackets / Feet | Calibrate horizontal plane and elevation | Fastened to subfloor; set height to match screed/tile |
Bonding Flange / Clamping Collar | Seals waterproofing membrane to the channel | Requires compatible sealant or mechanical compression |
Mortar Guard / Spacer | Protects the trough during mud work and tiling | Kept in place until grouting begins to maintain channel shape |
Strainer Grate / Tile-In Insert | Provides the visible, finished aesthetic | Adjusted flush with or 1 mm below top of adjacent tile |
Reviewing standard linear drain technical specifications confirms that components must be properly matched: solvent cements must correspond directly with the drain resin (ABS vs. PVC), and bonding flanges must pair seamlessly with your chosen waterproofing system.
Linear Shower Drain Installation Diagram for Wall-to-Wall Layouts
Installing a drain channel flush against the back wall creates a clean sightline. The standard channel width for most low-profile systems is 2-3/4” (70 mm). When planning the rough opening, frame the cavity roughly 2 inches wider than the drain length to accommodate end caps, brackets, and wall board thickness.
If the shower footprint is longer than standard off-the-shelf assemblies, channel extension kits span lengths from 60 inches up to 96 inches. When fitting wall-to-wall:
Maintain a single-directional slope (2% grade) originating at the shower entrance and pitching down to the back wall.
Maintain a 1/16-inch clearance between the back of the drain channel wall and the finished wall tile.
Ensure side trays and troughs are joined with continuous 3/8-inch silicone beads to keep water from bypassing the waste line.
Linear Shower Drain Installation Diagram for Curbless and Curbed Entries
Linear drains offer great design flexibility, allowing placement at the back wall, along the side wall, or right across the shower entrance.
At the Entrance (Curbless/Zero-Threshold): The drain sits directly along the transition between the bathroom floor and shower area. Floor pitch runs inward from the dry zone or slopes from the back wall toward the entry drain. In zero-threshold configurations, plumbing codes require extending the waterproofing membrane outward onto the bathroom floor (minimum 6 inches past the transition) to prevent moisture migration.
With a Traditional Curb: The curb depth must measure not less than 2 inches and not more than 9 inches from the top of the curb to the top of the drain. The shower base slopes from the curb downward toward the back-wall drain, directing water away from the entryway.
Preparing the Subfloor and Establishing the Proper Slope
No shower is better than the substrate underneath it. Any subfloor deflection will crack grout lines, compromise waterproofing, and cause puddles. Inspect joists to verify they meet TCNA deflection criteria (L/360 for ceramic/porcelain; L/720 for natural stone).
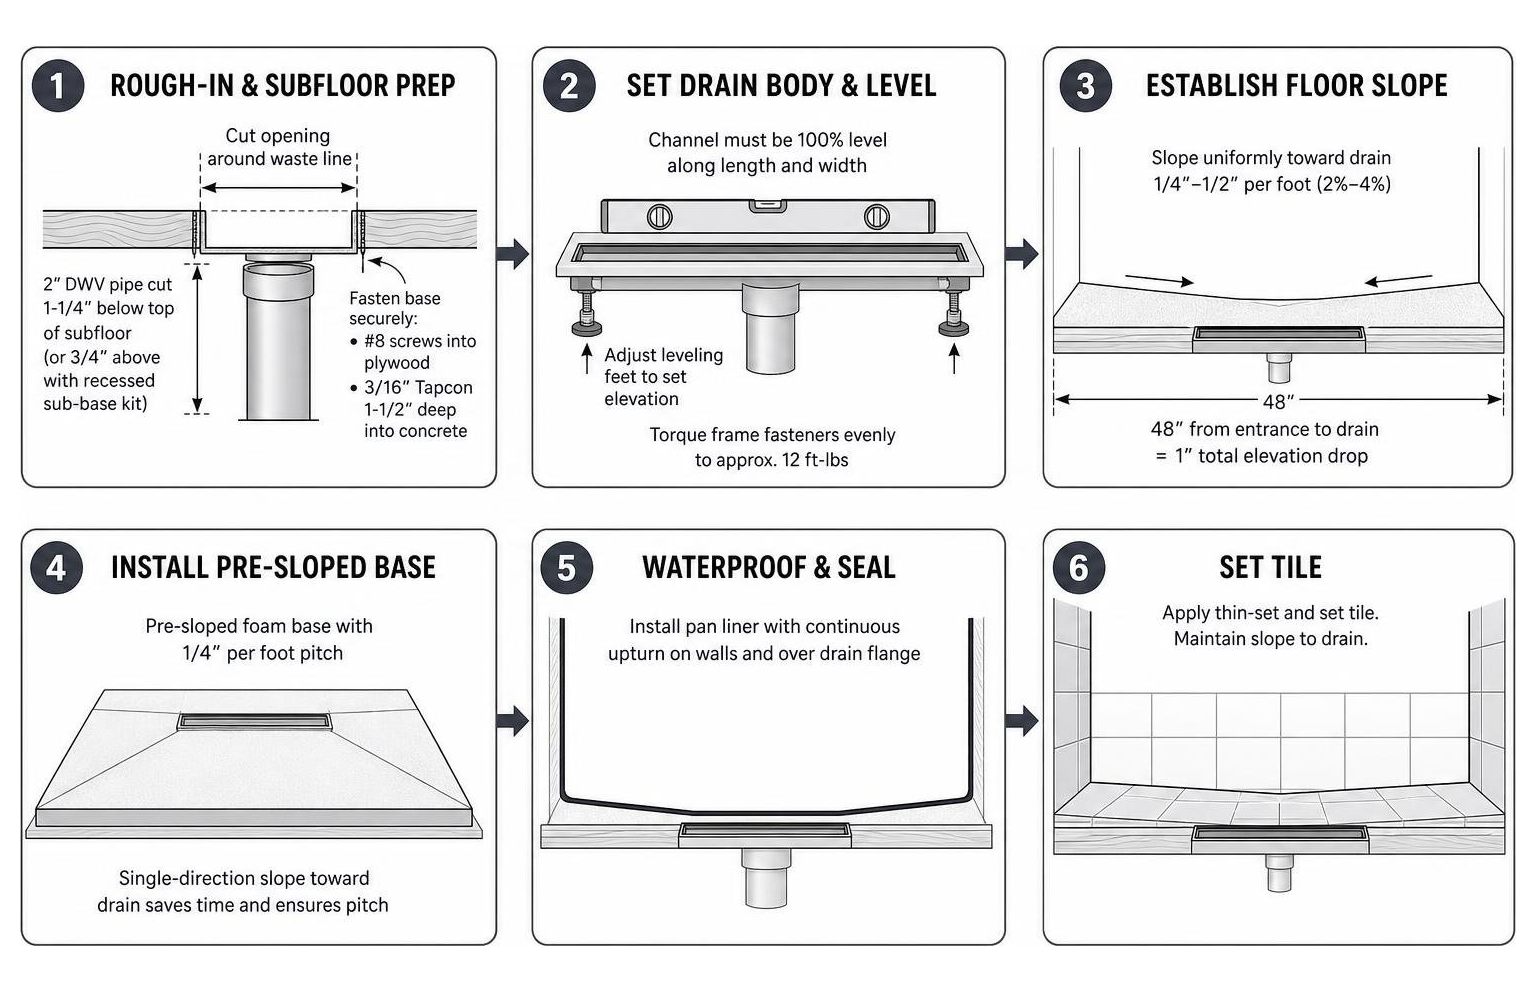
Plumbing codes dictate that finished floors must slope uniformly toward the drain at not less than 1/4 inch per foot (2% slope) and not more than 1/2 inch per foot (4% slope). In a shower measuring 48 inches from entrance to drain, this equates to a 1-inch total elevation drop.
Substrate Leveling and Plumbing Rough-In Dimensions
Prepare the plumbing rough-in before establishing the floor pitch:
Cut the subfloor opening cleanly around the waste line.
For solvent-welded assemblies, cut the vertical 2-inch Schedule 40 DWV waste pipe so it terminates 1-1/4 inches below the top of the subfloor (or 3/4 inch above the subfloor depending on whether a recessed sub-base kit is used).
Anchor the drain base or mounting plates securely: use #8 corrosion-resistant wood screws into plywood or 3/16” Tapcon fasteners drilled 1-1/2” deep into concrete.
Custom Pre-Sloped Foam Bases for Linear Drains
Building a traditional mortar "mud bed" requires a two-stage pour: an initial pre-slope under a pan liner, followed by a dry-pack mortar bed. This method requires multi-day cure times, adds substantial deadweight to framing, and leaves room for human error in the slope.
Modern installations frequently use lightweight, pre-sloped trays. To speed up your workflow, review our guide to Foam Shower Pan Installation. At Shower Concepts, we precision-machine custom shower pans from 100% virgin expanded polystyrene (EPS).
Our custom pans arrive with the exact single-directional 1/4"-per-foot pitch milled directly into the core, saving half a day of mud packing and eliminating low spots. Discover our full line of waterproof Shower Pans Ready for Tile to streamline your next installation.
Step-by-Step Drain Body and Waterproofing Installation
Follow these steps sequentially to install your linear drain and maintain a continuous waterproof barrier.
1. Connecting the Drain Body and Adjusting Leveling Feet
Clean all pipe ends with solvent cleaner. Apply appropriate PVC/ABS primer and cement, then seat the drain outlet firmly over the 2-inch waste pipe.
Use a bubble level across the channel's length and width. Linear drain channels must be 100% level along their perimeter even though the floor leading up to them is sloped. Adjust the threaded leveling legs or brackets until the drain flange is set to the correct elevation. When tightening frame fasteners, torque screws evenly to approximately 12 ft-lbs to prevent warping the steel or plastic channel.
2. Sealing Flanges, Corners, and Transitions
Always follow the manufacturer's written installation instructions for your specific drain body:
Topical Sheet Membrane Method: Spread modified thinset mortar across the substrate with a 1/4" x 3/16" V-notched trowel. Embed the sheet membrane, smoothing it outward with a drywall blade to eliminate air pockets. Clean the drain flange with isopropyl alcohol, apply a continuous 3/8-inch bead of hybrid polymer sealant (such as NobleSealant 150 or an approved hybrid polymer sealant) along the flange groove, and seat the membrane into the sealant. Secure the clamping collar if supplied.
Liquid Waterproofing Method: For roll-on membranes (e.g., Mapelastic AquaDefense), apply an initial continuous coat over the substrate and onto the bonding flange. Embed reinforcing fabric across the transition between the pan and drain flange, making sure there is at least a 2-inch overlap. Once dry to the touch, apply a second continuous coat over the entire assembly.
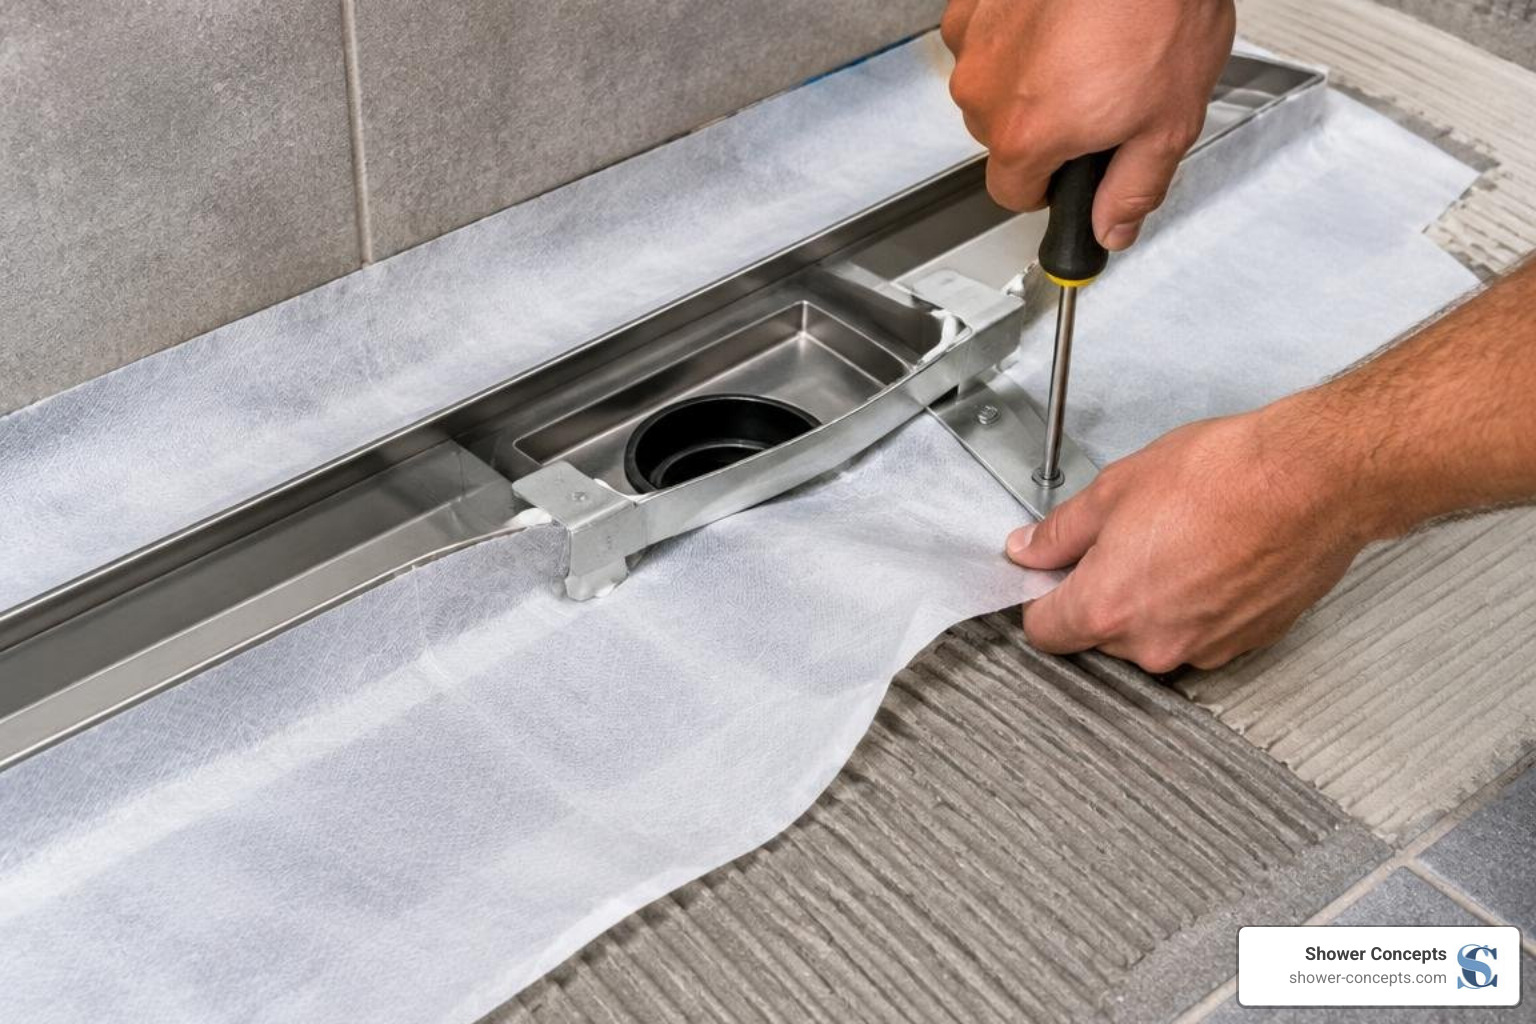
Always reinforce transitions:
Turn sheet membranes up the studs a minimum of 3 inches above the finished curb, or 6 inches above floor level in curbless designs.
Install preformed inside and outside corner seals at all 90-degree transitions using dedicated sealant.
3. Flood Testing and TCNA Verification Before Tile Setting
Never set tile without testing the shower pan first.
Insert an expandable mechanical test plug into the 2-inch drain outlet below the weep holes/flange.
Fill the shower base with water to the top of the curb (or a minimum of 2 inches deep for barrier-free entries).
Mark the water line with a grease pencil.
Let the water sit for 24 hours per ASTM D5957 standards.
Check for moisture along the perimeter, subfloor underside, and adjacent framing. If no drop in water level occurs (excluding minor evaporation), remove the plug and proceed to tile.
Setting Tile and Calibrating the Drain Grate Flush
Because linear drains slope along a single plane, you can use large-format tiles without making diagonal relief cuts ("envelope cuts").
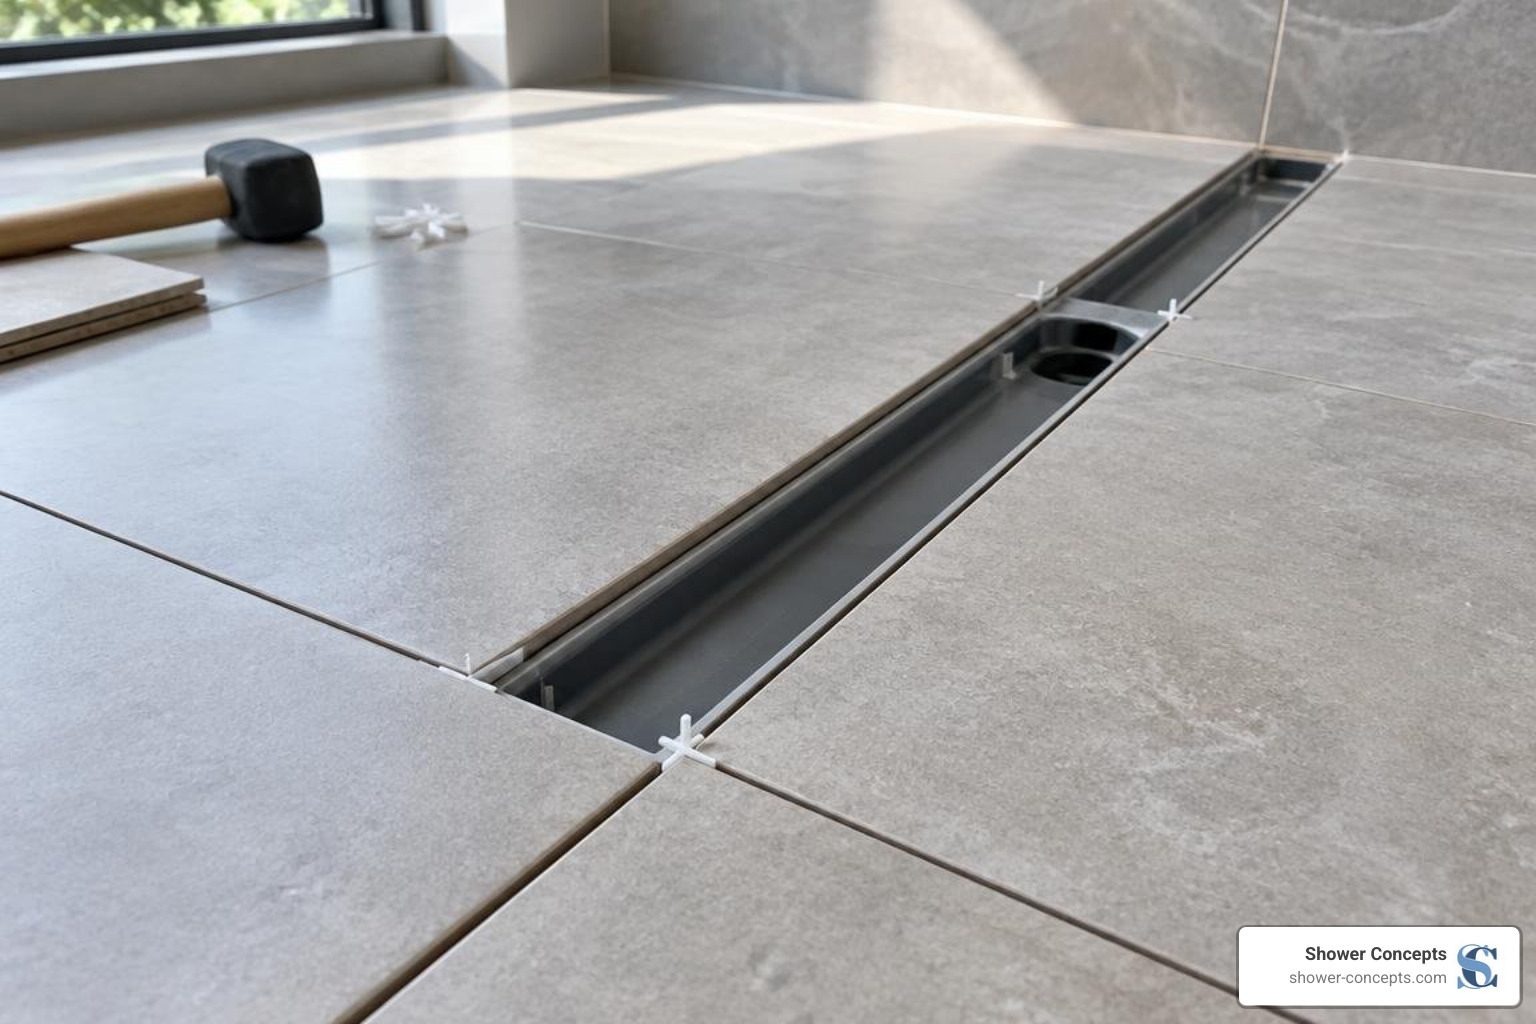
When tiling up to the drain assembly:
Maintain a 1/16-inch perimeter gap: Leave a strict 1/16-inch expansion clearance between the cut edge of the floor tile and the outer wall of the drain channel/strainer.
Never grout the perimeter gap: Do not fill this perimeter relief gap with rigid cement grout or 100% silicone. Leaving it clear allows water along the tile edge to drain freely and lets you easily lift the grate for seasonal maintenance.
Calibrate Grate Elevation: Use the height-adjustment spacers or threaded riser screws on the grate assembly to match your tile thickness. The finished grate must sit flush with or up to 1/16 inch (1 mm) below the surface of the adjacent tile. Setting a grate higher than the tile creates a dam that traps standing water.
Frequently Asked Questions About Linear Drain Installation
What is the minimum slope required for a linear shower drain?
Plumbing codes and TCNA standards mandate a minimum uniform pitch of 1/4 inch per linear foot (approximately a 2% grade) directed toward the linear drain channel. The maximum allowable pitch is 1/2 inch per linear foot (4% grade).
Can I install a linear drain against the wall without moving the plumbing?
Yes. Many linear drains feature off-center waste outlets, and side-outlet adapter kits can route water laterally along the channel. This allows the drain body to span wall-to-wall even if your existing 2-inch subfloor pipe is positioned several inches away from the framing.
How high should waterproofing extend on the shower walls and curb?
Waterproofing membranes must extend continuously up the shower walls at least 3 inches above the finished curb. In barrier-free or curbless showers without a physical curb, run the membrane at least 6 inches up all walls and out past the shower entry to protect the subfloor against splashing.
Conclusion
Installing a linear shower drain eliminates clunky four-way mud beds, allowing you to build sleek, barrier-free showers suited for large-format tile. Success comes down to three essentials: framing a solid subfloor, maintaining a consistent 1/4" per foot slope, and properly sealing your waterproofing membrane to the drain flange.
At Shower Concepts, we help contractors and builders save time on the job. We manufacture custom, pre-sloped virgin foam shower pans and accessories directly in Denver, Colorado, shipping custom-tailored solutions with rapid turnaround.
Planning a barrier-free shower remodel? Pair our precision-milled bases with the Rapid Recess Point Drain Kit and linear pan solutions to simplify your next install. Reach out to our Englewood team today to request a custom quote.
