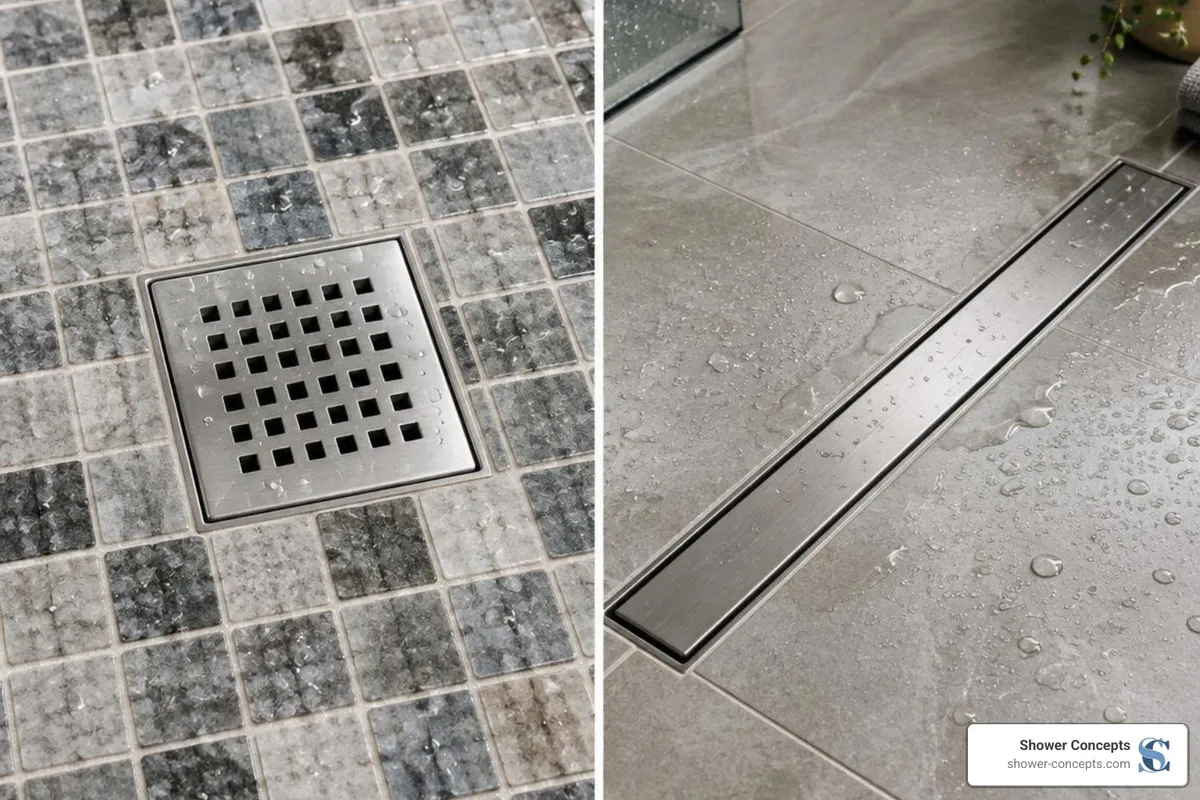
Top Tiled Floor Shower Drains for a Sleek Bathroom Look
Point vs. Linear: Choosing the Best Shower Drain for Tiled Floor Installations
Selecting the proper drain style dictates the slope geometry, installation timeline, and tile selection of your entire shower. The primary choice comes down to point drains versus linear drains.
Point drains collect water at a single central or offset point, necessitating a four-way compound slope (funnel pitch). Linear drains sit flush along a wall or entrance, catching runoff along a single continuous trough and requiring only a single-plane directional slope.
Feature | Point Drains | Linear Drains |
|---|---|---|
Slope Geometry | 4-way compound slope (pyramid/funnel) | Single-plane directional slope (mono-slope) |
Compatible Tile Formats | Mosaics, small formats (typically ≤ 4"×4") | Any format, including large-format porcelain & slabs |
Curbless / Barrier-Free | Challenging; requires complex transitions | Ideal; allows seamless transitions from dry floor |
Installation Complexity | Standard plumbing alignment | High precision required for level spans |
Relative Hardware Cost | Budget-friendly to moderate | Moderate to premium investment |
When planning a shower remodel, choosing between these styles also shapes your substrate preparation. If you prefer to skip traditional hand-packed screeds, pair your chosen drain with a custom shower pan slope kit to establish the pitch required for drainage.
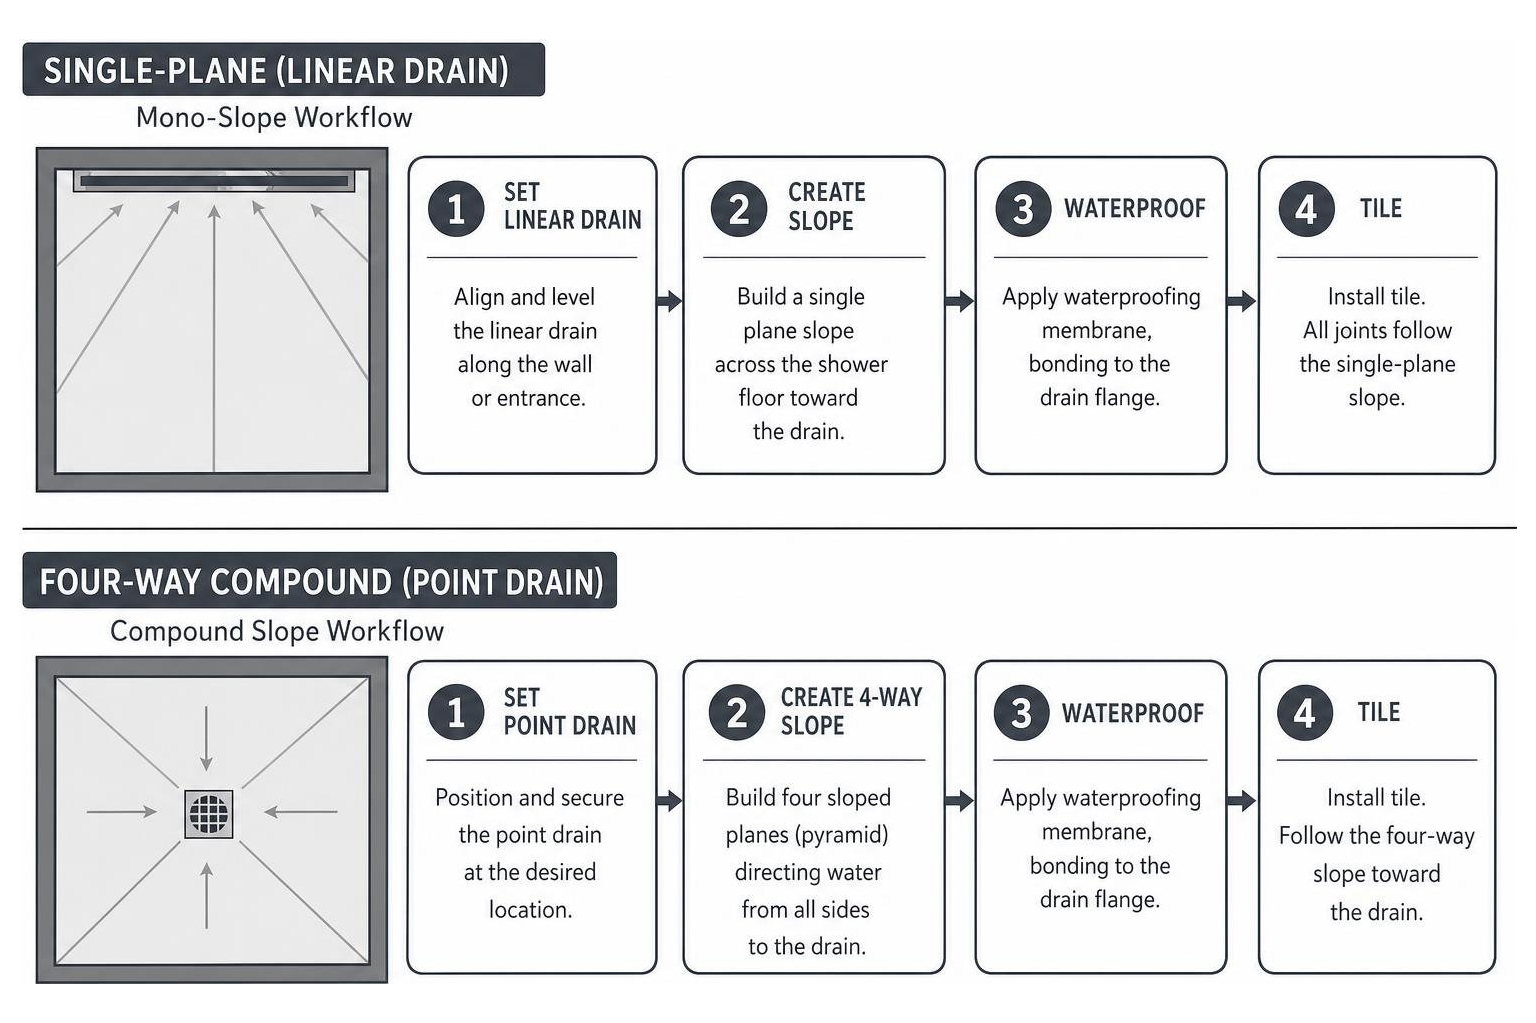
Key Features of a Point Shower Drain for Tiled Floor Projects
Point drains remain an industry standard because of their reliability, compact footprint, and mechanical simplicity. Modern systems have evolved well beyond outdated multi-piece clamping ring assemblies. Contemporary point drains feature an integrated bonding flange made of ABS, PVC, or 304 stainless steel, providing a wide surface area where a topical waterproofing sheet bonds directly to the drain body.
Modern point drains incorporate 2-inch or 3-inch outlets to meet local plumbing code volume requirements. High-end drain grates feature lateral adjustment collars and tilt compensation mechanisms. These allow you to shift the visible grate assembly horizontally or tilt it slightly after the mortar sets, ensuring alignment with your grout joints. Because point drains require a compound slope, they pair well with mosaic tiles that conform to multi-directional contours. For faster installations, many builders set these directly into pre-sloped shower pans ready for tile.
Sizing and Adjusting a Linear Shower Drain for Tiled Floor Layouts
Linear drains offer clean sightlines and practical construction advantages. Because a linear drain only requires a single slope towards a single channel, you can run uninterrupted, large-format porcelain tiles across the entire floor without envelope cuts.
Linear drains span lengths from 20" (50 cm) up to 72" (180 cm) to provide wall-to-wall drainage coverage. When joists or framing create obstacles beneath the subfloor, manufacturers provide both center-outlet and off-set outlet configurations to bypass structural obstructions without requiring extensive structural rework. When engineering the floor system, consult a detailed linear shower drain installation diagram to verify framing clearances, flange elevations, and flow rate capacities before securing the channel body.
Top Tiled Shower Drains: Performance, Specs, and Grate Styles
A sleek shower drain for tiled floor installations balances visual appeal with reliable moisture management and code-compliant plumbing. Grates must withstand foot traffic, resist harsh cleaning agents, and maintain continuous water evacuation.
High-grade 304 stainless steel provides strength, corrosion resistance, and longevity. Anodized aluminum provides modern design profiles, though installers must protect the finish from wet, alkaline cement mortars during installation. For a minimalist aesthetic, tile-in frameless grates allow you to insert the floor tile directly into the drain cover, leaving only a discreet perimeter reveal for water collection. Premium linear drains comply with standards like EN 1253, which mandates a drainage capacity of at least 30 liters per minute and a minimum water seal depth of 50 mm (2 inches) to block sewer gases.
Schluter®-KERDI-DRAIN and KERDI-LINE Bonding Flange Systems
The Schluter®-KERDI-DRAIN (point) and KERDI-LINE (linear) systems integrate bonding flanges directly into topical sheet membrane systems. Instead of allowing water to penetrate a thick mortar bed down to a weeping sub-drain, these systems stop moisture at the tile bond coat using a fleece-laminated flange.
Integrated Bonding Flange: Available in ABS, PVC, and 304 stainless steel with 2" or 3" outlets. Stainless steel flanges can be sealed using KERDI-FIX adhesive for a reliable mechanical bond.
Code Listings: Evaluated under ICC-ES ESR-2467 and listed under cUPC® and CSA® standards.
Grate Options: Available in ten distinct grate finishes, including classic perforated, modern curve designs, and frameless tileable covers.
Adjustability: Point drain assemblies accommodate tile thicknesses from 1/4" (6 mm) to 1-1/4" (32 mm), with lateral and tilt adjustment capabilities.
Linear Versatility: KERDI-LINE channels span from 20" to 72" in 4" increments, fitting standard tile thicknesses from 1/8" to 1".
Easy Drain Modulo Stone Frameless System
The Easy Drain Modulo Stone is engineered for ultra-clean installations with natural stone and large-format porcelain tiles.
Discreet Profile: The frameless design creates an invisible drain line, making the channel appear as a clean shadow gap in the floor.
High Drainage Capacity: Provides a flow capacity exceeding 30 L/min, accommodating multi-head custom showers.
Rotatable Trap: Features a 360-degree rotatable siphon and outlet assembly, simplifying pipe alignment around floor joists and plumbing drops.
Low Installation Depth: Offers low-profile built-in depth configurations with flexible water seals (28 mm, 35 mm, or 50 mm), making it well-suited for low-clearance remodeling projects.
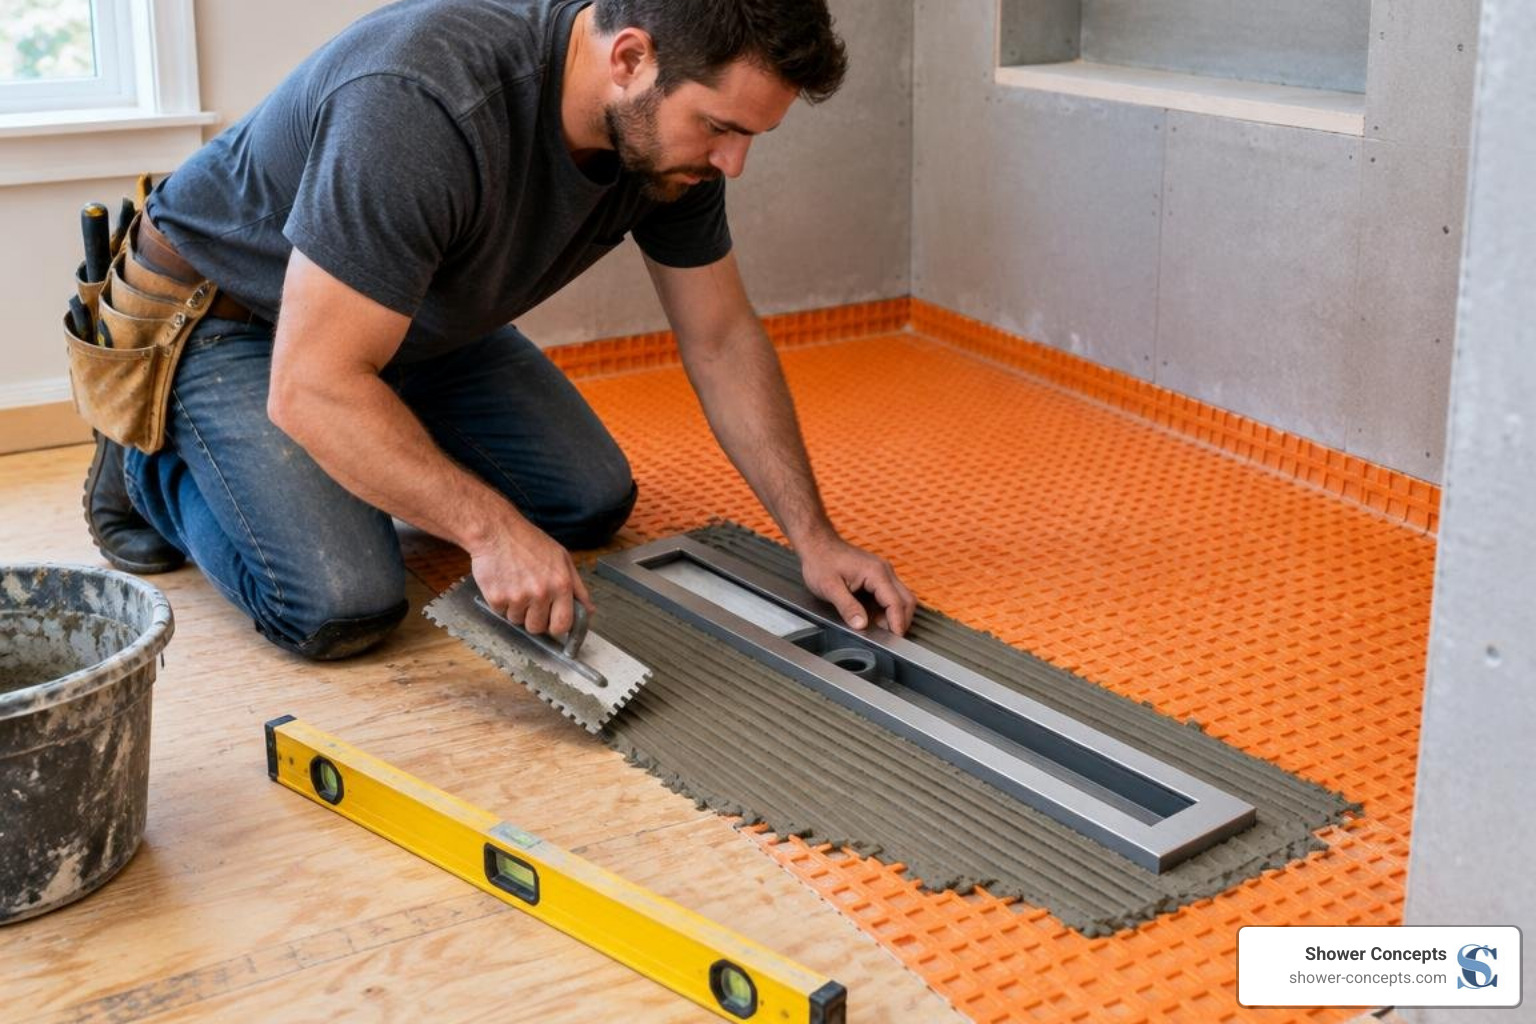
Complete Installation and Maintenance Guide
Installing a drain for a tiled shower requires precise rough-in work, correct substrate preparation, and accurate waterproofing connections.
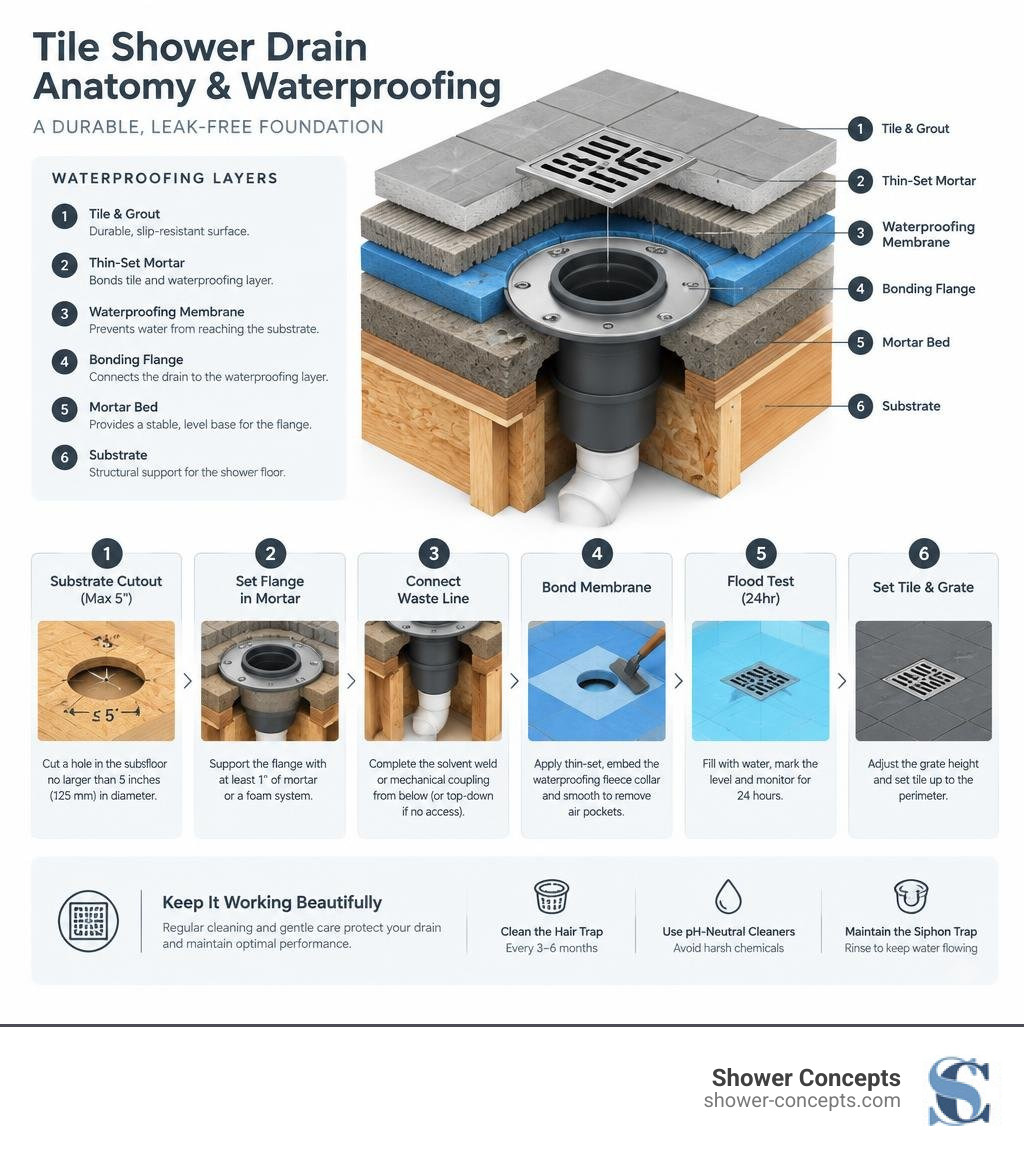
Substrate Preparation: Cut a hole in the subfloor no larger than 5 inches (125 mm) in diameter. An oversized cutout weakens support beneath the bonding flange, which can cause mortar movement and grout cracking.
Plumbing Connection:
Access from below: Set the shower pan and drain body first, then complete the solvent weld or mechanical coupling from the floor below.
No access from below (top-down): Accurately measure and cut your waste pipe to height, dry-fit the drain body, apply solvent cement, and bed the flange assembly into a supporting ring of loose mortar in a single motion.
Substrate Bedding: Ensure the bonding flange is supported by a minimum 1" mortar bed or set into a pre-engineered foam system. If you are using lightweight foam trays, follow the manufacturer's foam shower pan installation guide to prevent point-load deflection. For unusual floor plans or custom curb layouts, consider custom shower pan manufacturing to match your drain location and pitch requirements.
Watertight Bonding and 24-Hour Flood Testing
To seal the drain flange to the shower pan:
Mix an unmodified thin-set mortar to a smooth, spreadable consistency.
Apply the mortar over the bonding flange and surrounding pan using a 1/4" x 3/16" V-notched trowel.
Embed the pre-cut waterproofing fleece collar into the wet mortar, smoothing it with a flat trowel or drywall blade from the center outward to eliminate air pockets.
If using a stainless steel bonding flange, wipe the metal clean with alcohol to remove manufacturing oils before applying thin-set or adhesive sealant.
Allow the thin-set mortar to cure for at least 24 hours. Insert an inflatable mechanical test plug into the 2-inch drain throat below the flange and fill the shower base with water up to the top of the curb (or 2 inches deep for curbless entries). Mark the water line with grease pencil and monitor it for 24 hours. A steady water line confirms your bonded drain assembly is leak-free and ready for tile.
Grate Height Calibration and Ongoing Maintenance
After passing the flood test, set your floor tiles up to the drain perimeter. Thread or slide the grate adjustment collar into the drain throat, adjusting the height until the grate sits flush—or roughly 1/16" below—the adjacent tile surface. This prevents pooling along the tile edges. Modern adjustment collars accommodate tile thicknesses from 1/4" (6 mm) up to 1-1/4" (32 mm).
To maintain water flow and protect surface finishes over time:
Clean the Hair Trap: Remove the decorative grate cover every three to six months to clear accumulated debris from the integrated hair strainer basket.
Protect the Metal Finish: Clean stainless steel and anodized grates using pH-neutral soap and warm water. Avoid muriatic acids, bleach, or abrasive scouring pads, which strip the passive chromium oxide layer from stainless steel and cause surface corrosion.
Maintain the Siphon Trap: For low-profile linear drains with removable siphons, rinse the internal cartridge under clean water to remove soap scum and maintain rated flow capacity.
Frequently Asked Questions About Tile Shower Drains
Can you use a shower drain from one manufacturer with another brand's waterproofing system?
While topical sheet membranes can physically adhere to another brand's fleece-covered bonding flange using appropriate thin-set mortars, mixing manufacturers typically voids system warranties. Manufacturers design, test, and certify their membranes, bonding adhesives, and drain flanges as unified assemblies (such as ICC-ES ESR-2467). To maintain warranty coverage, use compatible components from the same product family.
Can an ABS drain flange be connected to a PVC waste line?
No. Plumbing codes prohibit using standard solvent cement to weld ABS plastic directly to PVC pipe. ABS and PVC expand and contract at different rates, and solvent welding them together creates a brittle joint prone to failure. If your drain flange is ABS and the rough-in pipe is PVC (or vice versa), connect them using a code-approved mechanical transition coupling (no-hub shielded coupling) or use a multi-purpose transition cement where local plumbing codes allow.
What tile thickness can standard bonded shower drains accommodate?
Standard bonded point and linear drains accommodate tile thicknesses ranging from 1/4" (6 mm) for thin ceramic mosaics up to 1-1/4" (32 mm) for thick natural stone slabs. Most point drains utilize a threaded or friction-fit adjustment collar that allows precise vertical fine-tuning, while linear drains use modular spacer shims placed directly beneath the grate frame.
Conclusion
Choosing the right drain for a tiled shower floor balances daily drainage performance with long-term moisture management. Whether you choose the four-way slope of a point drain or the clean lines and large-format versatility of a linear drain, using an integrated bonding flange helps prevent leaks and protects your subfloor.
At Shower Concepts, we manufacture pre-pitched, custom-milled virgin foam shower foundations that simplify plumbing connections and cut down installation time. To speed up your next curbless or low-profile shower project, check out our Rapid Recess Point Drain Kit to build a solid, leak-free, and code-compliant shower floor. If you have questions about matching drain locations to custom shower pans, stop by our Englewood shop or reach out to our team at Shower Concepts in Englewood, CO.
