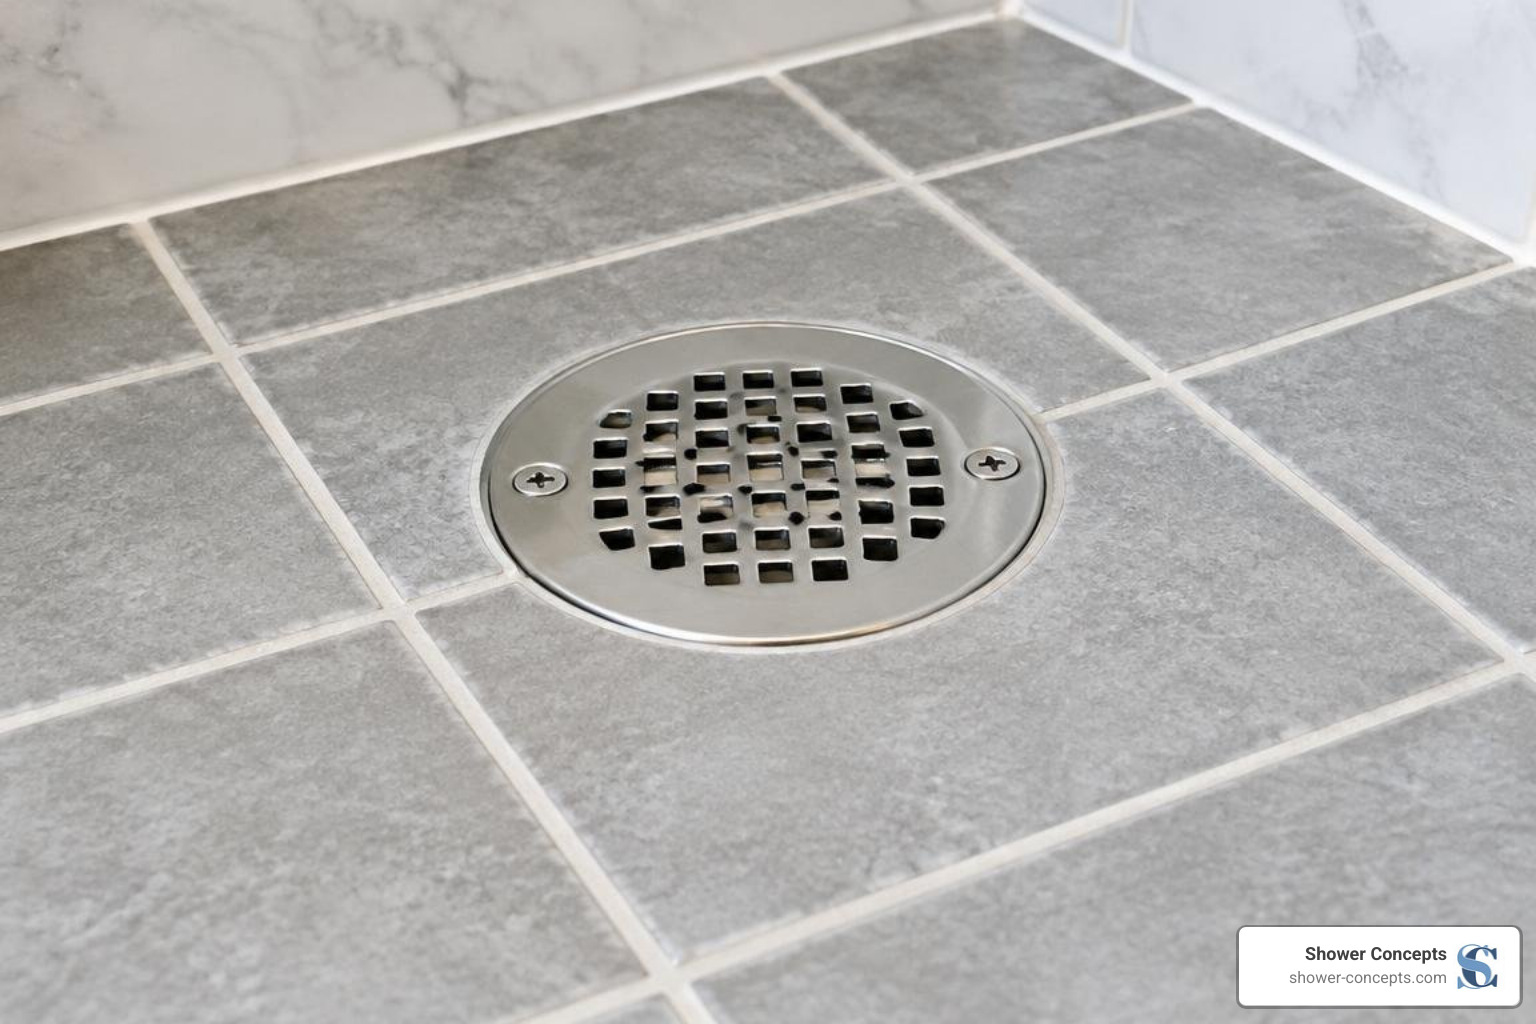
The Complete Guide to Identifying and Removing Bathroom Drains
Types of Shower Drains and How to Remove Them Safely
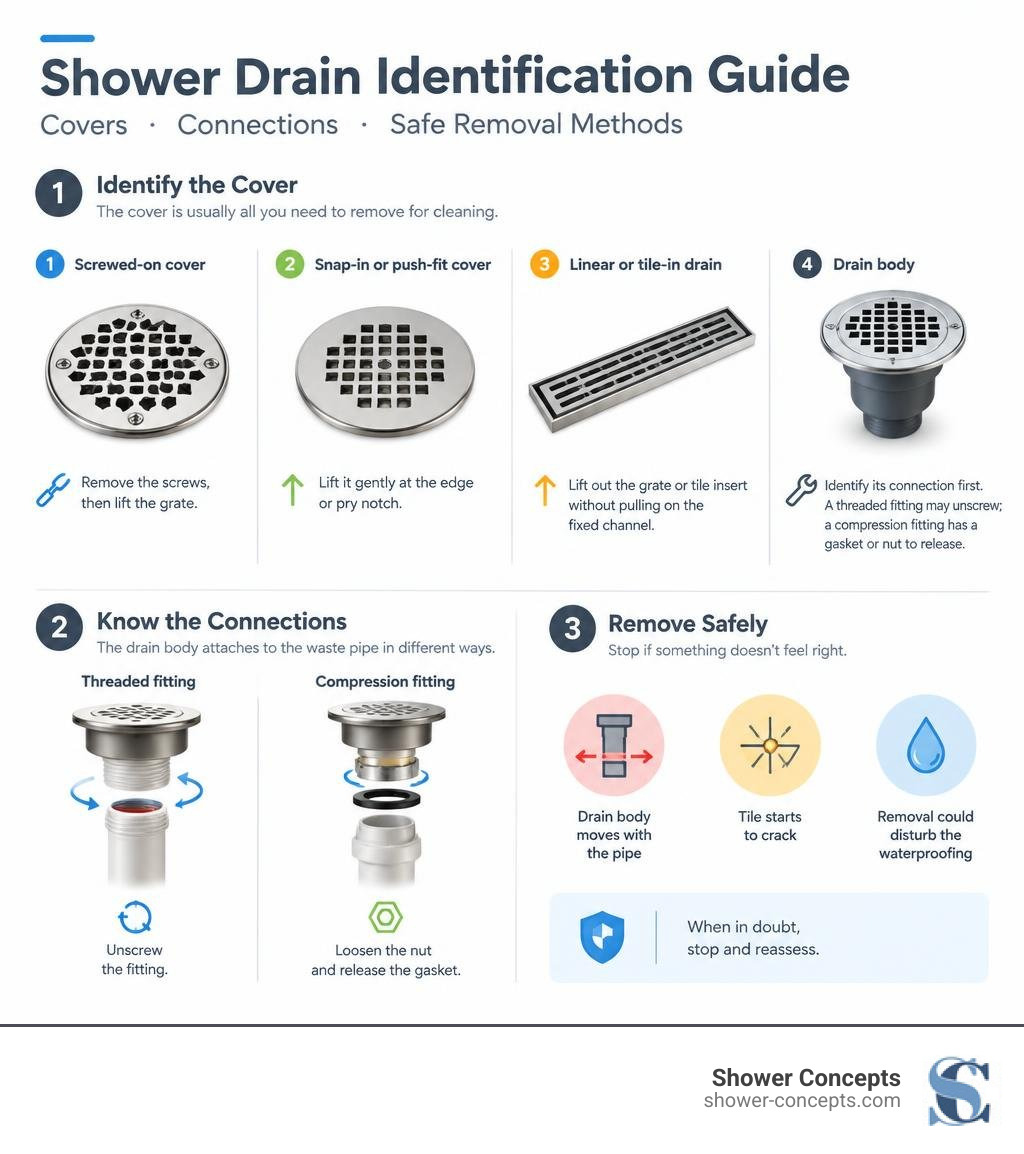
Knowing the types of shower drains and how to remove them starts with one question: Are you removing the cover or the drain body? For cleaning, the cover is usually all you need to remove.
Screwed-on cover: Remove the screws, then lift the grate.
Snap-in or push-fit cover: Lift it gently at its edge or pry notch.
Linear or tile-in drain: Lift out the grate or tile insert without pulling on the fixed channel.
Drain body: Identify its connection first. A threaded fitting may unscrew; a compression fitting has a gasket or nut to release.
Stop if the drain body moves with the pipe, tile starts to crack, or removal could disturb the waterproofing.
I'm David Stewart, an owner and partner at Shower Concepts. My 15-plus years in construction and tile installation shape this guide to types of shower drains and how to remove them while protecting the shower pan.
Common Types of Shower Drains and How to Remove Them
Understanding the physical taxonomy of your shower's drainage assembly protects you from causing structural subfloor damage or tearing a waterproofing liner. Drains differ dramatically by their visible grate design, how they attach to the waste pipe, and how they interface with the surrounding shower floor.
Before picking up a wrench, inspect the visible fasteners, the outer shape, and the inner mechanics to match your fixture against standard residential plumbing configurations.
Drain Type | Connection Method | Primary Visual Cues | Flow Rate Capacity | Removal Difficulty |
|---|---|---|---|---|
Screw-In Point Drain | Threaded flange or screws | Visible perimeter screws, round/square grid | ~5–7 GPM | Beginner |
Snap-In / Push-Fit | Friction clips or rubber gasket | Smooth rim, pry notches, no exposed screws | ~5–7 GPM | Beginner |
Compression Drain | Rubber gasket + compression nut | Central hex nut or internal friction collar | ~5–7 GPM | Intermediate |
Solvent-Weld Drain | Glued PVC/ABS joint | Bonded plastic collar beneath strainer | ~5–7 GPM | Advanced |
Linear Channel Drain | Flanged channel bonded to pan | Long longitudinal grate (16" to 78") | 6–8 GPM | Beginner (grate) / Pro (body) |
Tile-In / Concealed | Flush tray sitting in frame | Recessed tile tray with perimeter slot | 6–8 GPM | Beginner (tray) / Pro (body) |
Tub/Shower Stopper | Threaded pin, rocker arm, or friction | Lift knob, push button, or trip lever | ~5–6 GPM | Beginner |
Threaded and Push-In Types of Shower Drains and How to Remove Them
Threaded and push-in grates represent the most frequent designs found in modern tiled and prefabricated showers.
Screw-in grates use two or more small screws (typically #2 Phillips or flathead) that anchor the strainer directly into the top rim of the drain barrel. Removing them requires a manual screwdriver. Avoid powered drivers, which can strip the soft brass or stainless steel heads.
Push-in and snap-in grates rely on tension prongs or a flexible elastomer ring that sits tightly within the internal pipe throat. These snap into place without exposed hardware. To release them, hook a stiff pick or needle-nose pliers into the outer holes and pull upward evenly.
When you need to extract the underlying drain body on a two-part or three-part assembly, the internal configuration matters. A standard 2-part threaded seal uses a mechanical nut tightened over a rubber gasket, whereas a 3-part AB&A style system utilizes an internal clamping collar that pinches the waterproofing pan liner.
For a durable tiled-shower installation, selecting a reliable shower drain for tiled floor projects ensures mechanical connections remain serviceable for years without degrading the tile assembly.
Compression and Solvent-Weld Assemblies
Drain bodies secure to waste pipes using one of two primary plumbing methods: mechanical compression or chemical solvent-welding.
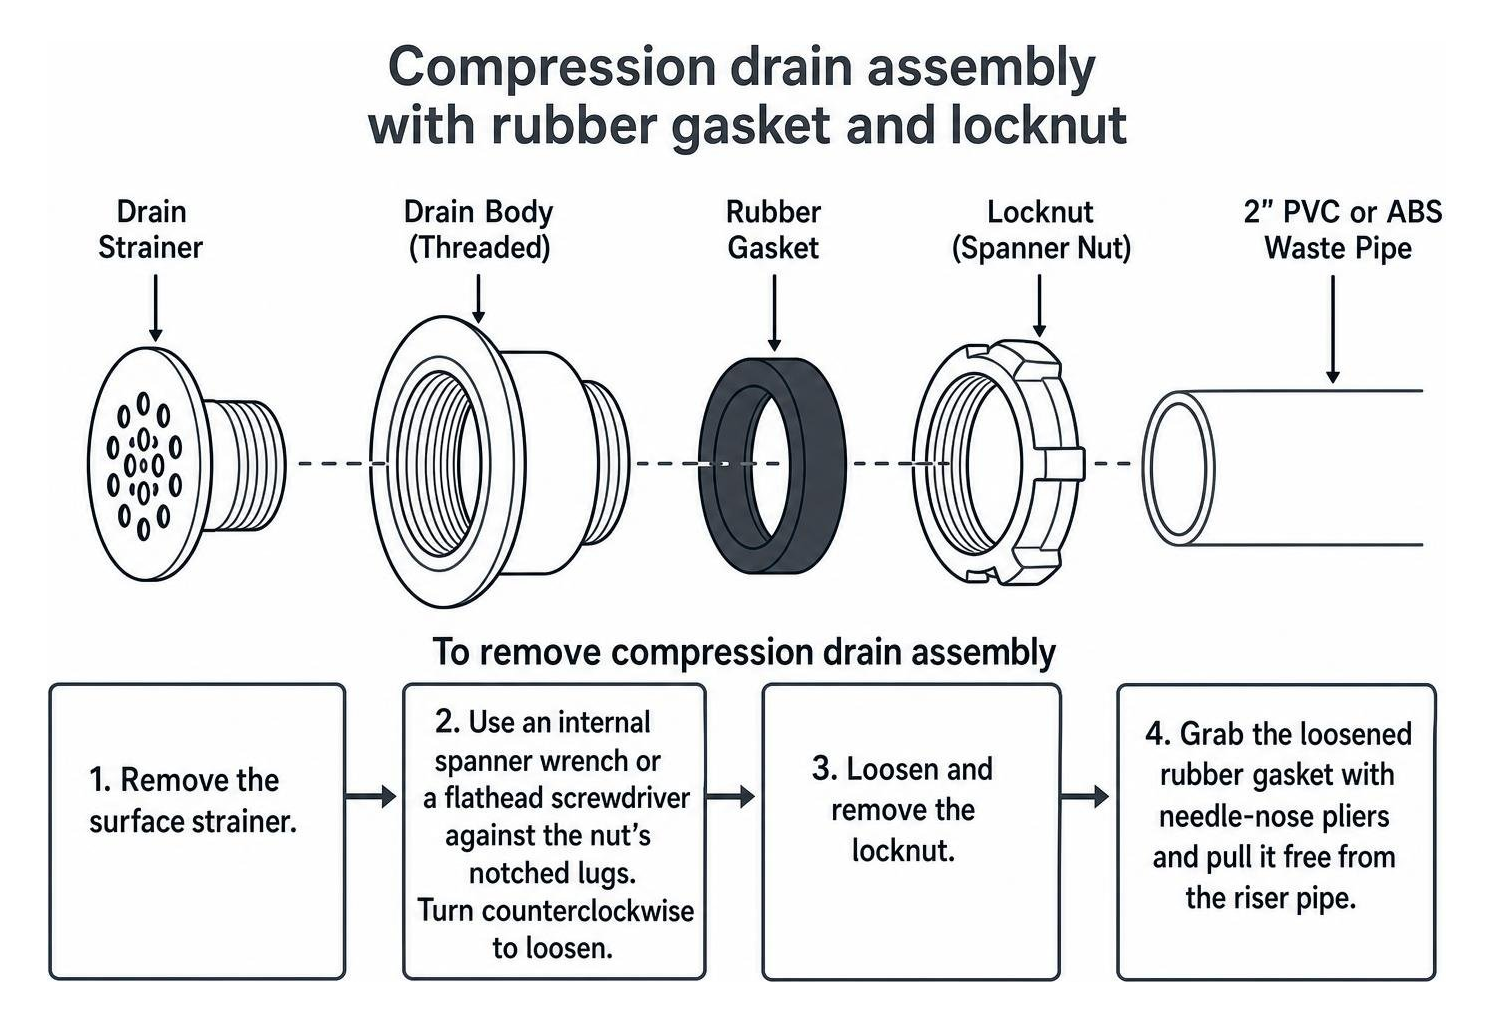
Compression Shower Drains: Widely used in fiberglass, acrylic, and pre-formed foam shower pans, these units allow the drain body to slip over a 2-inch PVC or ABS waste pipe without primer or glue. The seal is formed by a tapered rubber compression gasket compressed between the pipe and the brass or plastic drain housing via an internal threaded spanner nut. To dismantle a compression connection:
Remove the surface strainer.
Use an internal spanner wrench or a flathead screwdriver against the nut's notched lugs to back the threaded collar out counterclockwise.
Grab the loosened rubber gasket with needle-nose pliers and pull it free from the riser pipe.
Solvent-Welded Assemblies: In many site-built mortar bases, the drain body is glued directly onto the waste riser with PVC/ABS solvent cement. Once cured, this joint is chemically fused. You cannot simply unscrew a solvent-welded body. Removing it requires cutting the pipe from underneath the subfloor or using an internal pipe cutter inside the throat.
If you are updating a manufactured structure, follow our dedicated tips on how to remove shower drain cover in mobile home configurations, where plumbing clearances can be exceptionally tight.
Linear and Tile-In Types of Shower Drains and How to Remove Them
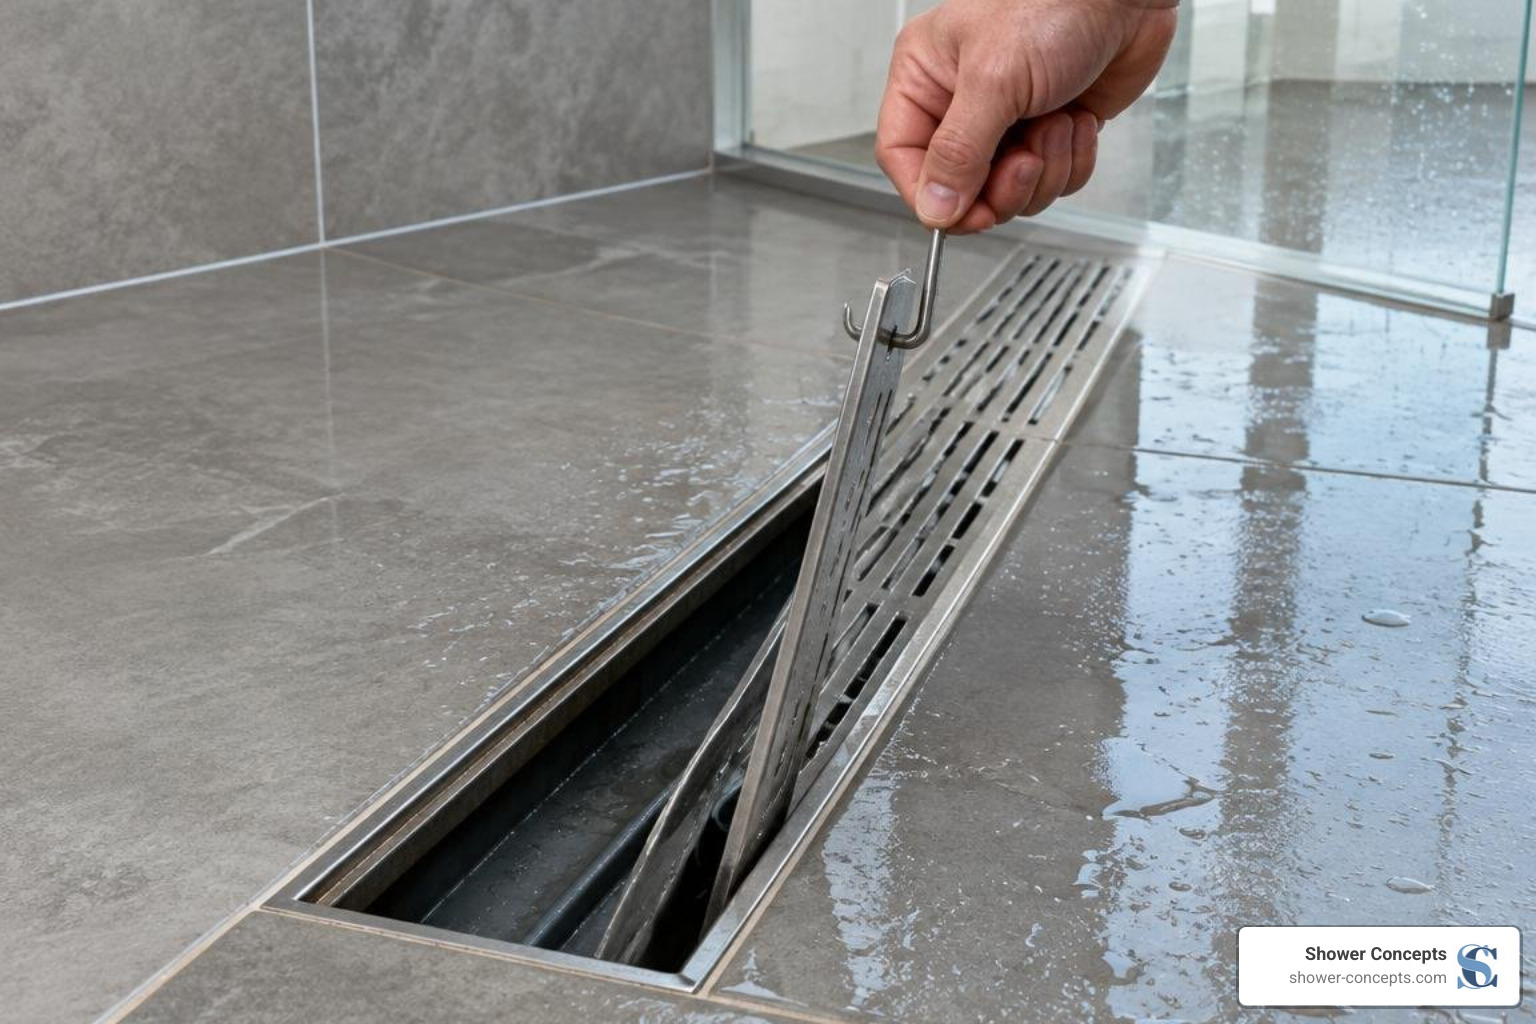
Linear drains and tile-insert assemblies provide a clean aesthetic and support large-format tile by allowing a single-plane slope across the shower pan. These systems deliver a high gravity-flow rate of 6–8 GPM (gallons per minute).
To remove the visible channel or tile insert:
Locate the lifting key: Linear systems come with small, hook-shaped lifting keys. Insert the hooks into the grate slots at both ends.
Lift vertically: Pull straight up with smooth, balanced pressure. If you lack the original key, an improvised bent wire coat hanger works equally well.
Extract the debris basket: Once the grate or tile tray is lifted out, remove the internal stainless steel hair basket. Rinse away accumulated hair and soap scum.
Avoid forcing the trough: The long outer channel (available in lengths such as 16, 24, 28, 36, 48, 60, and 78 inches) is fully bonded to the shower pan and waterproof membrane. Never attempt to pry or unscrew the perimeter metal channel unless you are conducting a complete tear-out and subfloor remodel.
For design tips on integrating low-profile drainage, explore our overview of the hidden shower drain design. When installing single-slope systems, pairing a linear drain shower pan with a clear linear shower drain installation diagram ensures water moves directly into the waste channel without pooling against the wall.
Shower and Tub Stopper Mechanisms
If your shower is combined with a bathtub enclosure, removing the drain involves addressing the mechanical stopper rather than just a flat grate.
Lift-and-Turn: Turn the upper knob to the open position, inspect the brass shaft underneath for a small set screw, loosen it with a flathead screwdriver or Allen key, and unscrew the entire assembly counterclockwise.
Push-Pull: Hold the base post securely with pliers (wrapped in a cloth to protect the finish) while unthreading the top knob counterclockwise. Lift out the central brass bolt.
Toe-Touch: Push down to open the stopper, unscrew the wide decorative cap by hand or with a rubber friction pad, then use a screwdriver to remove the exposed mounting shaft.
Trip-Lever and Pop-Up Assemblies: These feature an overflow faceplate on the tub wall. Unscrew the two faceplate screws and gently draw the entire linkage rod and brass plunger (or rocker arm) out through the overflow opening.
Step-by-Step Drain Removal Techniques and Required Tools
Having the right tools prevents stripped fasteners, scratched finishes, and cracked tiles.

The Mobile Maintenance Kit
Screwdrivers: #2 Phillips, 1/4-inch flathead, precision terminal driver.
Pliers: Needle-nose pliers, 10-inch adjustable channel locks.
Specialty Plumbing Tools: Drain key (internal expanding wrench), tub drain extractor (cam-style tool for crossbarless drains), spanner wrench.
Safety & Support: Penetrating oil, razor utility knife, heavy rubber gloves, 300+ lumen flashlight, shop rags.
For standard specifications on plumbing maintenance tools, refer to practical field guides like Building Maintenance & Construction: Tools and Maintenance.
Removing Grates, Covers, and Strainers
Protect the Work Area: Lay a soft microfiber towel across the shower base to prevent dropped tools from chipping the acrylic or tile.
Loosen Fasteners: Spray stubborn screw heads with penetrating oil if they show signs of mineral binding. Seat your screwdriver firmly into the screw head and turn counterclockwise.
Pry the Grate: For snap-fit grates, insert the tip of a flathead screwdriver into the dedicated pry notch. Place a folded shop rag between the screwdriver shaft and the tile edge to act as a fulcrum cushion. Apply gentle, steady upward leverage.
Clear Biofilm and Strainers: Lift the strainer basket. Clear out hair mats and wash the inner barrel with a soft nylon brush and mild detergent.
Extracting the Flange and Drain Body
When replacing a worn assembly, removing the drain flange requires controlled counter-rotation without stressing the pipe below:
Engage the Crossbars: Insert a dedicated dumbbell drain wrench or drain key into the throat, locking the lugs against the bottom crossbars.
Apply Counter-Clockwise Torque: Hold the tool upright and use an adjustable wrench on its hex head to turn the flange counterclockwise.
Handle Missing Crossbars: If the internal crossbars have corroded away, drive a reverse-helix tub drain extractor into the barrel. As you turn it counterclockwise, the biting flutes expand outward against the inside walls of the flange.
Release Lower Seals: If dealing with a 2-part compression system, back out the spanner nut and remove the rubber gasket before attempting to lift the flange. For full step-by-step guidance on mechanical disassembly, check our detailed tutorial on how to remove shower drain flange fittings without cracking the shower base.
Troubleshooting Stuck Drains, Calcification, and Seized Fasteners
Mineral scale (calcium carbonate) and hardened plumbing putty can freeze metal threads in place, turning a quick project into a headache.
The 15-Minute Penetrating Oil Soak: Apply penetrating oil around the threaded perimeter. For light mineral resistance, a 15-minute wait softens the bond. For heavy calcification, allow a 90-minute soak before applying torque.
The Kinetic Vinegar Agitation: For heavy limescale, pour 1/2 cup of baking soda into the drain throat followed by 1 cup of warm white distilled vinegar. The resulting exothermic effervescence lasts 4–5 minutes, mechanically breaking down biofilm and mineral crusts around the upper threads.
Temperature Limits for PVC Pipe: Never pour boiling water directly into your shower drain to loosen seized parts. Standard residential PVC piping is rated to a maximum service temperature of 140°F (60°C). Exceeding this thermal threshold softens plastic pipe joints and can reduce the pressure rating of the pipe wall to 20% of its normal capacity. Use hot tap water (typically 120°F) instead.
The 15-Minute Decision Rule: If a drain cover or flange will not budge after 15 minutes of proper tool use and soaking, stop. Applying excessive torque risks snapping the drain shoe beneath the floor or twisting the PVC riser—turning a simple DIY maintenance job into an invasive subfloor repair.
Repair vs. Replacement: Knowing When to Call a Professional
Knowing when to repair a component versus replacing the entire drain keeps your bathroom watertight and structurally sound.
When to Clean or Repair (DIY)
Slow Drainage from Hair: Routine clogs are located within the top 6–12 inches of the drain throat. A plastic zip-tool or needle-nose pliers can extract hair mats in 5–15 minutes.
Corroded or Discolored Grates: If the drain body is watertight but the finish is pitted, simply replace the surface grate or stopper without disturbing the flange.
Routine Maintenance: Perform a light cleaning every 30 days and inspect visible gaskets every 6–12 months.
When to Replace the Drain Assembly
Cracked Drain Body: Visible splits in the brass or PVC housing will leak water into the subfloor framing during every shower.
Stripped or Corroded Threads: If the flange threads are stripped and can no longer compress the rubber gasket tightly against the shower pan, replace the unit.
Gasket Dry-Rot: Brittle, crumbling rubber seals beneath the shower base require complete disassembly and resealing.
When to Call a Licensed Plumber
The Drain Body Spins Freely: If turning the top flange causes the underlying drain pipe to twist beneath the floor, the connection has broken loose. Continuing can cause a $5,000+ subfloor and framing restoration.
Water Leaks into Lower Ceilings: Persistent dampness on ceilings below the bathroom indicates that the shower pan liner or drain seal has failed.
No Under-Floor Access: Replacing solvent-welded assemblies on a concrete slab or locked joist space without topside mechanical adapters requires professional diagnostic cameras and specialized cutting tools.
Frequently Asked Questions About Shower Drain Removal
Can I remove a shower drain without removing the shower pan?
Yes. You can easily remove grates, strainers, and most drain stoppers from the topside without disturbing the pan. For full drain bodies, mechanical compression drains (like WingTite systems) and threaded flanges with topside locknuts can be removed directly from above. However, glued solvent-welded assemblies or drains secured with bottom locknuts require access from an underside ceiling panel or crawlspace unless you cut the internal barrel from above with an internal pipe cutter.
What should I do if my shower drain is spinning but not unscrewing?
If the drain flange spins continuously without backing out, the drain shoe or waste pipe below the shower floor is turning along with the tool. Stop immediately. Continuing to rotate the fitting can shear the glued PVC riser or break the P-trap connection. You must stabilize the lower pipe assembly from below (via a basement, crawlspace, or access panel) using pipe clamps or channel locks while an assistant unthreads the flange from above.
How do I remove a shower drain cover that is stuck with grout or sealant?
When a previous installer allows tile grout or 100% silicone sealant to overlap the edge of a snap-in or screw-in cover, do not pry against the bare tile with heavy force. Use a fresh utility knife blade to score around the outer perimeter of the metal grate, cutting through the thin layer of grout or silicone. Once the perimeter seal is broken, place a thick shop rag beneath a flathead screwdriver to protect the tile edge, insert the tip into the pry notch, and lift gently.
Conclusion
Understanding how different shower drain styles are put together makes maintaining and updating your bathroom straightforward. By identifying whether your fixture uses a screw-in cover, friction-fit prongs, a compression gasket, or a linear trough, you can use the right tools and protect your shower floor from accidental scratches or cracked tiles.
Keep your shower draining properly by clearing debris with a plastic zip-tool every 30 days, avoiding caustic chemical cleaners, and never exposing PVC piping to water above 140°F. If you encounter seized fittings or spinning waste pipes that resist standard removal steps, pausing after 15 minutes of effort prevents costly structural leaks beneath the subfloor.
When planning a new curbless or low-profile shower installation, starting with a precision-engineered base ensures seamless drainage. At Shower Concepts in Denver, Colorado (2965 S Tejon St, Englewood, CO 80110), we manufacture custom foam shower pans and high-performance components for tile installers and builders. To streamline your next build with a perfectly integrated, watertight drain connection, explore our rapid recess point drain kit.
