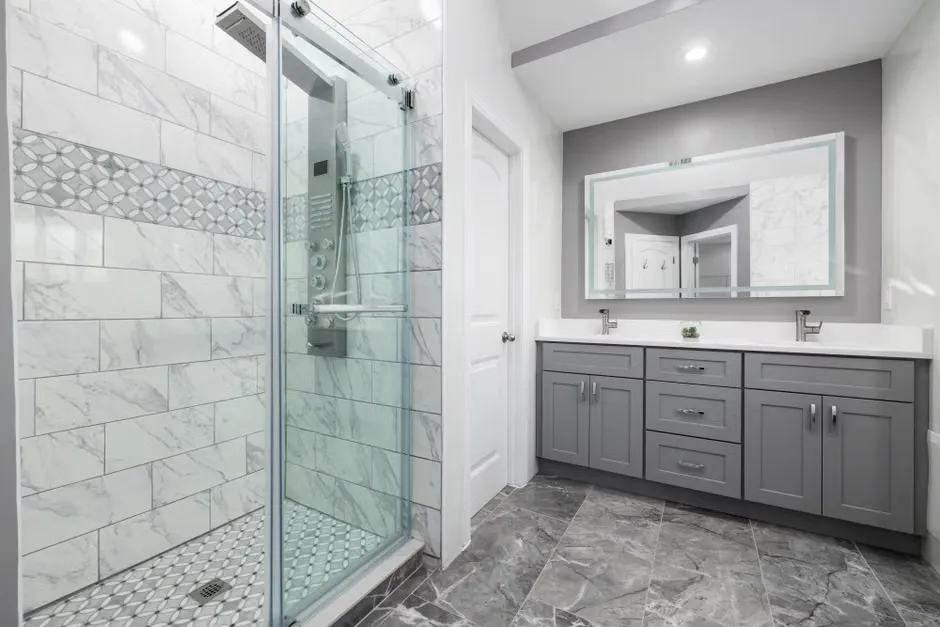
Linear Drain Shower Pan Comparison: Pre-Sloped Foam vs. Custom Mortar
Choosing a Linear Drain Shower Pan: Foam or Mortar?
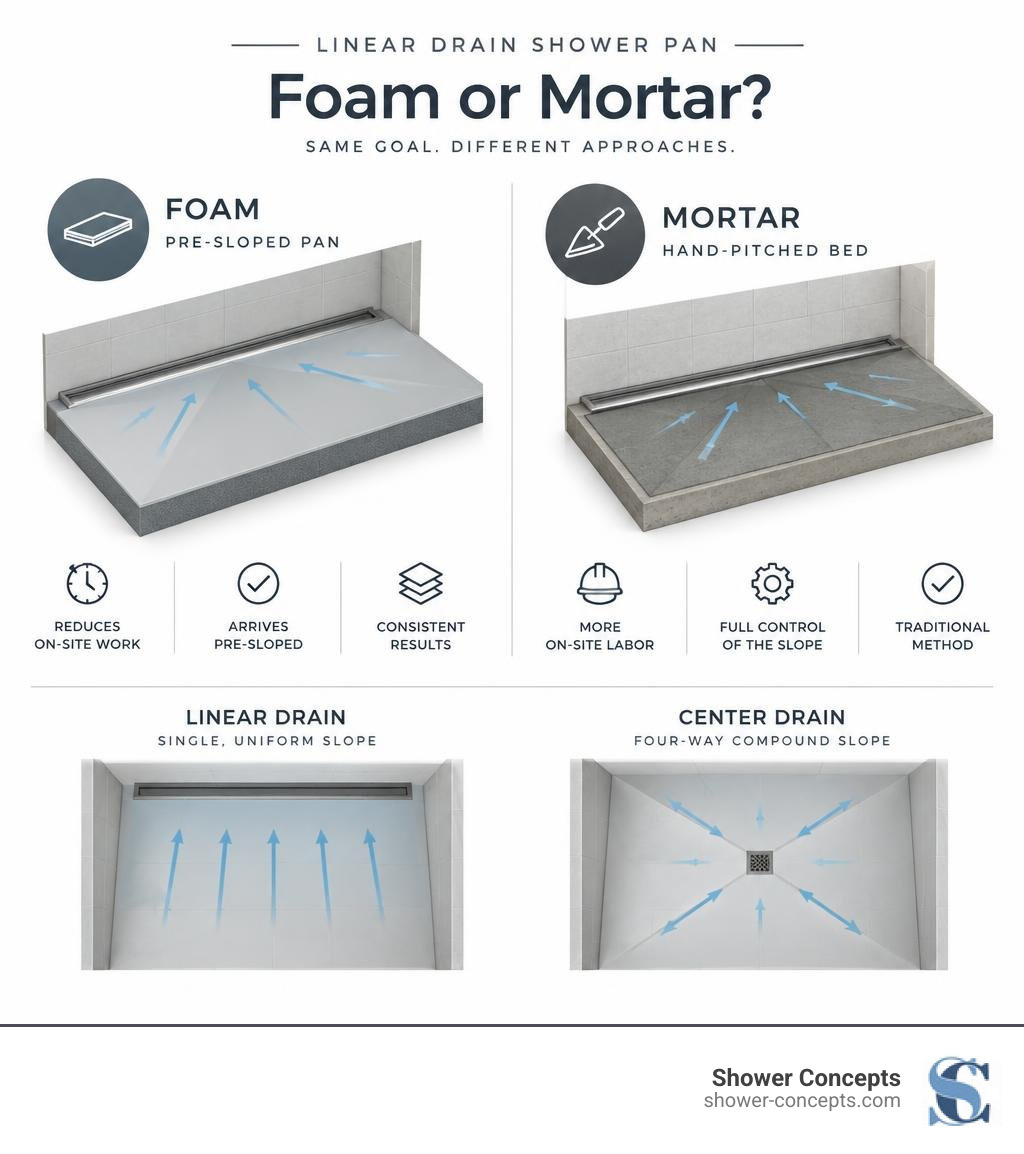
A linear drain shower pan slopes toward a long drain channel, often along one wall. Unlike a center-drain pan, it can use a single-plane slope, making large-format tile easier to lay. For a tile contractor, the main choice is pre-sloped foam or a hand-pitched mortar bed: foam arrives shaped for the planned layout and reduces on-site slope work; mortar lets the installer form the slope on site but takes more labor. Either choice needs a level base, a compatible drain, and careful waterproofing.
I’m David Stewart, an owner and partner at Shower Concepts in Denver. After more than 15 years in construction and tile installation, I help installers plan custom foam bases, including a linear drain shower pan, around real job-site constraints.
Core Differences: Linear Trench Systems vs. Center Point Drains
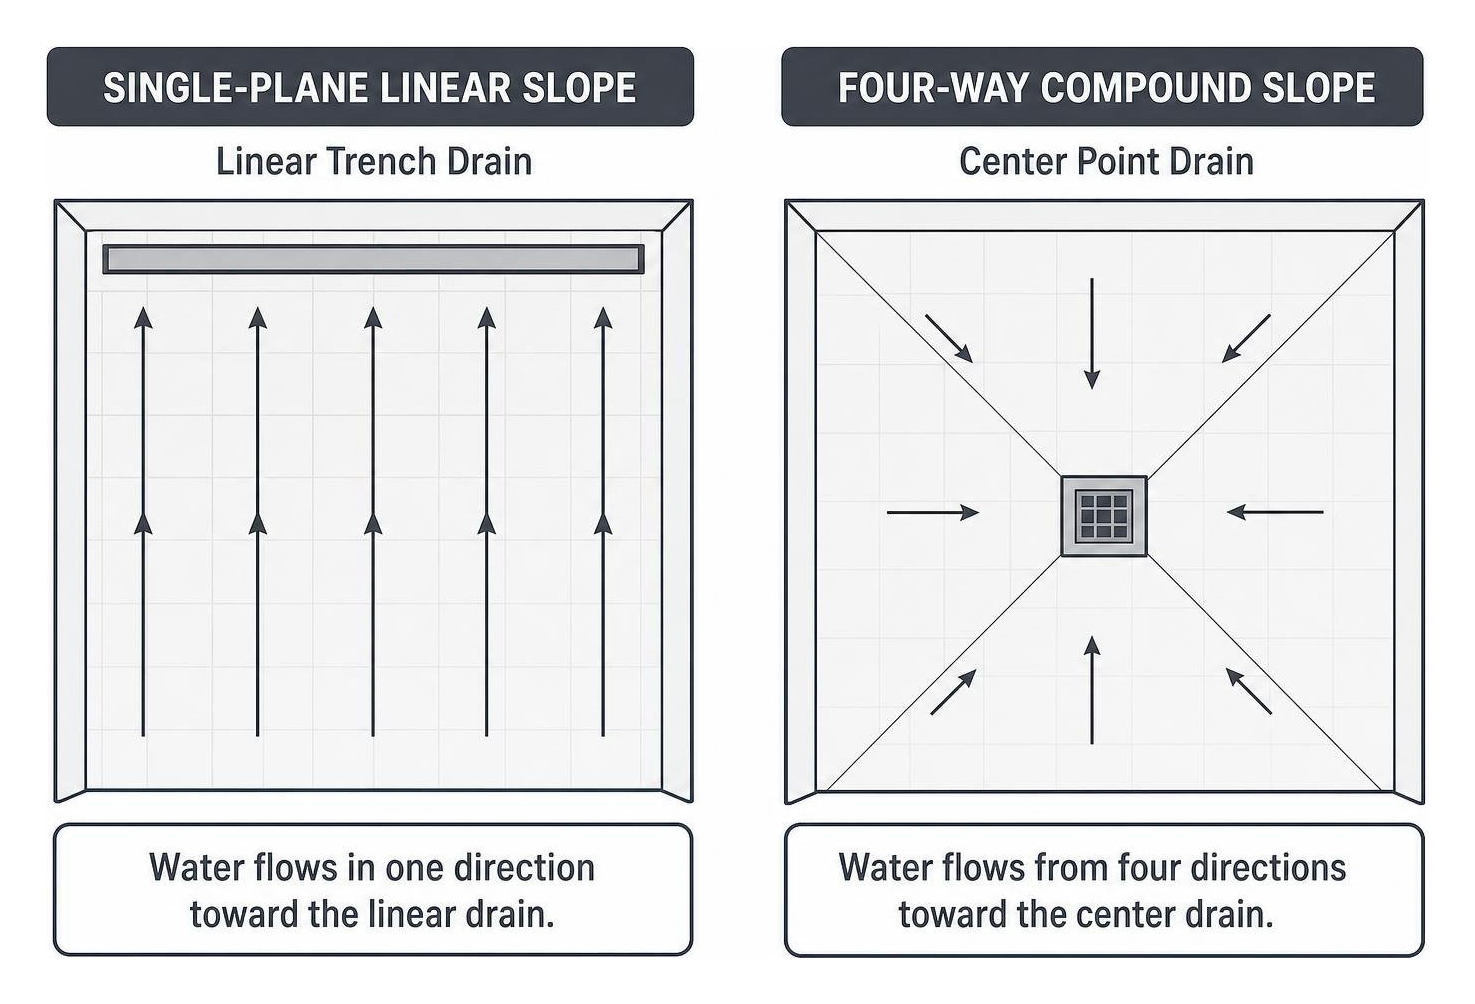
Upgrading from a traditional center drain to a linear drain system fundamentally changes the geometry of a shower floor. Standard point drains sit in the center of the enclosure, requiring a bowl-shaped, four-way compound slope to channel water from every corner toward the middle. While this approach has been standard for decades, it severely restricts your tile choices and introduces multiple compound angles that complicate layout and cutting.
Linear drains (often referred to as trench drains) collect runoff along a narrow, continuous trough positioned against a perimeter wall or across the entryway. This layout transforms the entire drainage mechanic into a single, uniform gradient that carries water away smoothly without pooling.
Single-Direction Slope Dynamics
The primary mechanical advantage of a trench system is the uni-directional pitch. Building codes standardly mandate a slope of 1/4 inch per foot toward the drain to ensure proper water evacuation without ponding. Creating this continuous pitch on a single plane is much simpler than screeding four independent triangles that meet cleanly at a central point.
When water flows across a single plane, it moves evenly across the surface toward the channel. This streamlined slope eliminates low spots where soapy residue and standing water collect, making an efficient shower drain for tiled floor designs easier to execute reliably.
Large-Format Tile Capabilities
Traditional center drains force installers into small mosaic sheets or demanding envelope cuts—diagonal relief slices across large tiles—to accommodate the four-way compound pitch. These cuts interrupt intricate tile patterns and create extra grout lines that collect dirt and soap scum.
Because a trench base slopes in one direction, you can install large-format porcelain slabs, textured natural stone, or wood-look planks directly across the floor without relief cuts. Pairing large slabs with modern linear shower drains gives you uninterrupted grout lines running from the dry bathroom floor directly into the wet area, providing a clean visual field and easier cleaning.
Comparing Pre-Sloped Foam vs. Custom Mortar Bed Bases
When framing out your shower foundation, you must decide between a manufactured, pre-pitched base and a traditional hand-packed mud bed. Both methods yield durable, code-compliant wet rooms, but their workflows, installation speeds, and physical demands differ significantly.
Comparison Metric | Pre-Sloped Custom Foam Pan | Hand-Pitched Mortar Bed |
|---|---|---|
Typical Install Time | 30 to 60 minutes | 4 to 8 hours (plus curing time) |
Weight Load | Extremely light (approx. 5 to 15 lbs) | Heavy (approx. 50 to 80 lbs per sq. ft.) |
Compressive Strength | 140 to 230+ PSI (over 2,000 PSI tiled) | 2,500+ PSI (fully cured concrete) |
Slope Accuracy | Factory-engineered 1/4" per foot | Dependent on hand-screeding skill |
Leak Risk | Low (uniform bonded membrane support) | Moderate (susceptible to weeping and cracks) |
Cure Time Before Tile | Immediate (or as soon as thinset sets) | 24 to 72 hours minimum |
Pre-Sloped Foam Linear Drain Shower Pan Systems
Pre-sloped foam trays use high-density expanded polystyrene (EPS) or extruded polystyrene (XPS) cut with CNC precision to maintain a true 1/4 inch per foot slope. These bases arrive on site ready to be bonded to a level subfloor with modified thinset mortar.
Modern high-density ready to install shower pans feature integrated bonding flanges matched to specific linear drain channels. Because they weigh under 15 pounds, a single installer can easily carry, dry-fit, and install them without stressing framing or back muscles. Following a proper step-by-step foam shower pan installation process allows you to set the pan, bond the waterproofing, and start tiling in a single afternoon.
Traditional Hand-Pitched Mortar Mud Beds
A traditional mud bed requires mixing deck mud—a semi-dry blend of portland cement and sand (typically a 4:1 or 5:1 ratio)—and hand-tamping it over a pre-sloped subfloor, pan liner, and metal lath reinforcement. Hand-screeding a consistent, flat plane across an entire shower floor requires solid technique, especially around an elongated linear trench.
While a custom shower pan slope kit helps establish reference guides, hand-screeding always introduces some risk of minor high spots or birdbaths where water can stall. Hand-packed mortar also requires 24 to 72 hours of curing before you can safely apply topical sheet membranes and install tile.
Material Durability, Compressive Strength, and Waterproofing
A common myth among older trades is that foam cannot support heavy point loads or wheelchair traffic. In reality, bare high-density EPS foam exhibits a compressive strength between 140 and 230 PSI. Once coated with a modified thinset mortar, reinforced with a sheet membrane, and tiled, the assembly reaches a compressive strength exceeding 2,000 PSI—easily handling heavy residential and commercial loads.
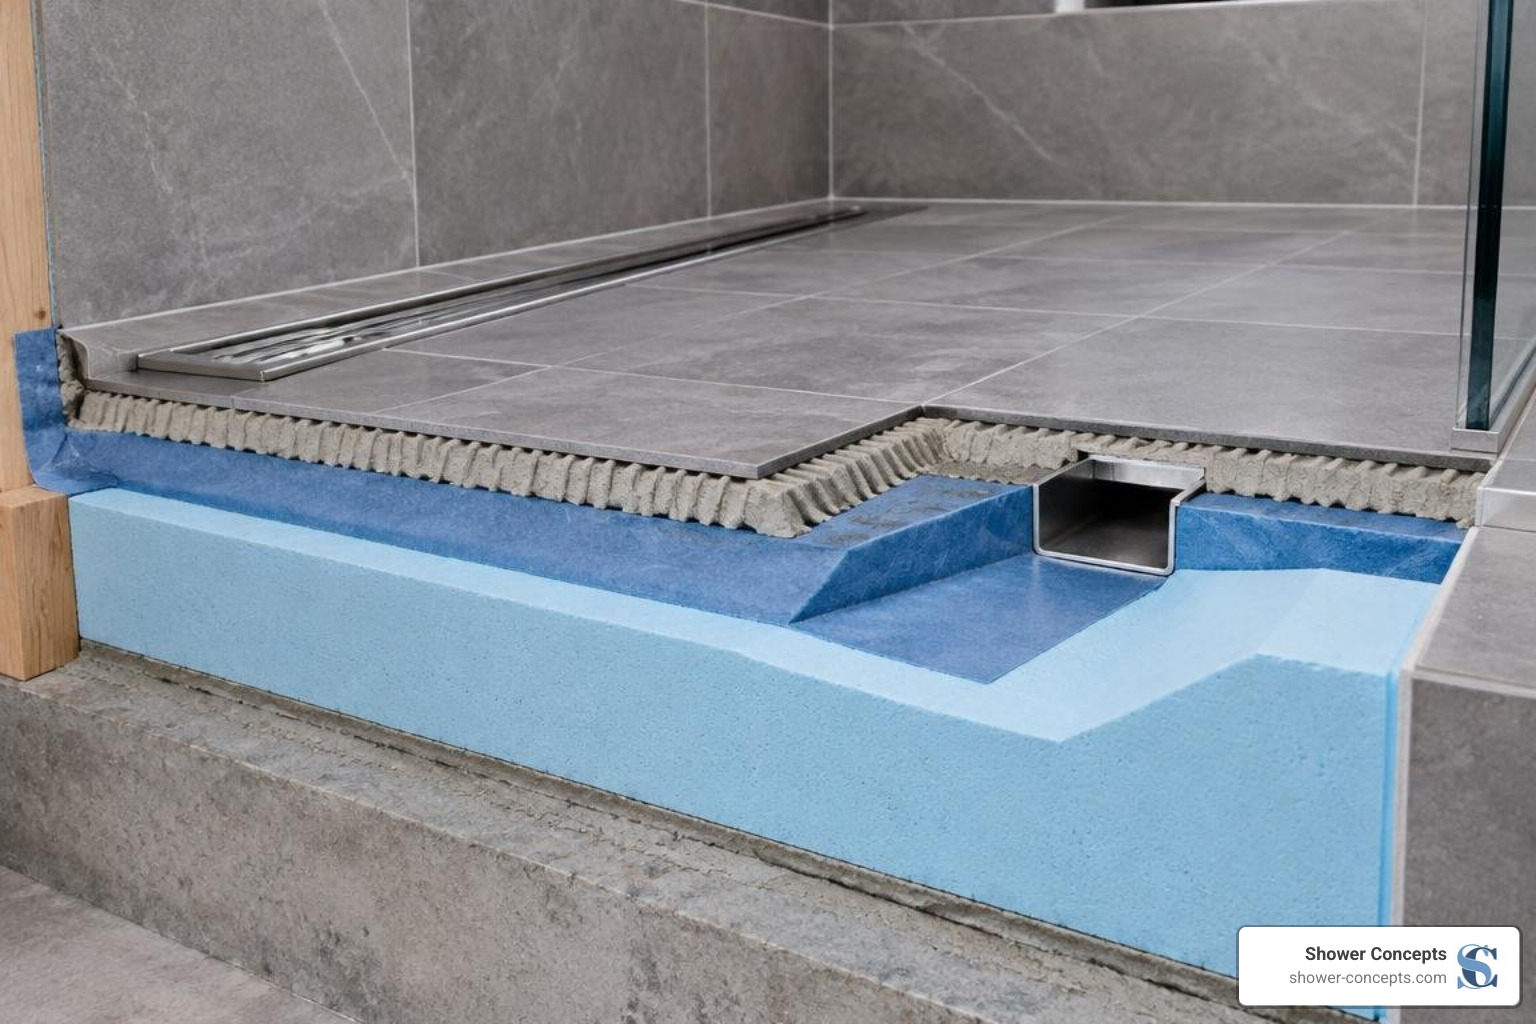
Bonded topical sheet membranes and liquid-applied waterproofing form an unbroken seal over the pan and up the framing walls, stopping moisture before it ever touches the substrate. In contrast, traditional clamped-liner mud beds allow moisture to saturate the dry-pack bed before escaping through weep holes, which can lead to slow dampness, efflorescence, and unpleasant odors over time.
Key Benefits of Choosing a Linear Drain Shower Pan
Beyond modern visual appeal, linear drain bases provide functional, structural, and accessibility advantages over traditional point-drain basins.
Accessibility and Curbless Roll-In Thresholds
One of the strongest arguments for choosing a linear pan is the ability to build zero-threshold, curbless entries. Standard point drains make curbless transitions tricky because their four-way compound pitch can cause water to splash or roll toward the bathroom floor unless the entire subfloor is deeply recessed.
With a custom curbless shower pan, the single-plane slope directs water straight back toward the rear wall or across an entry trench. This creates an accessible, ADA-compliant roll-in shower without tripping hazards. These setups meet ANSI Z124.1.2 standards and provide smooth, safe access for aging-in-place homeowners, wheelchair users, and walk-in wet rooms.
Aesthetic Integration and Grate Design Options
Linear drains offer versatile cover options that complement modern plumbing fixtures. You can select:
Tile-In Inserts: A shallow tray that holds a cut piece of your floor tile, leaving only a slim, discreet perimeter gap for water to drain into a seamless hidden shower drain.
Brushed Stainless Steel: A classic, durable cover with clean linear or geometric perforations.
Matte Black & Architectural Finishes: Modern coatings matched to contemporary faucets, shower heads, and glass hardware.
Running the drain wall-to-wall creates a clean geometric reveal that frames your tile work neatly.
Installation, Sizing, and Waterproofing Best Practices
A dependable shower pan installation starts with careful subfloor prep and precise drain positioning.
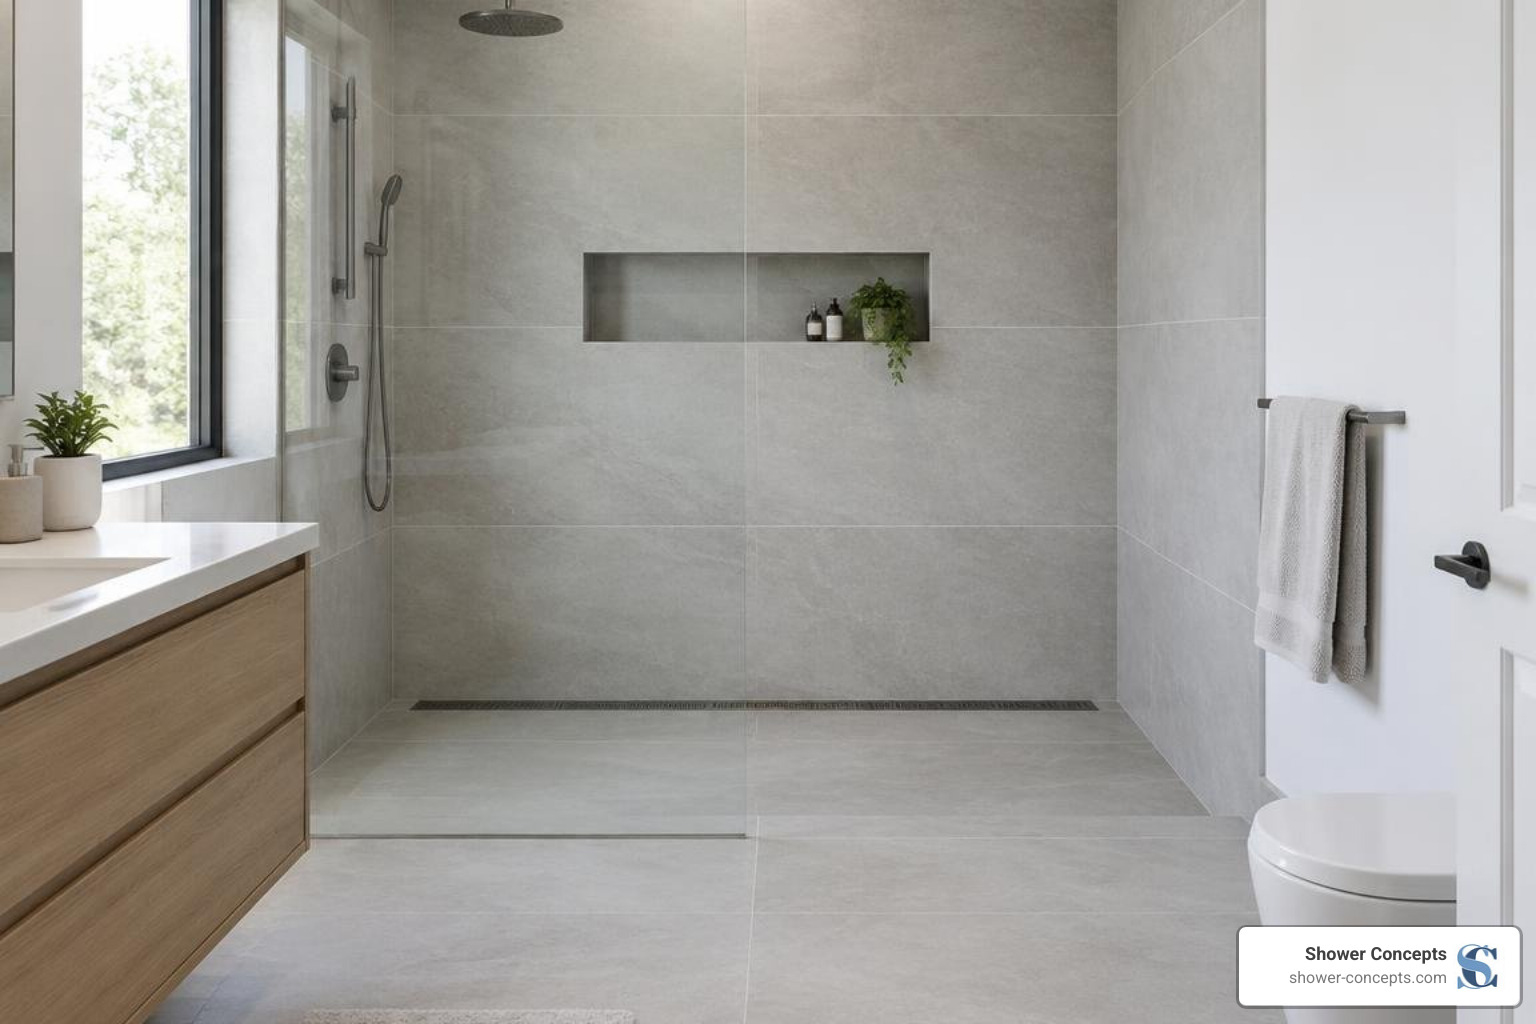
Sizing and Drain Placement for a Linear Drain Shower Pan
Linear drains are most commonly placed in two configurations:
Against the Back or Side Wall: The pan slopes continuously away from the entry toward the wall. This is the most reliable, forgiving layout for curbless bathrooms because gravity directs water away from the bathroom floor.
Across the Threshold (Shower Entry): The pan slopes from the back wall forward toward the entry trench. While this layout can look clean, you must size and install the drain carefully to prevent water from washing past the grate into the dry room. Reviewing common drain threshold placement mistakes before framing will help you avoid costly site errors.
Reviewing a detailed linear shower drain installation diagram helps ensure your drain channel, subfloor framing, and wall backer boards align correctly. For unusual dimensions or out-of-square framing, high-density foam pans can easily be trimmed or customized on site for an exact fit.
Waterproofing Membranes and Flow Rate Calculations
Proper plumbing sizing is just as critical as your slope. A standard residential 2-inch drain outlet handles approximately 9 gallons per minute (GPM) at a 1/2-inch water head. If you are installing high-flow multi-head body sprays or a high-capacity rain head, consider upgrading to a 3-inch waste line (capable of handling up to 21 GPM) or installing dual outlets along the channel. Standard indoor linear drains generally perform best with an outlet placed at least every 60 inches along the trough.
When using high-density foam shower pans ready for tile, ensure the drain's integrated bonding flange integrates cleanly with your chosen waterproofing system. Wrapping the perimeter seams with waterproof sealing bands and performing a 24-hour flood test before setting tile ensures your shower will remain leak-free for decades.
Frequently Asked Questions About Linear Drain Shower Bases
Can I install a linear drain base in an ADA-compliant curbless shower?
Yes. Linear drain pans are well-suited for ADA-compliant, zero-threshold showers. To meet ADA guidelines, roll-in showers must provide a minimum clear inside floor dimension of 60 inches wide by 32 inches deep. Any transition bevel at the threshold must not exceed 1/2 inch (with a maximum 1:2 vertical-to-horizontal bevel profile for thresholds between 1/4 inch and 1/2 inch). A single-direction slope creates a level, barrier-free entry that accommodates wheelchairs safely without compromising drainage.
How do I clean and maintain a trench drain channel and hair trap?
Linear drains are straightforward to clean if maintained regularly:
Use the included lift-out key to lift the decorative grate or tile-in cover.
Remove the internal stainless steel hair basket or debris trap.
Empty trapped hair into the trash and rinse the basket clean under a faucet.
Wipe down the stainless steel channel trough using warm water, mild dish soap, and a soft microfiber cloth. Avoid harsh chlorines, wire brushes, or abrasive pads that can scratch the protective stainless steel passivated layer.
Drop the hair trap back into place and set the top grate back into its channel.
What is the typical cost difference between foam pans and mud beds?
While raw dry-pack mortar and PVC liners look cheaper at first glance ($75 to $150 in raw materials), they require 4 to 8 hours of labor from a skilled tile setter, plus a return trip once cured. Pre-sloped foam kits cost more upfront ($400 to $1,100 depending on dimensions, custom cuts, and included drain hardware), but they cut site labor down to under an hour. When factoring in reduced labor hours, built-in slope precision, and lower warranty callback risks, pre-sloped foam pans generally deliver a better overall return on investment for contractors and homeowners alike.
Conclusion
Both pre-sloped foam pans and custom mud beds are capable of supporting a dependable linear drain shower floor. However, high-density pre-sloped foam bases have become the industry favorite for a simple reason: they eliminate manual screeding errors, dramatically shorten install times, and provide reliable, waterproof foundations for high-end large-format tile designs.
At Shower Concepts, we manufacture custom-engineered foam shower bases made to order with rapid turnaround, ensuring your pans arrive ready to set and matched to your exact job-site dimensions. If you are framing an open-concept curbless shower, pairing your custom foam base with a Rapid Recess subfloor lowering kit simplifies joist modifications and helps you build smooth zero-threshold transitions without hassle.
