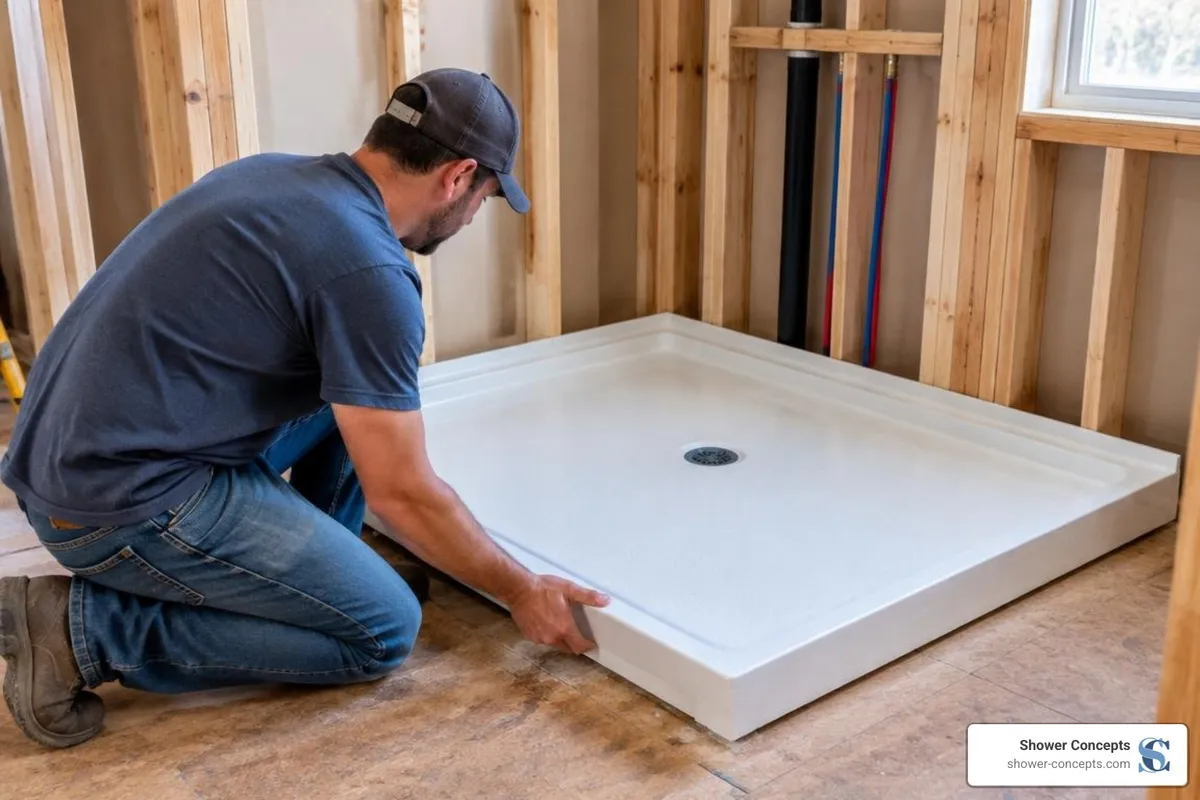
How to Install a Shower Pan in 7 Simple Steps
How to Install a Tile-Ready Shower Pan
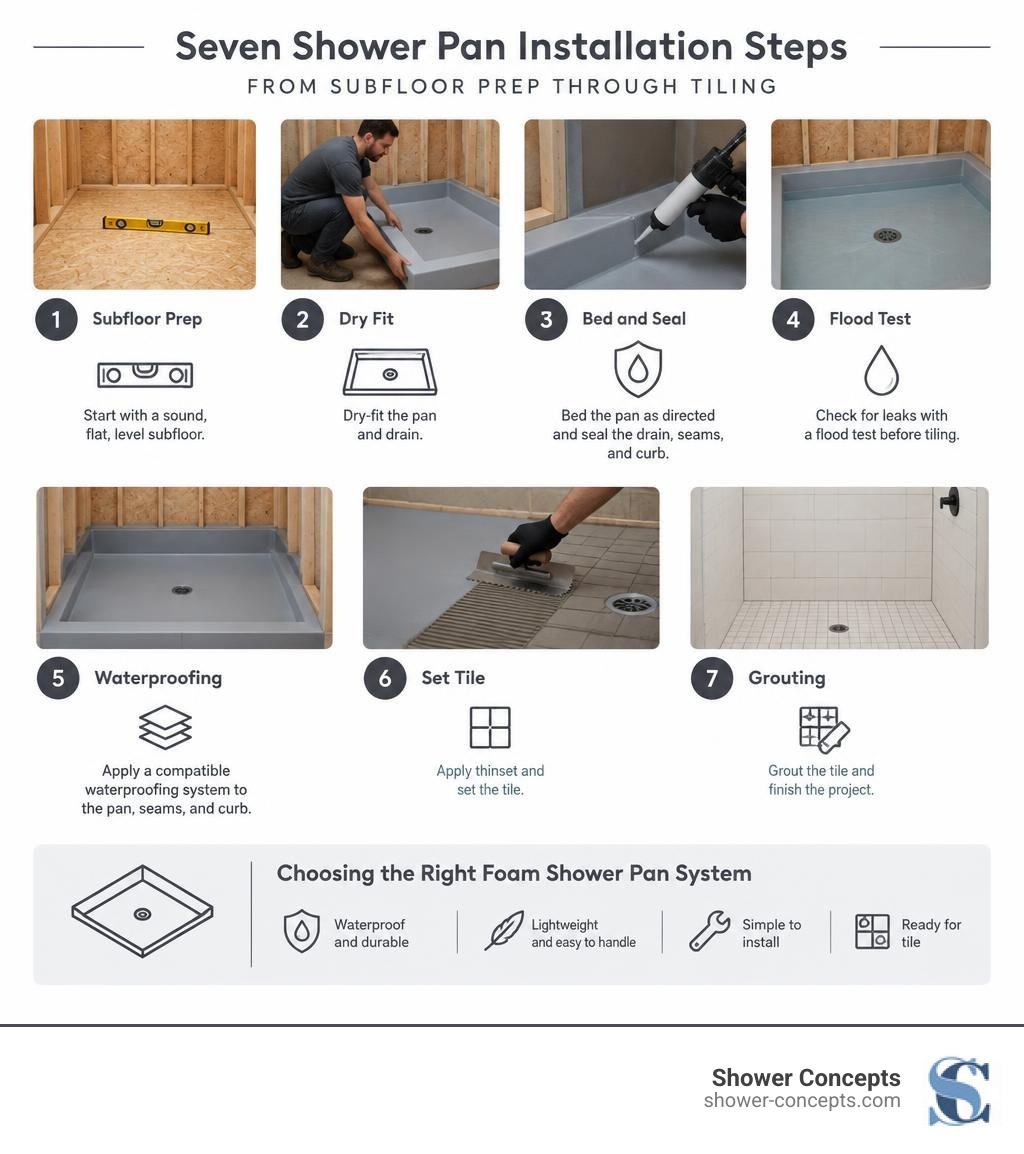
To install a tile-ready foam shower pan, start with a sound, flat, level subfloor. Dry-fit the pan and drain, bed the pan as its manufacturer directs, and seal the drain, seams, and curb with a compatible waterproofing system. Flood-test the assembly before tiling. Throughout the job, check that the floor slopes about 1/4 inch per foot toward the drain.
I'm David Stewart, an owner and partner at Shower Concepts in Denver, with over 15 years of experience in construction and tile installation. That work shapes this guide for any tile installer for a shower pan and the seven steps below.
The article editor does not render LaTeX. Do not write LaTeX commands or math delimiters in article copy. Explain calculations in plain language, or use an ordinary-text formula when useful, such as watts = volts × amps. Write units as readable text, such as ft³/hour or gallons/kWh. When asked to remove formulas or confusing mathematical notation, replace them with prose; do not substitute different equations or hide the notation in code.
Choosing the Right Foam Shower Pan System
For decades, building a shower base meant shoveling hundreds of pounds of sand and Portland cement into a bathroom, hand-troweling a pre-slope, rolling out a rubber pan liner, and adding another heavy mud bed on top. While deck mud costs around $6 a bag, the labor required to pack, pitch, and cure a traditional 3-foot by 5-foot shower floor takes days. Even worse, the most common failure in tile-lined showers—beyond outright catastrophic leaking—is moisture accumulating between the porous mortar bed and the clamping membrane, creating a breeding ground for foul odors and mold.
Modern high-density expanded polystyrene (EPS) systems have completely transformed bathroom construction. Today’s top-tier shower pans ready for tile provide structural load-bearing performance engineered to exceed Tile Council of North America (TCNA) guidelines while weighing a fraction of concrete.
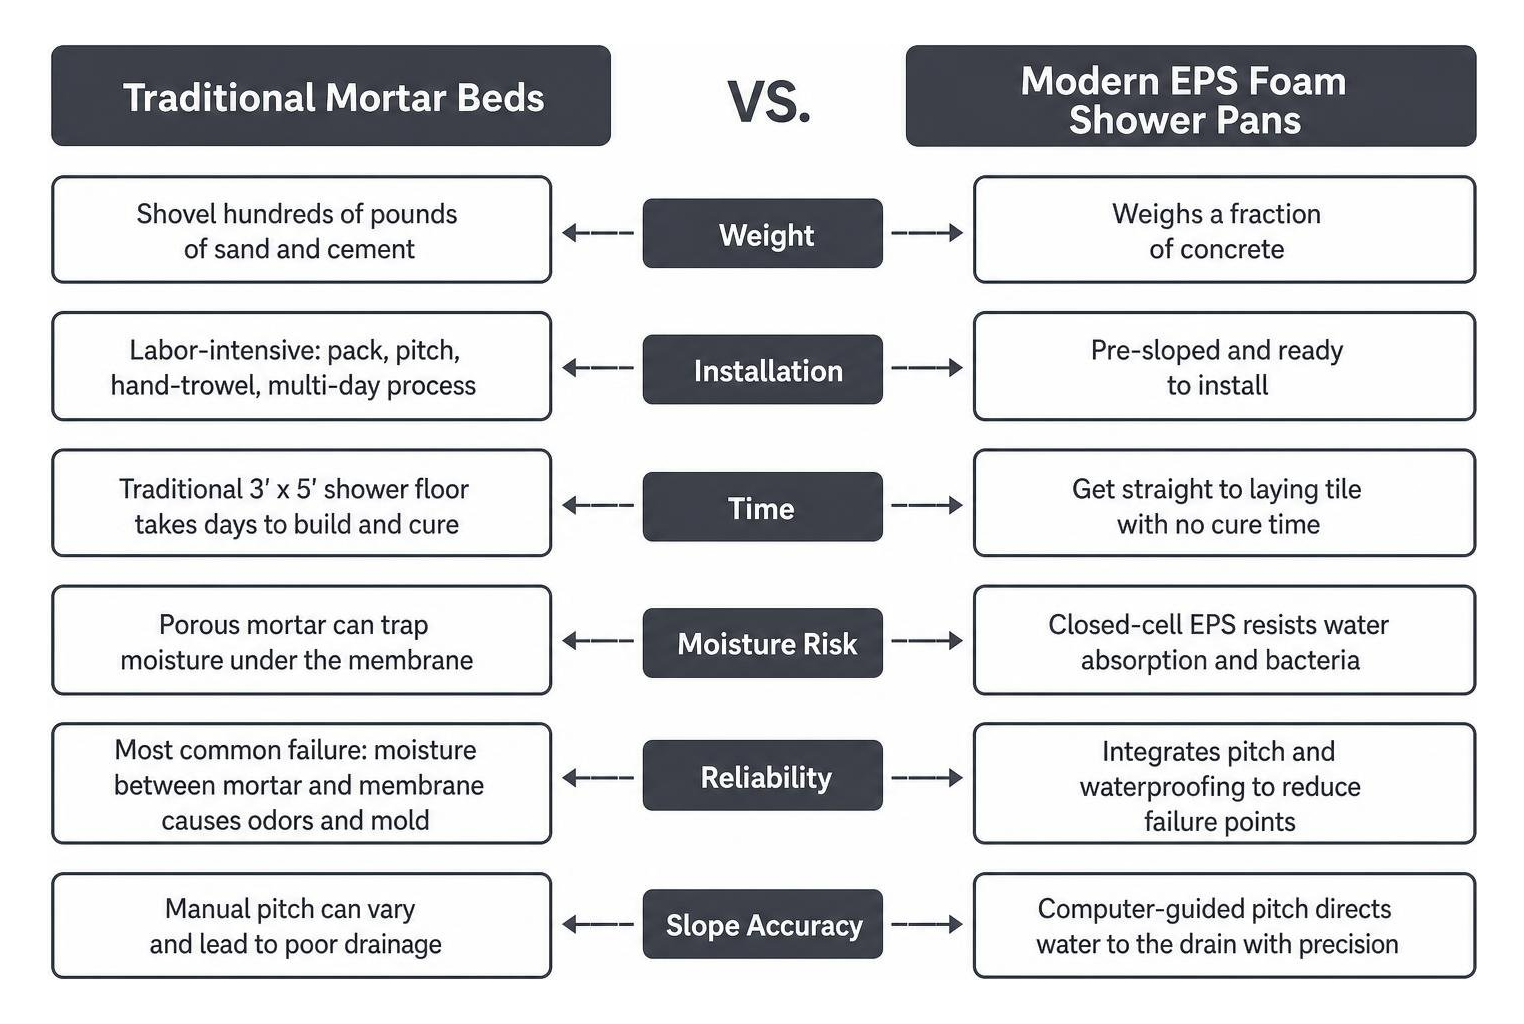
By integrating the pitch and core waterproofing directly into the substrate, these systems eliminate installer guesswork, protect your back, and let you get straight to laying tile without waiting days for thick cement slabs to cure.
Understanding Pre-Sloped Systems for a Tile Installer Shower Pan
When you unpack a pre-sloped foam shower tray, every square inch has been calibrated with computer-guided accuracy to direct water effortlessly toward the waste line. High-performance units built from 100% virgin EPS foam feature dense, closed-cell cores that naturally resist water absorption, vapor drive, and bacterial growth.
Unlike job-site hand-floated pans that can suffer from dips, birdbaths, or uneven corners, a custom shower pan tile ready foam ensures consistent perimeter heights and flawless drainage angles. Premium trays come ready to integrate with modern compression drains or integrated bonding flanges, complying with rigorous IAPMO and ANSI Z124 standards. When combined with our rapid turnaround manufacturing in Denver, you get precision-engineered bases custom-milled to your exact blueprint, saving hours on every project.
How to Install a Tile Installer Shower Pan in 7 Simple Steps
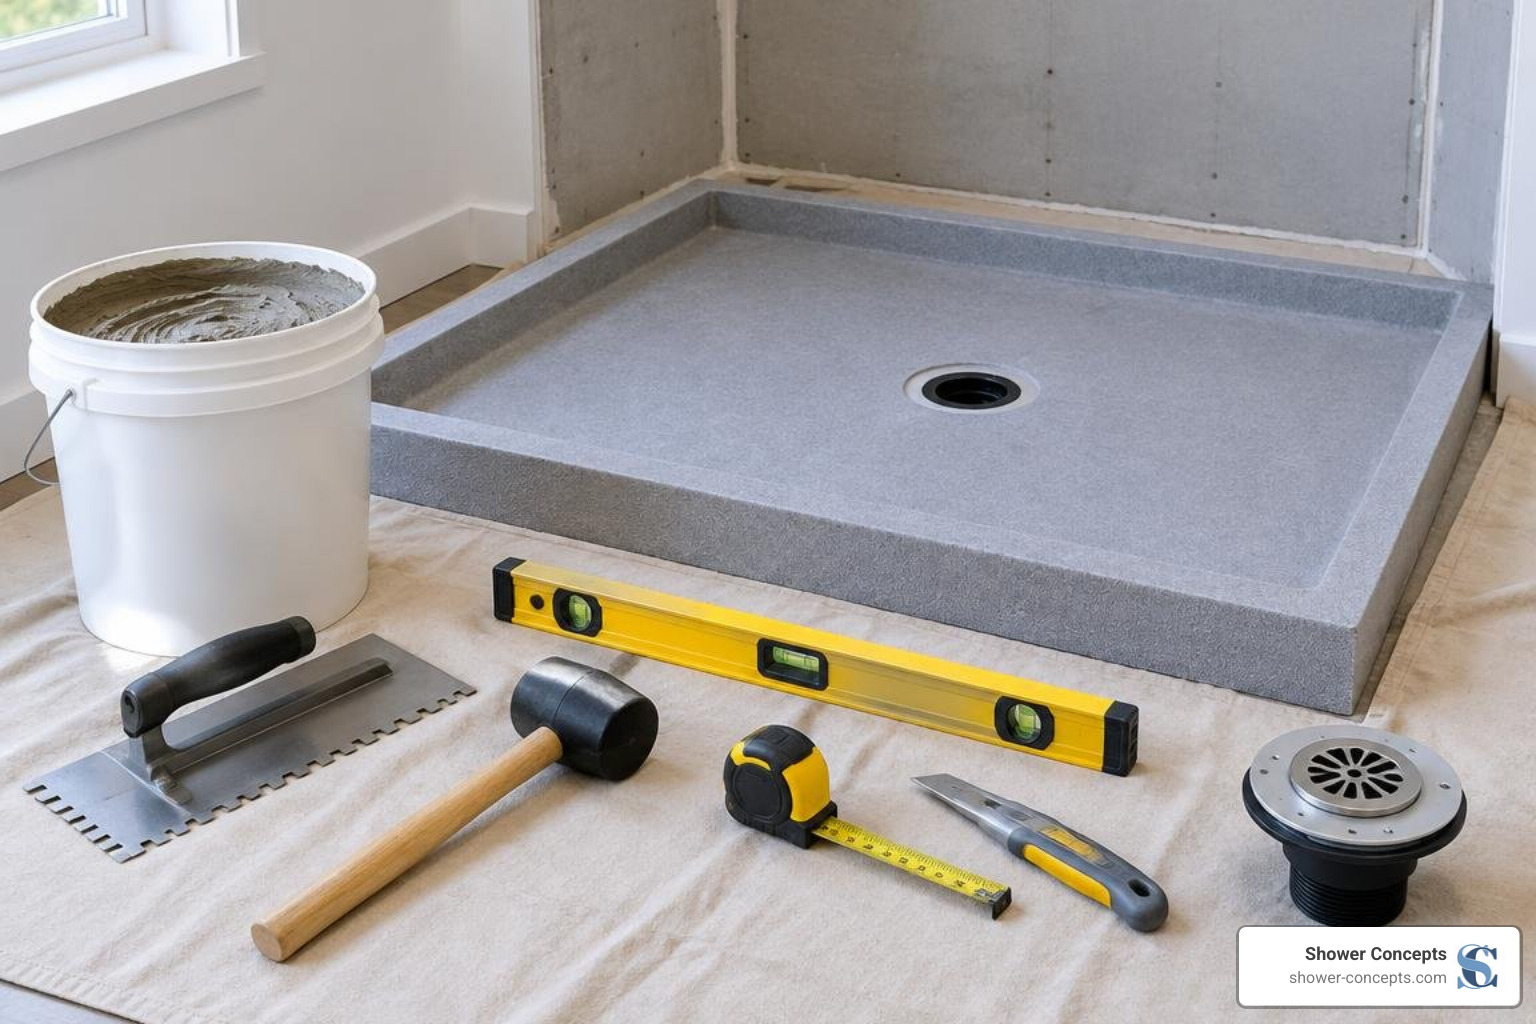
Installing a modern tile-ready tray requires clean prep, careful dry fitting, and the right mortar. Whether you are moving away from traditional mud beds or looking to refine your technique alongside classic guidelines like the Pro Tips: How To Install A Dry-Pack Shower Pan | DIY Shower Pan Guide, following this proven 7-step sequence ensures a rock-solid, watertight installation every time.
Step 1: Subfloor Inspection and Framing Preparation
A waterproof shower is only as durable as the structure beneath it. Begin by inspecting your subfloor for structural deflection and flatness:
Check Structural Spacing: For standard 16-inch on-center joists, ensure your subfloor has a minimum thickness of 5/8-inch exterior-grade plywood or OSB. For 19.2-inch joist spacing, step up to at least 3/4-inch subflooring to eliminate flex under load.
Level the Foundation: Sweep the entire area clear of debris, drywall dust, and protruding fasteners. Check the floor with a 4-foot spirit level. If you find high spots, sand or grind them down; fill any low dips using a fast-setting self-leveling underlayment. The subfloor must be flat within 1/8-inch across 10 feet.
Cut the Drain Opening: Mark and cut a clean 6-inch to 7-inch diameter bore hole through the subfloor around the rough plumbing. Never cut an oversized hole wider than 7 inches, as unsupported foam edges around the drain flange can compromise structural integrity.
Square the Studs: Use a framing square to verify that the wall studs sit at true 90-degree angles. Shim or sister out studs where necessary so your ready to install shower pans slide in flush without binding against bowed lumber.
Step 2: Setting the Drain Assembly and Rough Plumbing
Next, align your plumbing infrastructure:
Cut your 2-inch PVC or ABS waste pipe so it terminates at the exact elevation specified by the drain manufacturer.
For integrated bonding flange drains, dry-fit the drain body to ensure the top flange sits perfectly flush with the recessed pocket molded into your foam pan.
If using a solvent-weld connection, clean and prime both the pipe and drain hub thoroughly before applying heavy-duty pipe cement.
If working with integrated compression drain assemblies, ensure the rubber compression gasket, friction ring, and locking collar are positioned cleanly without pinching.
Double-check pipe alignment from beneath the floor or through your cutout to ensure the waste line stands completely plumb.
Step 3: Achieving the Proper Slope and Dry Fitting
Before mixing any thin-set mortar, always perform a complete dry fit. Place the foam shower tray directly over the subfloor and press it firmly into position against the wall framing.
The industry standard code requirement for shower drainage is a pitch of 1/4 inch per linear foot from the perimeter down to the drain. For extended runs or specialized installations, incorporating a custom shower pan slope kit guarantees this uniform drop across every plane.
Place your spirit level along all perimeter edges of the tray. Because the slope is built directly into the top surface of the EPS foam, the outer perimeter rim of the tray must read level in all directions. Step across the dry-fitted tray to confirm that it sits fully supported with zero rocking or floor deflection.
Step 4: Spreading Mortar Bed and Bedding the Pan
Never install a foam shower pan directly onto bare plywood without a proper structural bonding bed. For a successful foam shower pan installation, follow these bedding steps:
Mix the Mortar: Mix a batch of premium ANSI A118.4 polymer-modified thin-set mortar (or the specific mortar recommended by the pan manufacturer) to a smooth, lump-free consistency.
Key and Comb the Bed: Using the flat side of a trowel, burn a thin scrape coat of mortar into the wood subfloor or concrete slab. Immediately switch to a 1/2-inch by 1/2-inch square-notched trowel, combing out straight, parallel ridges across the entire pan footprint.
Set the Pan: Carefully lower the foam tray into the wet mortar bed. Apply firm, even pressure across the surface by walking flat-footed over a sheet of plywood laid across the tray, or by working a wood float outward from the drain to the perimeter. This collapses the mortar ridges into a continuous 100% void-free support bed.
Re-verify Level: Check the outer perimeter rims with your level once more. Let the mortar cure undisturbed for 24 hours before subjecting the pan to heavy foot traffic.
Step 5: Waterproofing Seams, Flashing, and Curb Integration
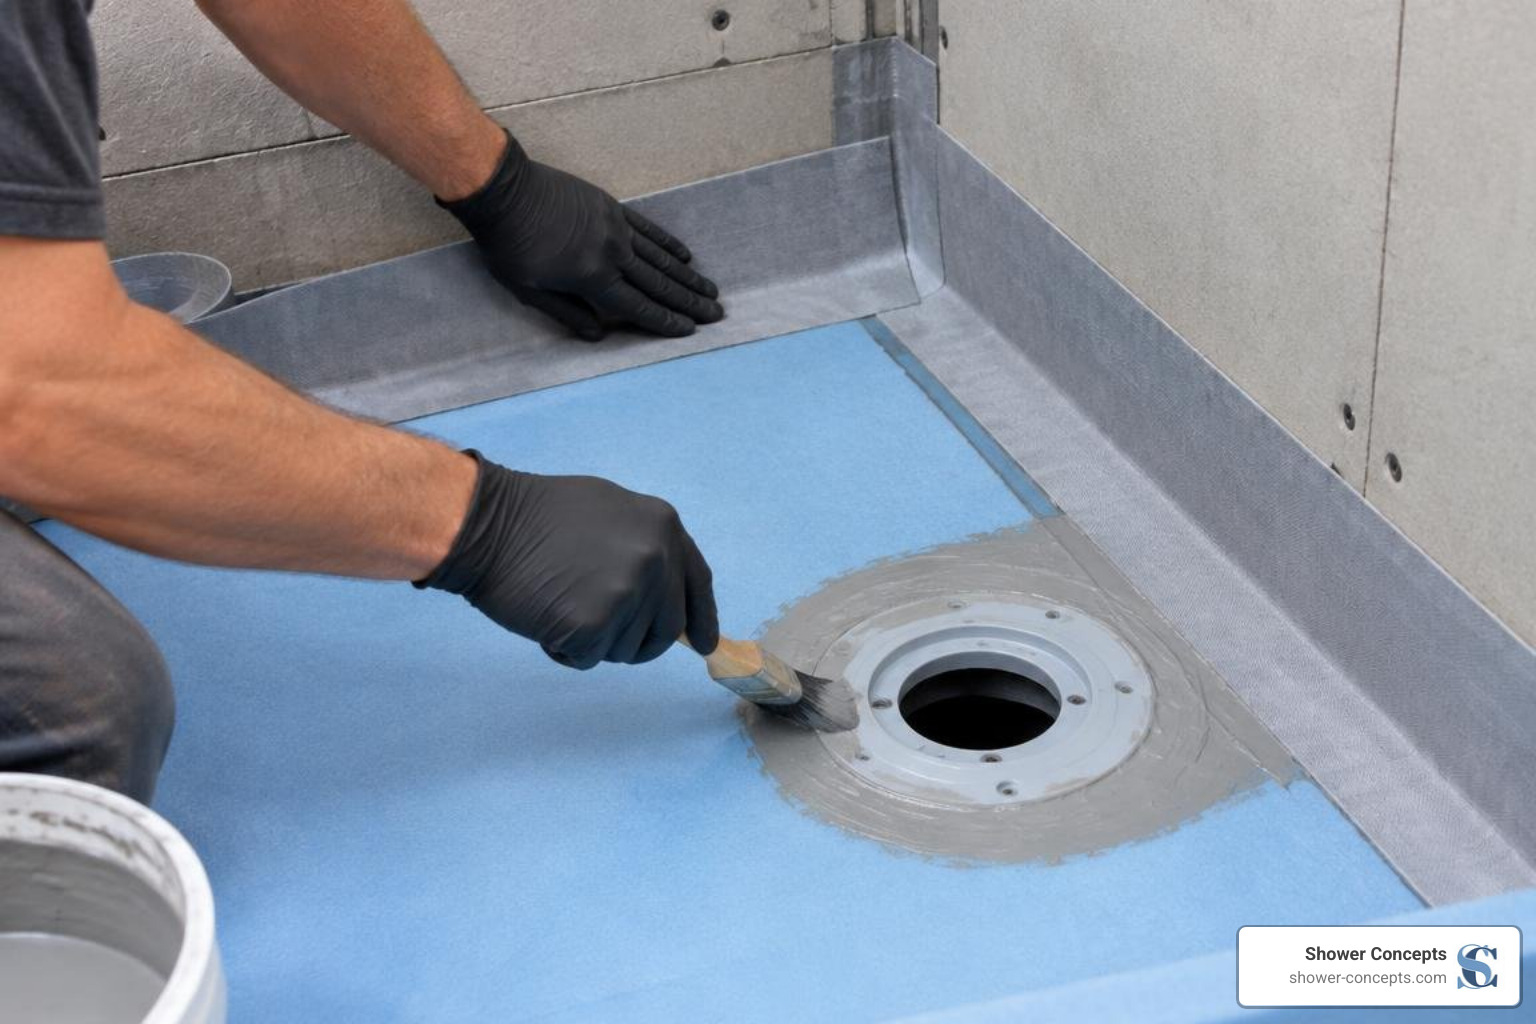
With the pan solidly anchored, integrate the floor transitions with your shower wall substrate. Install your cement backer board, fiber-cement panels, or high-density foam wall panels so they rest just above the perimeter flange of the pan.
Apply Seam Tape: Apply waterproof sheet membrane bands or waterproofing seam tape over the floor-to-wall joints, embedding the fabric in thin-set mortar with a 2-inch to 4-inch overlap across all transitions.
Seal the Drain Flange: Bond the integrated drain collar or surface-applied membrane collar directly to the drain flange using manufacturer-approved sealant or unmodified thin-set. Ensure a tight, continuous seal with zero air pockets.
Flash Curbs and Transitions: If your design features a raised threshold, wrap the waterproofing membrane continuously up, over, and down both sides of the curb. Never drive mechanical fasteners (nails or screws) through the top or inside face of a curb. For step-free designs, your custom curbless shower pan seamlessly bridges the bathroom floor level using reinforced waterproofing bands across the recessed threshold.
Step 6: Performing the Mandatory Flood Test
Before laying a single tile, you must verify complete watertight integrity. A flood test is non-negotiable for professional tile installers and code compliance inspectors alike.
Insert a mechanical expanding test plug or pneumatic drain ball into the 2-inch waste pipe below the drain flange. Fill the shower base with clean water up to the top of the curb (or at least 2 inches deep for curbless showers) and mark the water level with a pencil or grease marker.
Leave the water standing for a full 24 hours. After the test window, check the water level line and inspect the ceiling or subfloor cavities below for dampness. Once verified leak-free, release the drain plug and let the shower pan dry completely.
Step 7: Setting Tile and Grouting the Base
Now you are ready to install your finish surface on a rock-solid, fully waterproof substrate:
Select Tile and Thin-Set: For traditional center point drains with four-way slopes, use mosaic tiles (typically 2x2 inches or smaller) that conform naturally to compound curves without awkward lippage. Use an ANSI A118.4 or ANSI A118.15 modified thin-set mortar spread with an appropriately sized notch trowel (such as 3/16-inch by 5/32-inch V-notch for mosaics).
Lay Tile and Expansion Joints: When laying floor tile over a shower pan for custom tile, leave a clean 1/8-inch movement joint at all perimeter wall intersections and around the drain collar. Never pack hard grout into these 90-degree plane changes; seal them with color-matched 100% silicone sealant to accommodate natural structural movement.
Grout the Surface: Fill all tile joints with a high-performance, stain-resistant, mold-fighting grout or epoxy grout system to complete a gorgeous, long-lasting shower enclosure.
Advanced Layouts: Custom Sizes, Curbless Entries, and Linear Drains
Modern bathroom architecture continues to push beyond the boundaries of standard 36x36-inch center-drain stalls. Homeowners and commercial developers increasingly request open-concept wet rooms, zero-entry barrier-free walk-in showers for aging in place, and sleek designer linear drains.
Creating a curbless transition requires careful planning. The subfloor joists in the shower zone must either be recessed using engineered joist hangers or sistered subfloor framing to allow the sloped foam pan to finish flush with the outside bathroom floor.
When you order a shower pan custom built to exact dimensions, you eliminate the hassle of field modifications. Furthermore, pairing single-plane slopes with a linear drain shower pan allows you to install large-format floor tiles without cutting complex envelope relief lines, creating clean sightlines that comply fully with ADA accessibility standards.
Overcoming Complex Layouts with a Custom Tile Installer Shower Pan
Custom bathroom layouts often present unique framing obstacles:
Radius and Curved Walls: Custom high-density EPS foam can be hot-wire CNC milled to follow intricate curved framing or rounded walk-in enclosures, maintaining an accurate 1/4-inch slope across irregular geometries.
Offset Plumbing Obstacles: When joists or ductwork prevent you from centering a drain, custom manufacturing places the drain cutout in the exact position of your rough plumbing, avoiding costly structural rework.
Multi-Curb Neo-Angles: Corner showers with dual curbs, integrated built-in benches, or corner shaving steps can be fabricated as integrated, monolithic foam assemblies ready for immediate installation.
Avoiding Common Shower Pan Installation Mistakes
Even skilled professionals can run into expensive callbacks if critical details are overlooked. Keep this checklist handy on every installation:
Skipping Subfloor Leveling: Bedding a foam pan over a wavy or unlevel subfloor creates hollow voids beneath the ribs, leading to floor flex, cracked tiles, and broken grout lines over time.
Under-combibing Mortar: Spreading thin-set in random swirl patterns traps air pockets under the pan. Always comb mortar in straight, parallel ridges using a 1/2-inch square-notched trowel.
Puncturing the Curb: Never drive drywall screws, cement board screws, or glass door track anchors through the top horizontal surface of a shower curb. Anchor glass door hardware using structural adhesive or clamp-mounted jamb assemblies.
Ignoring the 24-Hour Flood Test: Skipping the water test to save a day can result in discovering a hidden leak after tens of thousands of dollars in finish tile and custom glass have already been installed.
Using Incompatible Thin-Sets: Always verify whether your chosen waterproofing membrane requires an unmodified (ANSI A118.1) or modified (ANSI A118.4 / A118.15) mortar to ensure proper bond curing.
Frequently Asked Questions About Shower Pan Installation
What type of thin-set should a tile installer use on a foam shower pan?
For bedding the EPS foam tray to a plywood or concrete subfloor, use an ANSI A118.4 polymer-modified thin-set mortar to ensure strong adhesion and structural support. When setting tile over factory-fused sheet membranes on top of the pan, consult the manufacturer's specific guidelines. Many bonded sheet membranes require high-grade ANSI A118.4 or ANSI A118.15 modified mortars, while steam shower applications require specialized mortars meeting ISO 13007 C2TES2 standards to withstand thermal expansion and vapor drive.
How long does it take a tile installer to install a modern shower pan?
While building and floating a traditional two-stage dry-pack mortar bed takes 2 to 3 days (accounting for pre-slope curing, membrane placement, top bed pack, and dry time), installing a pre-sloped foam shower pan takes just 30 to 60 minutes once subfloor prep is complete. You can waterproof the seams, set your wall boards, and be ready for flood testing on the very same day.
What is the required slope for a tileable shower pan to pass plumbing code?
Both the International Plumbing Code (IPC) and TCNA guidelines require a minimum slope of 1/4 inch per linear foot from the farthest wall to the edge of the drain opening, with a maximum pitch of 1/2 inch per linear foot. This pitch ensures swift, complete drainage and prevents water from pooling on the tile floor.
Conclusion
Building a high-performance, leak-free shower doesn't have to involve back-breaking cement mixing, difficult slope calculations, or multi-day cure times. By leveraging modern high-density EPS foam technology, you combine industrial-grade compressive strength with computer-milled drainage slopes, speeding up your project timeline while guaranteeing lifetime waterproofing integrity.
Based right in Denver, Colorado, Shower Concepts designs and manufactures custom, 100% virgin EPS high-density foam shower bases, curbs, benches, and niche solutions for professional builders and tile setters. Explore our lineup of custom foam shower solutions to streamline your workflow and deliver flawless, long-lasting custom showers on your next project.
